E
CONVERTING
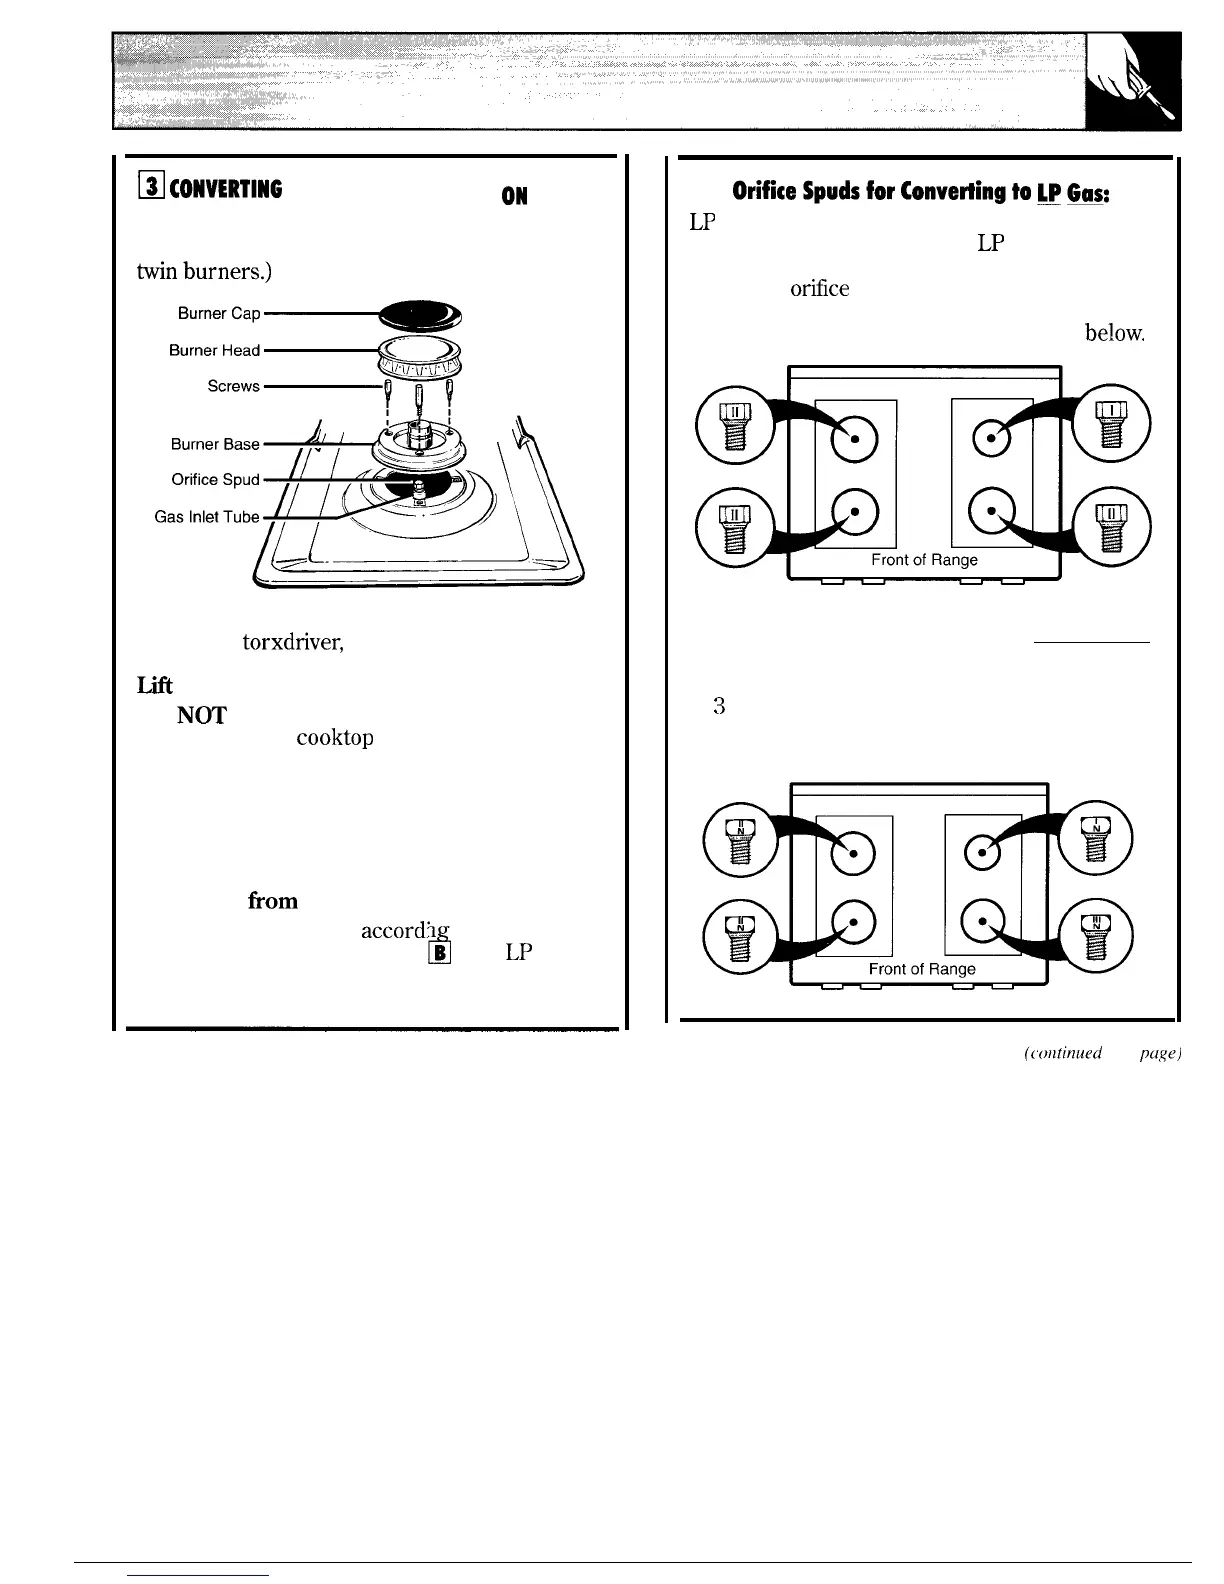
SURFACE BURNERS
ON
MODELS EQUIPPED WITH SEALED BURNERS
(See
Step 4 if range is equipped with standard
twinburnersj
‘“rnercap~
1. Remove grates, burner caps and burner heads.
2. Using a
torxdriver, remove the burner bases
by unscrewing the 3 small screws in each base.
~
the burner straight out.
DO
N~
disconnect the wires from the burner
bases unless the
cooktop needs to be raised.
3. Remove the brass orifice spud under each
burner base by unscrewing spud from fitting with
a 7 mm or a small adjustable wrench (depending
on the size of your spuds). Apply a 3/4” wrench
to the hex on the gas inlet tube as a back-up
when removing spud to prevent the
aluminum
horn
twisting.
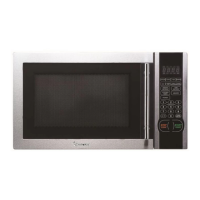
4. Install orifice spuds
accordin to one of the
d
following diagrams (see ❑ or B ), for LP
gas or natural gas, depending on which you are
converting to.
❑
Orifieespudsfor
Convetiingto
U@:
LP
orifice spuds are in a small plastic bag packed
with this Use and Care Guide.
LP
orifice spuds
have a 2-digit number and the letter “L” on one
side. Each
orflce
spud will also have 1 or 2
grooves on one side, denoting the location on the
range where it is to be installed as shown
below.
❑
Orifice Spuds for Converting to Natural Gas:
Natural gas orifice spuds have a 3-digit number
on one side. Each orifice spud will also have 1, 2
or
3
grooves on one side, with the letter “N”
underneath denoting the location on the range
where it is to be installed as shown below.
(cofttinued next
puge)
41