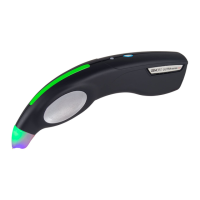
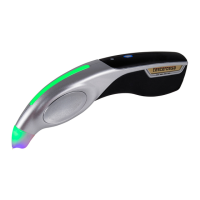
EASY OPERATION GUIDE & OWNERS MANUAL
SPECIFICATIONS:
• Working Voltage: DC 9V (1) × 9V alkaline battery
(approximately 11.5 hours of continuous use).
• Warm-Up Stabilization Time: Approximately 3 seconds.
• Ideal Working Temperature: 65F to 75F.
• Ideal Air Relative Humidity: 25% to 50%. As with any electronics,
do not use the AuRACLE PRO in or around water.
• STATIC DISCHARGE – This sensitive instrument could have reactions to high
static environments. If the AuRACLE PRO is subjected to static discharge,
the display may freeze or lock. To correct this, simply power-cycle the
unit. If the unit will regularly become subjected to high static, consider
using a grounding bracelet to safeguard the unit from such conditions.
CAUTION:
Disassembling the AuRACLE PRO other than opening the battery
compartment door for battery replacement will void the warranty.
DETAILED OPERATION INSTRUCTIONS
. BATTERY AND AC ADAPTER INSTALLATION
Install a 9V alkaline battery (not included) as follows. First, always be mindful that
the AuRACLE PRO is a delicate instrument and can be broken if it is not handled
with care. Open the battery compartment door located on the bottom side of
the unit by pressing and then sliding the battery compartment door o with your
thumbs. Remove the battery connector and attach a 9V alkaline battery to it
with the direction of the positive (+) and negative (-) polarity correctly positioned.
Reinsert the battery and wiring back into the compartment so that the door may
be replaced. Replace the battery compartment door. To conserve the battery
life, be certain to always power down the AuRACLE PRO when not in use.
. POWERING ON / OFF
The AuRACLE PRO may be powered by either its AC adapter or a 9V alkaline
battery. When an AC adapter is installed the AuRACLE PRO will automatically be
powered by it while preserving the battery life. Alternatively, if no AC adapter is
being used and the battery is installed, the tester will be powered by it. To power
on the AuRACLE PRO simply press the Power/Mode button. When the unit is
powered on, it will run through a quick boot sequence (“AuRACLE PRO” will show
on the display) and then will default to the “Standard Mode” setting. To power
o the AuRACLE PRO press and hold the Power/Mode button for more than two
seconds. The display will show a 5 second count down timer. When the timer
reaches zero then it will power o. Pressing either button during the countdown
will abort the process and return the AuRACLE PRO to normal operation.