GEMORO TESTEROSSA 14 15
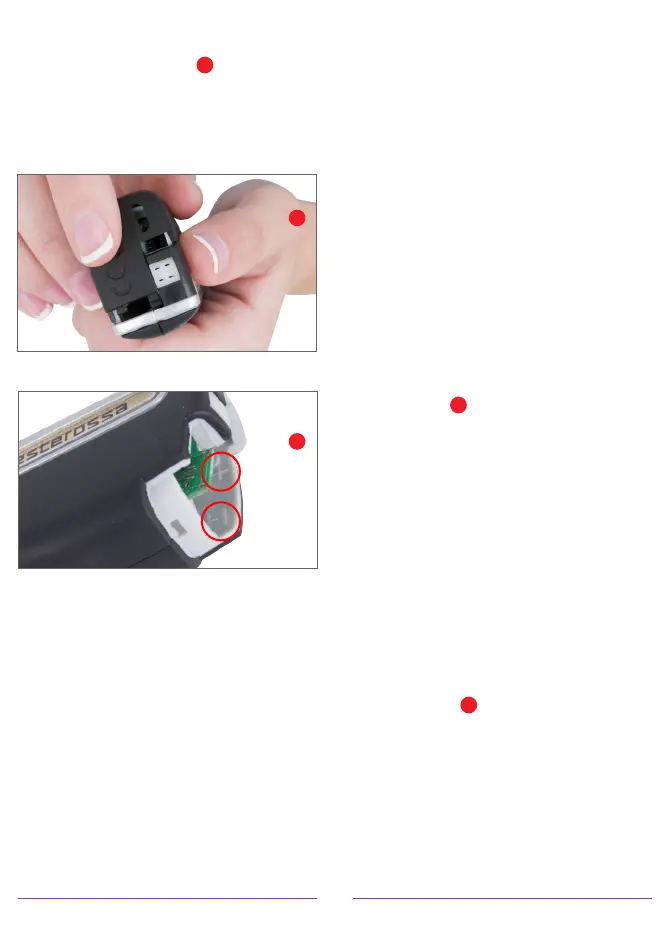
battery compartment wall showing
the direction of positive (+) and
negative (-) polarity
H
. Always
be certain that the batteries are
correctly positioned in the battery
holder. Then carefully replace
the battery compartment door.
2. The TESTEROSSA’s NiMH
rechargeable batteries may be
charged by placing the tester in
its included UltraDock 3 battery
charging station with the micro-
USB power cord plugged into the
rear of the charging station or by
plugging its micro-USB power
cord into the rear the tester and
the USB adapter cube directly into
a wall outlet. Once the tester is
connected to the AC adapter or
the charging station, the tester will
switch to its DC power mode. The
tester’s built-in Intelligent Charging
Circuit “ICC” will automatically
identify the type of batteries
installed (NiMH rechargeable
batteries or alkaline batteries). If
alkaline batteries are installed, the
circuit will automatically cut off
the power supply to the batteries
so that the alkaline batteries
will not be recharged. If NiMH
rechargeable batteries are installed,
the batteries will be recharged and
at the same time the tester may
be used with the AC adapter.
3. To turn the TESTEROSSA ON, press
the oval shaped power button
located on the top center edge of
the tester
I
and hold it down for
approximately one second, then
release the button. The power
button’s blue LED indicator will
begin flashing. The warm-up time
is approximately 25 seconds.
When it has fully warmed up, the
flashing blue LED light will become
solid. At this time the tester will
say, “READY” or if in the ring tone
setting, a bell will chime twice. You
may now begin using the tester.
4. To turn the TESTEROSSA OFF,
press the oval shaped power button
once again
I
and hold it down for
approximately one second, then
release the button. The power
button’s blue LED indicator will no
longer be illuminated indicating
it has been turned OFF. If the
TESTEROSSA has been left on
for a period of approximately 5
TESTER BATTERY COMPARTMENT
BATTERY POLARITY
G
H