and subwoofers in one room, including very
high channel count immersive systems. For
more information, latest downloads and
documentation, see https://www.genelec.
com/glm.
Storing Settings in Amplifiers
If you plan not to use a computer for
controlling the monitors after the calibration,
use GLM software to write the settings into
the monitors ('Store the Settings').
One of these settings is the volume
setting applied inside the monitor which
should be optimised for the audio source
level adjustment. The following two points
are guidelines for selecting the optimal
volume setting for the stand-alone use of the
monitor.
Analogue Audio Level
The sensitivity of the monitor system can
be adjusted using GLM software. It is
advantageous to keep the incoming signal
level high and to lower the level in the monitor
using the GLM level control to maintain the
highest digital resolution. Frequently the best
overall signal-to-noise ratio can be obtained
when the GLM volume setting is set to -10 to
-15 dB when the analogue input is controlled
in the mixing console.
AES/EBU Audio Level
For a digital –30 dBFS input, the 8381A
produces 100 dB of sound level (SPL) at
1 meter in free space when the volume is
set to the maximum (0 dB). The sensitivity
of the monitor system can be adjusted by
the volume setting in the GLM software.
It is advantageous to keep the incoming
signal level high and to lower the level in
the monitor using the GLM level control to
maintain the highest digital resolution.
RAM-81 Amplifier
Amplifiers for the Top and Bottom
Enclosures
The 8381A monitor includes two RAM-81
ampliers. Each amplier comes from the
factory with a unique calibration that is
specic to a certain enclosure of the 8381A.
Please observe the match of the RAM-81
serial number with the serial number marked
next to the amplier connector in the lower
enclosure to ensure correct connections.
Connectors on the RAM-81
The 'MAINS INPUT' Connector: Connects
to a mains supply of 100-240 VAC and 50-60
Hz.
'DIGITAL IN AES/EBU' Connector: The
monitor defaults to reproducing an analogue
input signal. The digital audio AES/EBU input
is selected automatically when a valid digital
audio signal is presented. Use GLM software
to dene the AES/EBU subframe to monitor.
The digital input is set at the factory to
the highest sensitivity, resulting in a sound
output of 130 dB SPL for a 0 dBFS digital
input signal. This sensitivity can be adjusted
using GLM software.
'DIGITAL THRU AES/EBU' Connector:
This output carries an unaltered copy of
the digital audio signal and can be used
for daisy-chaining the signal to up to three
additional SAM monitors or subwoofers.
'ANALOG IN' Connector: The maximum
input level of the analogue input is +24 dBu.
The analogue input must not be overloaded,
otherwise distortion will result. When the
maximum input is exceeded, the enclosure
front panel light turns red, indicating the
overload.
The sensitivity of the monitor system
is set using GLM software. The analogue
input is set at the factory to the highest
sensitivity, resulting in a sound output of 100
dB SPL for a -6 dBu analogue input signal.
This sensitivity can be adjusted using GLM
software.
'CONTROL NETWORK' Connectors:
The RJ45 sockets connect the monitor
to the proprietary Genelec Loudspeaker
Manager™ (GLM™) network. Do not
connect to Ethernet LAN.
'Loudspeaker Connectors' Group, 'LED'
Connector: This RJ45 socket is connected
to the bottom enclosure to drive the front
panel warning LED. Connect the LED cable
to RAM-81 marked as ‘1’.
'SPEAKER' Connector: Takes an eight-pole
'Speakon' cable. The 8381A monitor uses
two RAM-81 ampliers, both connecting to
the bottom enclosure of the monitor. On the
GLM network, both ampliers appear as one
8381A monitor. CAUTION! The 'SPEAKER'
connectors on the RAM-81 ampliers can
output hazardously high voltages. To ensure
electrical safety, unless the included cable
assembly is used, the enclosure wiring must
be installed by a qualied and trained person.
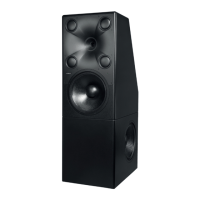
LED Indications on the Enclosure
The 8381A enclosure has an LED indicator
light in the waveguide area.
Steady green light indicates that all
systems are working normally.
A red light is shown when the 8381A
system protection activates. It is possible
that the sound output changes and
does not have the designed quality and
characteristics. This can be corrected by
reducing the output level or the level of input
to the 8381A. Genelec does not recommend
the 8381A to be operated such that the
red light is blinking or is steadily on as this
may mean that the acoustic output quality
level may be reduced and judgements on
the audio character and quality may not be
accurate.
The red overload light can be activated by
several events:
• Exceeding the maximum input of the
analogue input (analogue input clipping).
• Reaching very close to the digital input
maximum (likelihood of digital clipping).
• Overload of drivers or amplier.
• Clipping in the power amplier.
• Error detected in AES/EBU audio data.
• Mute function is on
A yellow light is shown when the 8381A is
handled by GLM software or is not part of the
currently playing GLM Group. This is normal
and indicates the state of 8381A in the GLM
management network. This does not reduce
or change the output sound quality.
The light turns red in an overload or error
condition. If a red warning light appears on
the monitor at high output levels, turn the
source level down. If the red warning light
turns on at low output level, ensure that there
are no bit errors in the AES/EBU digital audio
and check the volume setting as low volume
setting can allow the input to clip early.
Power Button Indications
When the amplier is turning on the power
button light ashes rapidly.
After the amplifier power up correctly,
the lights glows steadily after the turn-on
has been completed. This is the normal
indication.
 Loading...