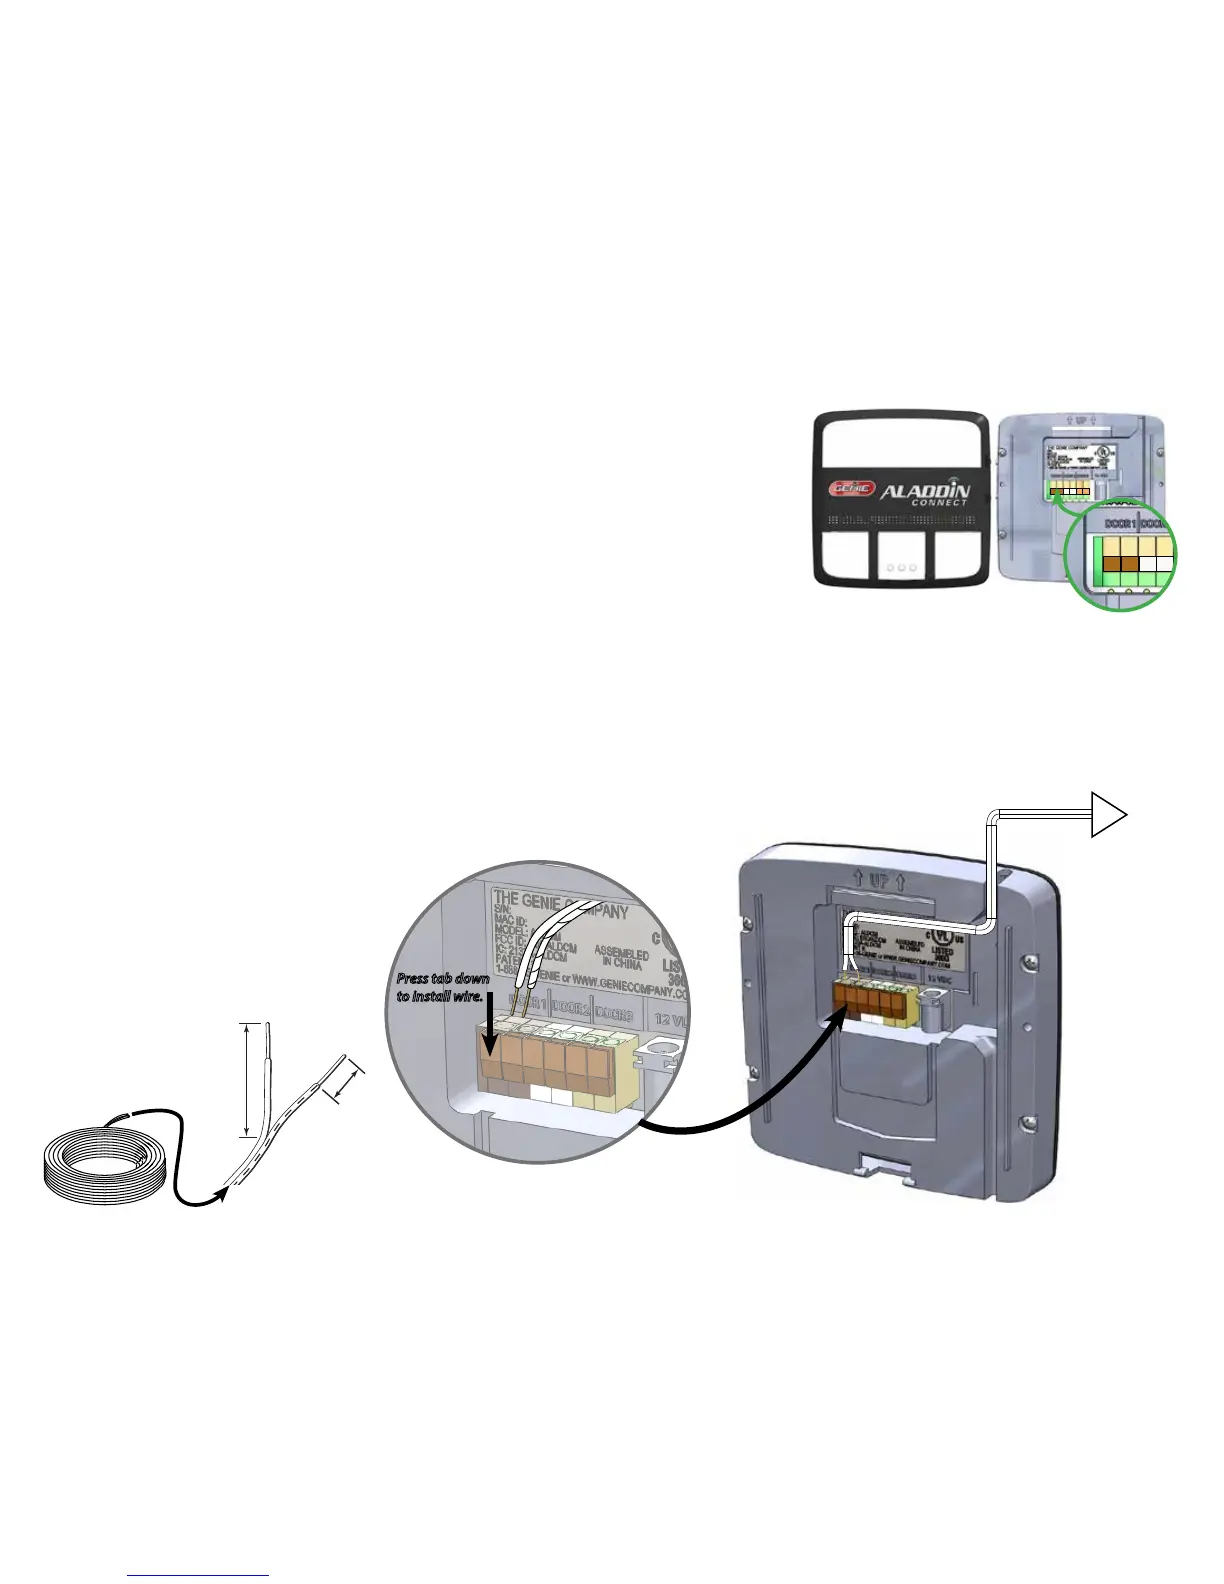
STEP 4
Wire Aladdin Connect™: (Single door install shown)
Aladdin Connect™ will wire directly to the wall control connections at the powerhead
or directly to the wall control. New Genie models shown.
Visit www.GenieCompany.com/AladdinConnect for more information on older models
and other brands of garage door openers.
1. Make sure garage door opener is unplugged.
• Leave wire spool intact for this part of the install.
2. Split provided dual strand wire approximately 2 in. then strip 1/2 in. of insulation.
FIG. A.
3. Press orange tabs down and insert both wires into connection points for DOOR 1
on the back of the DCM. FIG. B.
4. Trim and split the other end of the dual strand wire approximately 2 in. and then
strip 1/2 in. of insulation. FIG. A.
5. Insert wire into wall control inputs either:
• (OPTION A) Directly to the garage door opener.
• OR
• (OPTION B) To the Back of the wall control.
Press tab down
to install wire.
Door
1
Door
2
Door
3
Button & Connection Detail
FIG. B
1/2"
2"
FIG.A
Split 2” & Strip 1/2”
See
next
page

 Loading...