Wall Mount
Anchors (as needed)
Perforated Angle
Mount
STEP 5
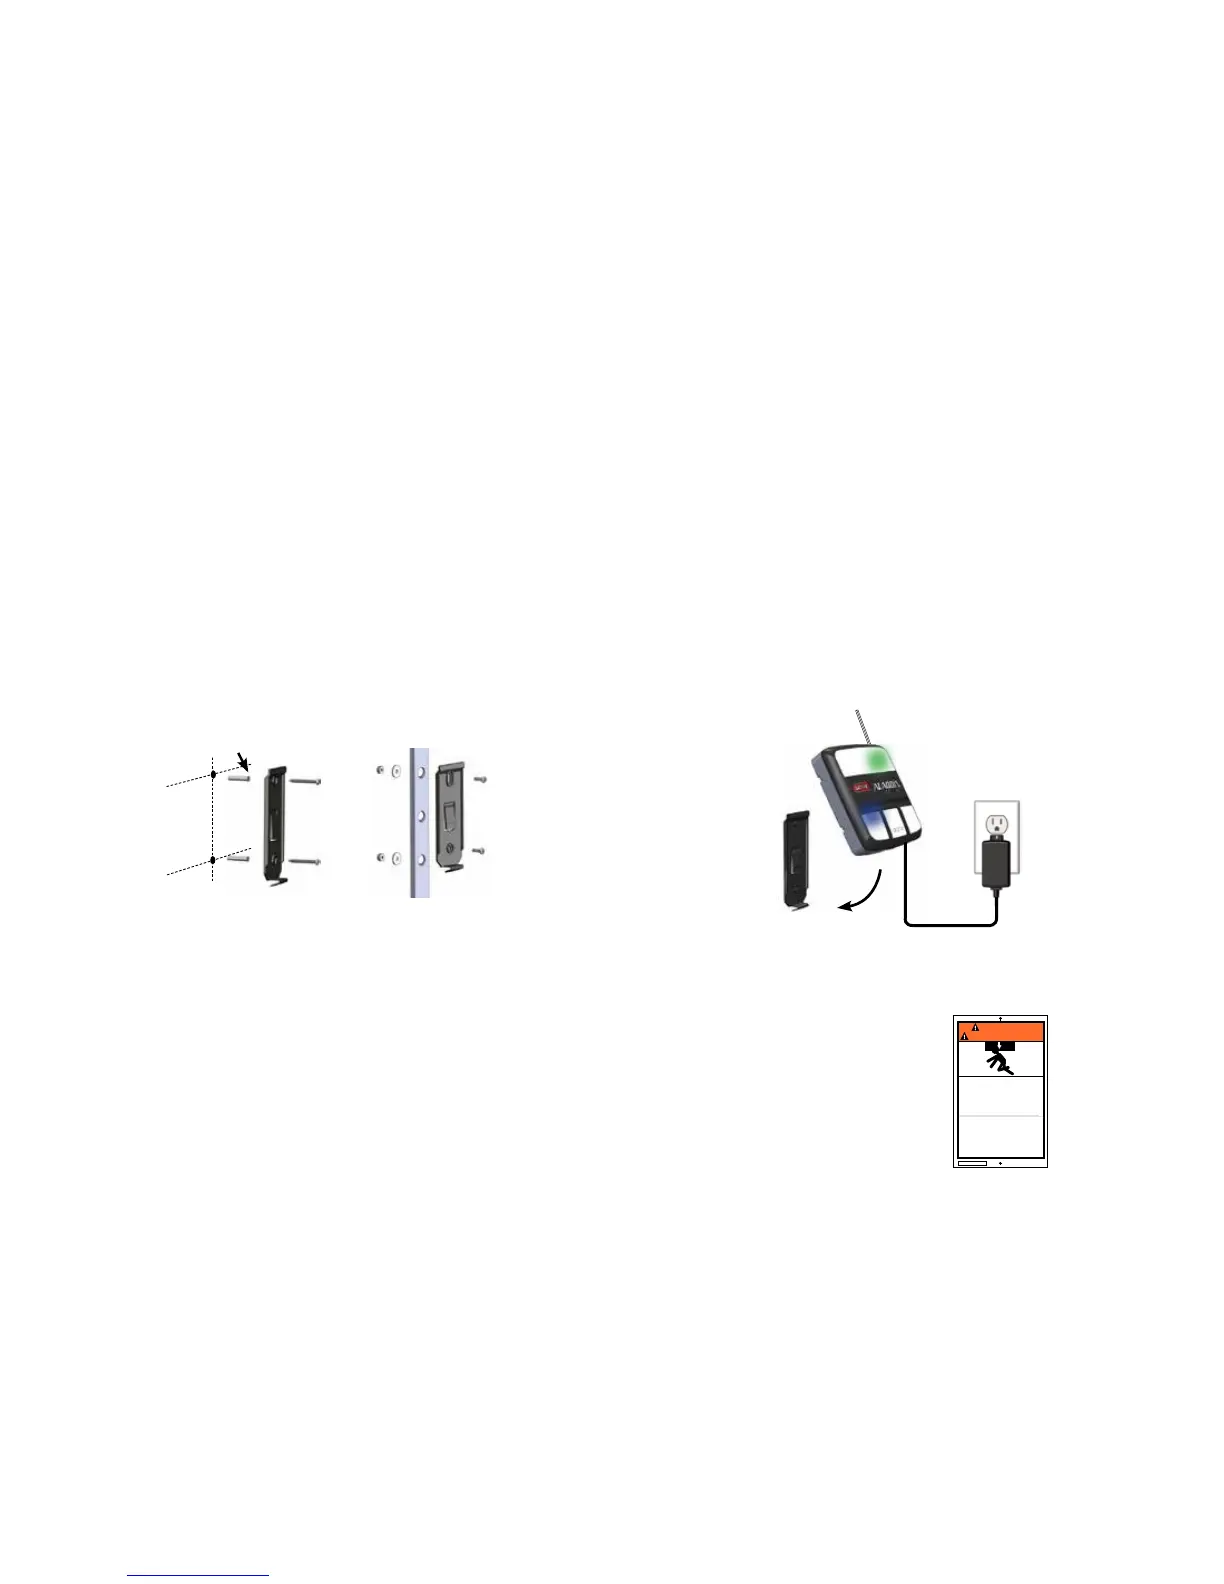
Mount and Power Aladdin Connect™:
1. Using the DCM mounting bracket as a template at the optimal Wi-Fi location. Mark and drill 2-3/32” pilot holes and mount bracket to wall using
supplied screws. If mounting to drywall, use anchors provided in kit or if mounting to perforated angle at opener location, use nuts, washers
and screws provided.
2. Plug power pack into wall outlet. An extended screw is provided to secure power pack to outlet if needed.
3. Plug power pack into back of DCM as shown in STEP 1.
NOTE: LEDs on DCM will ash momentarily as it reacquires signals.
4. Snap DCM onto mounting bracket.
5. Route wires and secure with supplied staples.
6. Ax the warning placard next to wall control or DCM in plain sight to signify that the door will operate remotely.
112612.0001
WARNING
AVERTISSEMENT
MOVING DOOR can cause serious
injury or death.
MOUVEMENT PORTE peut causer des
blessures graves ou la mort.
STAND CLEAR!
Door could close automatically.
Do Not stop or stand in doorway
SE TENIR À L'ÉCART DE LA PORTE!
La porte pourrait se refermer automatiquement.
Ne pas arrêter ou debout dans la porte.
1
2-4
6

 Loading...