23
GB
Thread size
Setting stroke*
guide values
M3 2
M4 2,5
M5 3
M6 3,5
M8 4
M10 5
M12 5
ATTENTION! If the setting stroke is unknown, rst set a lower setting stroke to prevent dama-
ge to the thread. If the nut is not sufciently set, increase the setting stroke in a small steps
(max. 0.5 mm; half a turn of the adjusting nut). If too large a setting stroke has been set and
the thread of the blind rivet nut is damaged, it must be unscrewed manually (see point 4.2).
*Guideline values determined with GESIPA
®
standard dome head blind rivet nuts for a grip
range of 0.25-3 mm in 1 mm material thickness.
4. Functional principle
4.1 Screwing on a blind rivet nut
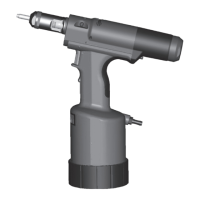
• Ensuring it is straight, set the blind rivet nut against the threaded mandrel A.
• It is advisable to screw in the blind rivet nuts manually by around a ½ turn to make it
easier to insert through the threaded mandrel A.
• Start the screw-in sequence by pressing the switch G.
• Hold down the switch G until the screw-in sequence is stopped automatically. While doing
this, hold the blind rivet nut secure against twisting during the entire screw-in sequence.
The blind rivet nut must be correctly positioned on the nosepiece B after the screw-in se-
quence. Otherwise, correct the setting of the threaded mandrel length (see Section 3.2)..
Caution: If the switch is released prematurely, the nut will be screwed off again.
 Loading...