3031 Schüttelinkubator
Shaking Incubator
Seite / Page 19 Rev.02 vom / dated 31.03.2014
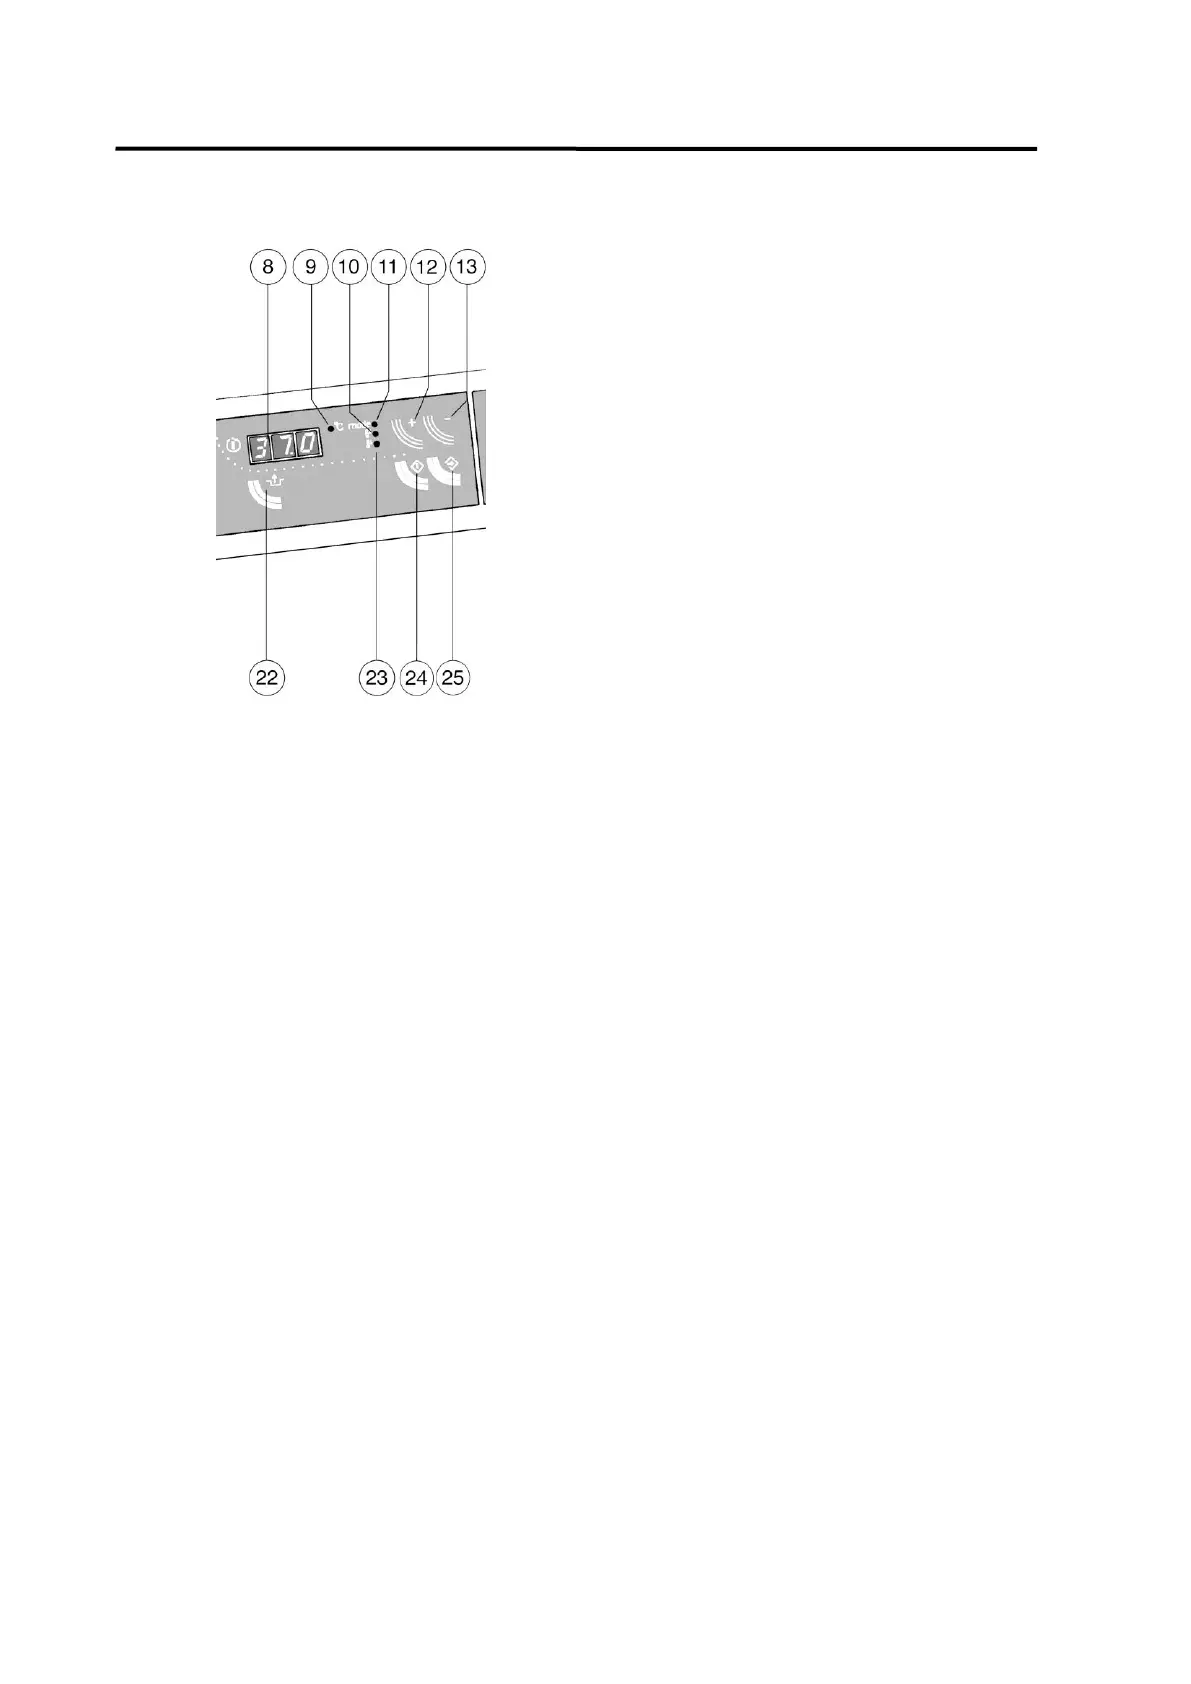
5.4 Incubation temperature
After switching the unit on, display 8 flashes
and shows the last memorized set tempe-
rature, pilot lamp 11 glows.
Use keys 12(+) and 13(-) to enter a new set
temperature.
Press key 25 to confirm the set temperature.
The temperature controller starts operation.
Approx 30 seconds after the last entry pilot
lamp 11 goes out and pilot lamp 9 glows. The
display now switches from set temperature to
actual temperature.
Three different temperatures can be
selected and changed by pressing key 12:
1. Set temperature, pilot lamp 11 glows.
2. Difference point for over-temperature alarm, dependent on the set temperature
(set temperature plus difference point = alarm point), pilot lamp 10 glows. Factory-
aligned at 04.0 = 4.0 K.
3. Difference point for under-temperature alarm, dependent on the set temperature
(set temperature minus difference point = alarm point), pilot lamp 23 glows. Factory-
aligned at 09.0 = 9.0 K.
When key 24 is pressed, the displayed set point starts to flash and can be reset through keys
12(+) and 13(-). Press key 25 to confirm the new set point.
Both under-temperature and over-temperature alarms that are due to external influences or to
an operational fault are given acoustically and optical. The display shows either E01 for over-
temperature alarm, or E02 for under-temperature alarm.
The heating is switched off. To cut off the alarm signal, press key 22.
In case of under-temperature the acoustic alarm is cut off immediately, the optical alarm is cut
off after exceeding the set alarm point. In case of over-temperature both acoustic and optical
alarms are switched off at the same time.
If the alarm occurs recurrently, the incubator should be checked by a trained electrician.
As an additional safety precaution to over-temperature and under-temperature alarms, a
thermostatic temperature cut-out protects the unit against overheating. For instructions on
deblocking the temperature cut-out please refer to chapter 6.1 of this operating manual.