- 15 -
Use extreme care when removing the CPU cooler because the thermal grease/tape between the CPU
cooler and CPU may adhere to the CPU. Inadequately removing the CPU cooler may damage the CPU.
1-3-2 Installing the CPU Cooler
RefertothestepsbelowtocorrectlyinstalltheCPUcooleronthemotherboard.(Actualinstallationprocessmay
differdependingtheCPUcoolertobeused.Refertotheuser'smanualforyourCPUcooler.)
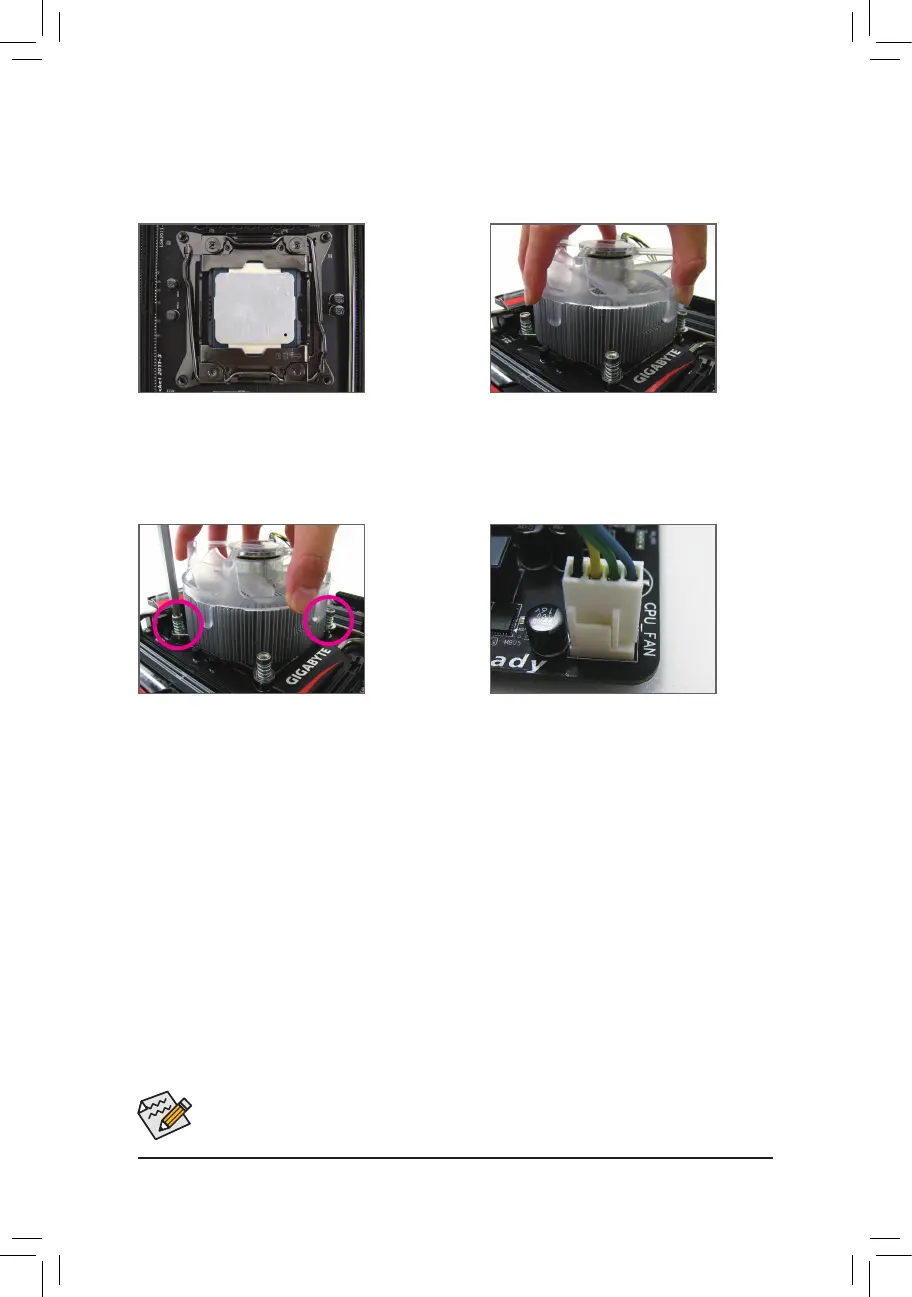
Step 1:
Apply an even and thin layer of thermal grease on
the surface of the installed CPU.
Step 4:
Finally, attach the power connector of the CPU
cooler to the CPU fan header (CPU_FAN) on the
motherboard.
Step 2:
Place the cooler atop the CPU, aligning the four
mounting screws with the mounting holes on
the ILM.
Step 3:
Use one hand to hold the cooler and the other to
tighten the screws in a diagonal sequence with a
screw driver. Begin tightening a screw with a few
turns and repeat with the screw diagonally opposite
the one you just tightened. Then do the same to
the other pair. Next, fully tighten the four screws.
 Loading...