EasyManua.ls Logo

Glacier bay N2451E - User Manual

Glacier bay N2451E
20 pages
Print Icon
To Next Page IconTo Next Page
Loading...
Item #1007767243
Model #N2451E
USE AND CARE GUIDE
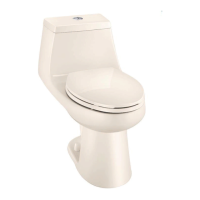
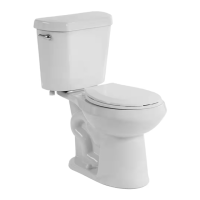
HIGH EFFICIENCY ELONGATED ALL-IN-ONE TOILET
THANK YOU
continually create quality products designed to enhance your home. Visit us online to see our full line of products available for your home
improvement needs. Thank you for choosing Glacier Bay!
Questions, problems, missing parts?
Before returning to the store,
call Glacier Bay Customer Service
1-855-HD-GLACIER
8 a.m. – 7 p.m., EST, Monday-Friday,
9 a.m. – 6 p.m., EST, Saturday
HOMEDEPOT.COM/GLACIERBAY

Questions and Answers

  • H
    heidimurphyAug 7, 2025
    What to do if my Glacier Bay Toilet is constantly running?
    • J
      Justin SmithAug 7, 2025
      If your Glacier Bay Toilet is constantly running, first, check that the flush valve seal is completely closed. Remove any debris from the flush valve seal and the sealing area of the flush valve that may be preventing a complete seal. Also, make sure the flush lever chain isn't too tight. Adjust the chain to allow the flush valve seal to close fully, leaving only a small amount of play between the lever and the chain.
  • M
    Michael GarciaAug 18, 2025
    How to improve the flush quality of my Glacier Bay Toilet?
    • N
      nortonchristopherAug 18, 2025
      To improve the flush quality of your Glacier Bay Toilet, ensure the water level in the tank reaches the water line marked on the flush valve's overflow tube. Adjust the fill valve's adjustment screw clockwise to raise the float cup and increase the water level. Also, check that the flush lever chain isn't too loose. Adjust the chain so the flush valve seal closes completely with only a slight bit of play between the flush lever and the chain.
  • P
    philip87Aug 27, 2025
    Why won't the fill valve on my Glacier Bay Toilet turn on or refill the tank?
    • M
      martinkarenAug 27, 2025
      If the fill valve on your Glacier Bay Toilet isn't turning on, turning off, or refilling the tank after flushing, start by removing the top cap and checking for any debris. If you find debris or the water flow seems weak, inspect the lower part of the fill valve for any blockages. The blockage might also be in the shut-off valve or the water supply line. If the fill valve has been used for a while, and/or the float cup doesn't drop when you flush, try replacing the seal with a genuine Fluidmaster 242 seal.

Summary

Pre-Installation Guide

Planning Installation Steps

Ensure all parts are present before installation and compare with included lists.

Required Tools for Installation

Lists the necessary tools for installation, including a putty knife, carpenter's level, and toilet water supply line.

Included Hardware Components

Details the hardware components included with the toilet, with a list of parts and quantities.

Package Contents Overview

Illustrates the main components of the toilet package, including the cover, toilet, and seat with lid.

Toilet Installation Process

Removing the Old Toilet

Steps to safely disconnect and remove the existing toilet, including shutting off water and removing bolts.

Installing Floor Bolts

Instructions for correctly positioning and securing floor bolts into the toilet flange for the new installation.

Installing the Wax Ring

Guidance on properly placing and attaching the wax ring to the toilet bowl outlet for sealing.

Placing and Aligning Toilet Bowl

Steps to align and place the new toilet bowl onto the prepared floor flange and bolts.

Securing the Toilet Bowl

Details on using washers, nuts, and caps to firmly fasten the toilet bowl to the floor.

Connecting Water Supply Line

Instructions for attaching the water supply line between the tank and the shut-off valve.

Installing Toilet Seat and Lid

Steps to attach the toilet seat and lid securely to the bowl using bolts and nuts.

Care and Cleaning Instructions

General Exterior Cleaning

Use mild soap, warm water, and a soft cloth for the exterior. Avoid abrasive cleaners and chlorine products.

In-Tank Cleaner Warning

Alerts users against using in-tank cleaners due to potential damage to tank fittings and property.

Quick Release Seat Removal

Step-by-step guide on how to detach and reattach the quick-release toilet seat for cleaning purposes.

Troubleshooting Common Issues

Fill Valve Not Operating Correctly

Diagnoses and solutions for fill valve issues, including checking for debris or replacing seals.

Poor Toilet Flush Quality

Troubleshooting steps for inadequate flushing, such as adjusting water level or flush lever chain.

Continuous Water Run Issue

Identifies causes for continuous running water, like a loose or tight flush lever chain or debris.

Valve Cap Assembly Maintenance

Detailed steps and diagrams for safely disassembling the fill valve cap assembly for maintenance.

Clearing Debris from Valve

Procedure for clearing debris from the fill valve by briefly turning the water supply on and off.

Flush Valve Seal Replacement

Recommendation to use a genuine Fluidmaster 242 seal when replacing the flush valve seal.

Valve Cap Reassembly

Instructions for correctly reassembling the fill valve cap assembly after maintenance or replacement.

Replacement Parts Identification

Lists the model numbers for key replacement parts like the fill valve and flush valve seal.

Glacier bay N2451E Specifications

General IconGeneral
BrandGlacier bay
ModelN2451E
CategoryToilets
LanguageEnglish

Related product manuals