4. Configuration
4.1 Standard configuration
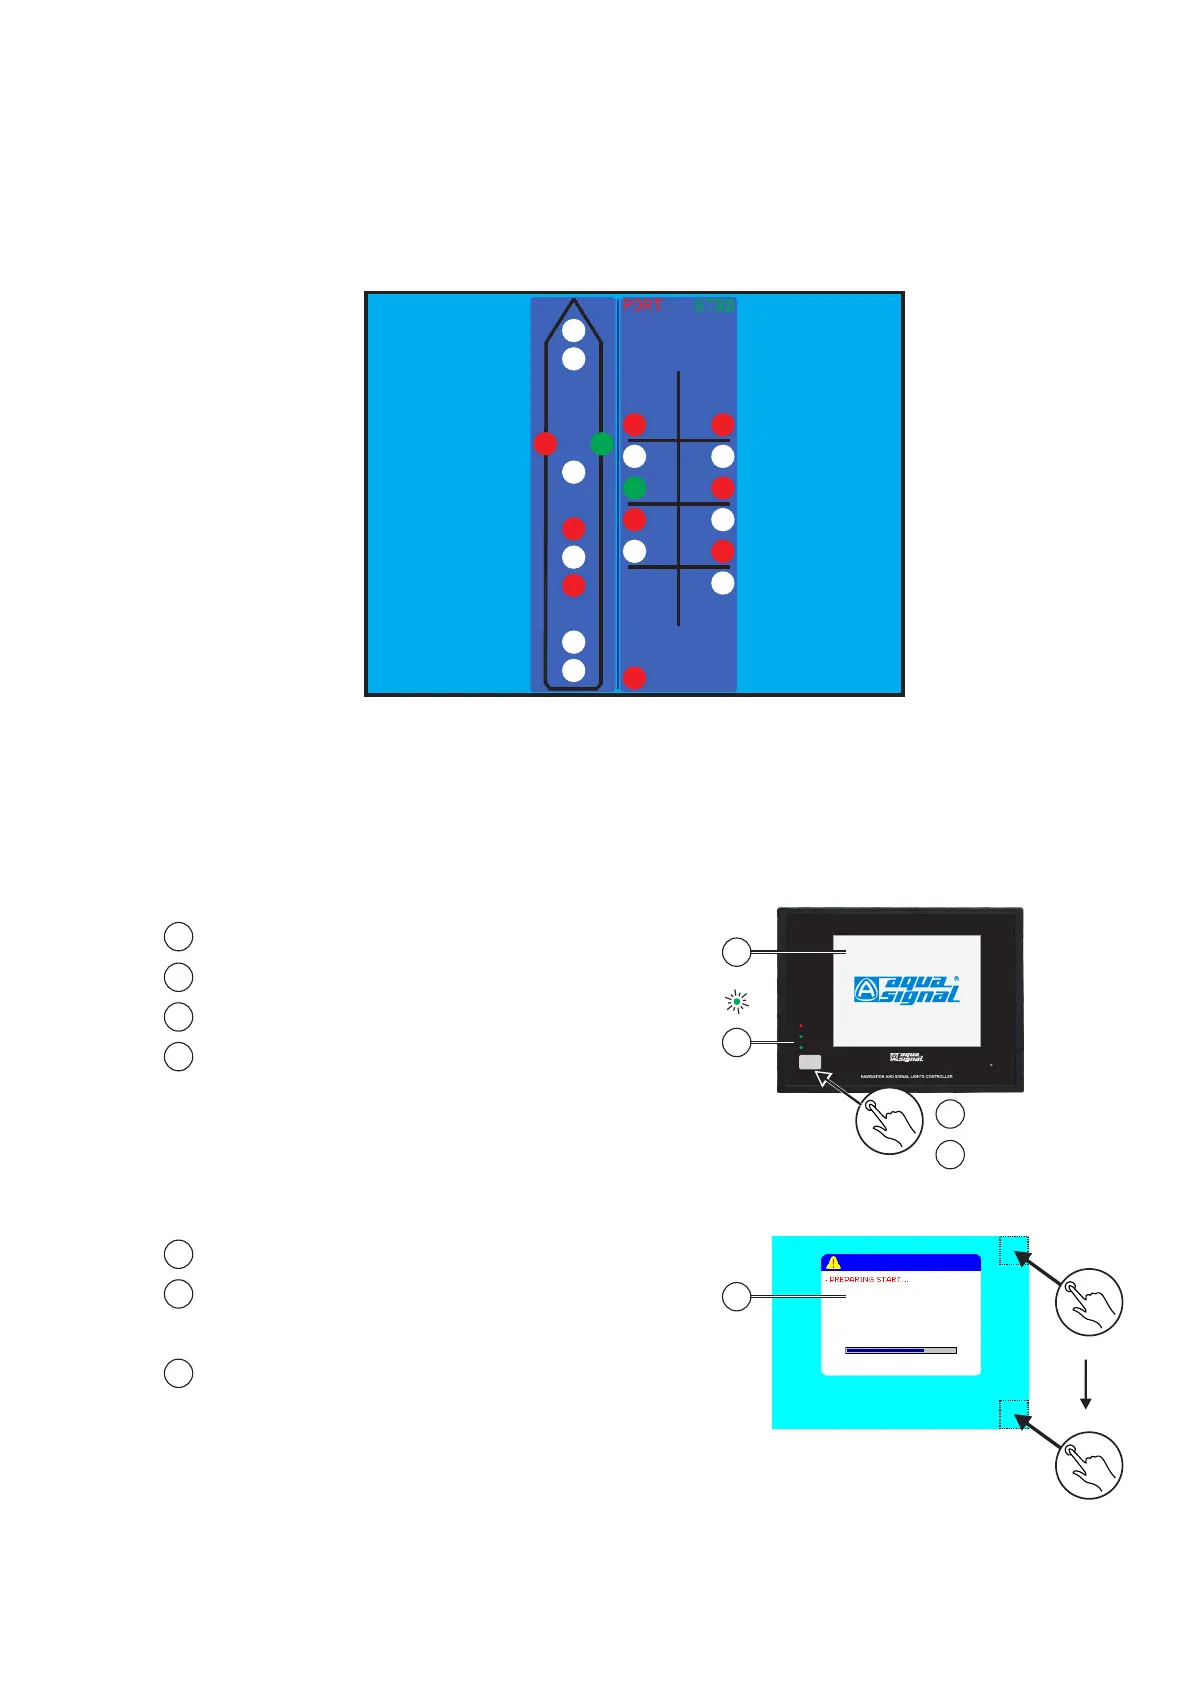
After installation has been done it is necessary to adjust configuration according ship specific arrangement.
Each control unit is delivered with standard configuration which is shown bellow.
3 4
1.ANCHOR FWD
2.MASTHEAD FWD
3.PORT
4.STARBOARD
5.MASTHEAD AFT
6.N.U.C. UPPER
7.R.A.M.
8.N.U.C. LOWER
9.ANCHOR AFT
10.STERN
SPARE EXIST
SPARE EXIST
SPARE EXIST
SPARE EXIST
SPARE EXIST
SPARE EXIST
SPARE EXIST
SPARE EXIST
SPARE EXIST
1
2
5
6
7
8
9
10
1.SUEZ RED
2.SUEZ RED
3.SUEZ WHITE
4.SUEZ WHITE
5.SUEZ GREEN
6.SUEZ RED
7.SUEZ RED
8.SUEZ WHITE
9.SUEZ WHITE
10.SUEZ RED
11.SUEZ WHITE
12.SUEZ RED
1
3
5
7
9
12
2
4
6
8
10
11
SPARE EXIST
4.2 Enter configuration mode
In order to enter configuration mode follow instructions bellow:
POW ER/
SYS TEM
FAIL URE
MAI N
SUP PLY
SPAR E
SUP PLY
POWER
ON / OFF
www.glamox.com/gmo
2
1
Push
3
Release
1
Push and hold POWER ON/OFF push button
2
3
4
Main supply (or spare supply) lights on
Release POWER ON/OFF push button
After approx. 30s logo will appear
4
5
5
6
7
When “PREPARING START” message occurs
Tap on upper right corner of screen
Message “LIGHT CONFIGURATION MODE CAN BE ENTERED”
Message “
”
PLEASE, WAIT... LOADING APPLICATION
FOR CONFIGURATION
Tap on lower right corner of screen
6
7
18
 Loading...