10
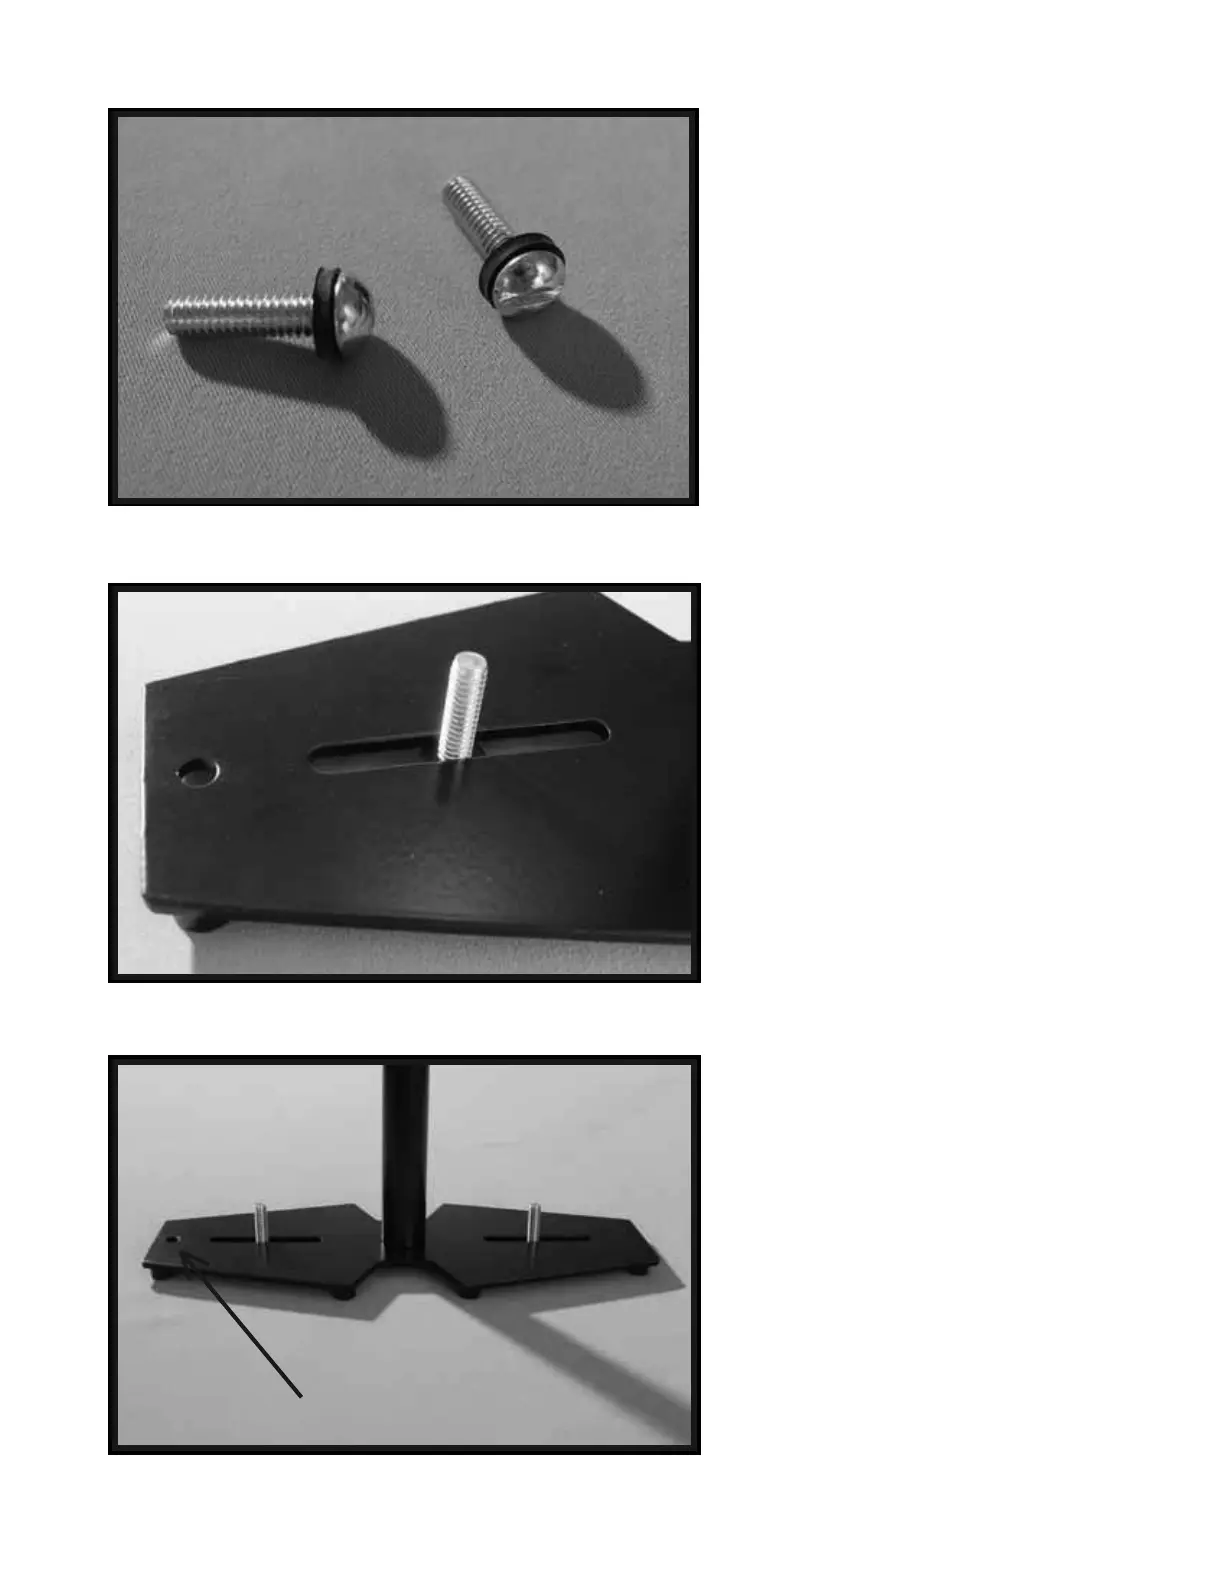
Now find a pair of bolts (example: ¼” x
20 x 1") and attach RUBBER WASHERS
as shown in the photo to the left.
NOTE: Different length bolts are provided
so you can use the longer bolts for a taller
stack of COUNTER WEIGHT DISKS.
Now, insert the selected bolts with
RUBBER WASHERS attached through
the slots in the BASE PLATFORM as
shown in this picture and repeat this
procedure for the slot on the other side of
the BASE PLATFORM.
At this point your Glidecam 2000 Pro
should look like this photo.
16
17
18
NOTE: This is the Monitor Mounting Hole