11
5.0 Opener Accessories Programming
5.1 Enable Optional Photo Sensor Beams
Optional Photo Sensor Beams are available to prevent a door from closing when an obstruction
(person, object etc) is located in the beams path. By default, Photo Sensor Beams are disabled
(setting ‘H0’) on all units. To enable this feature please complete the following steps:
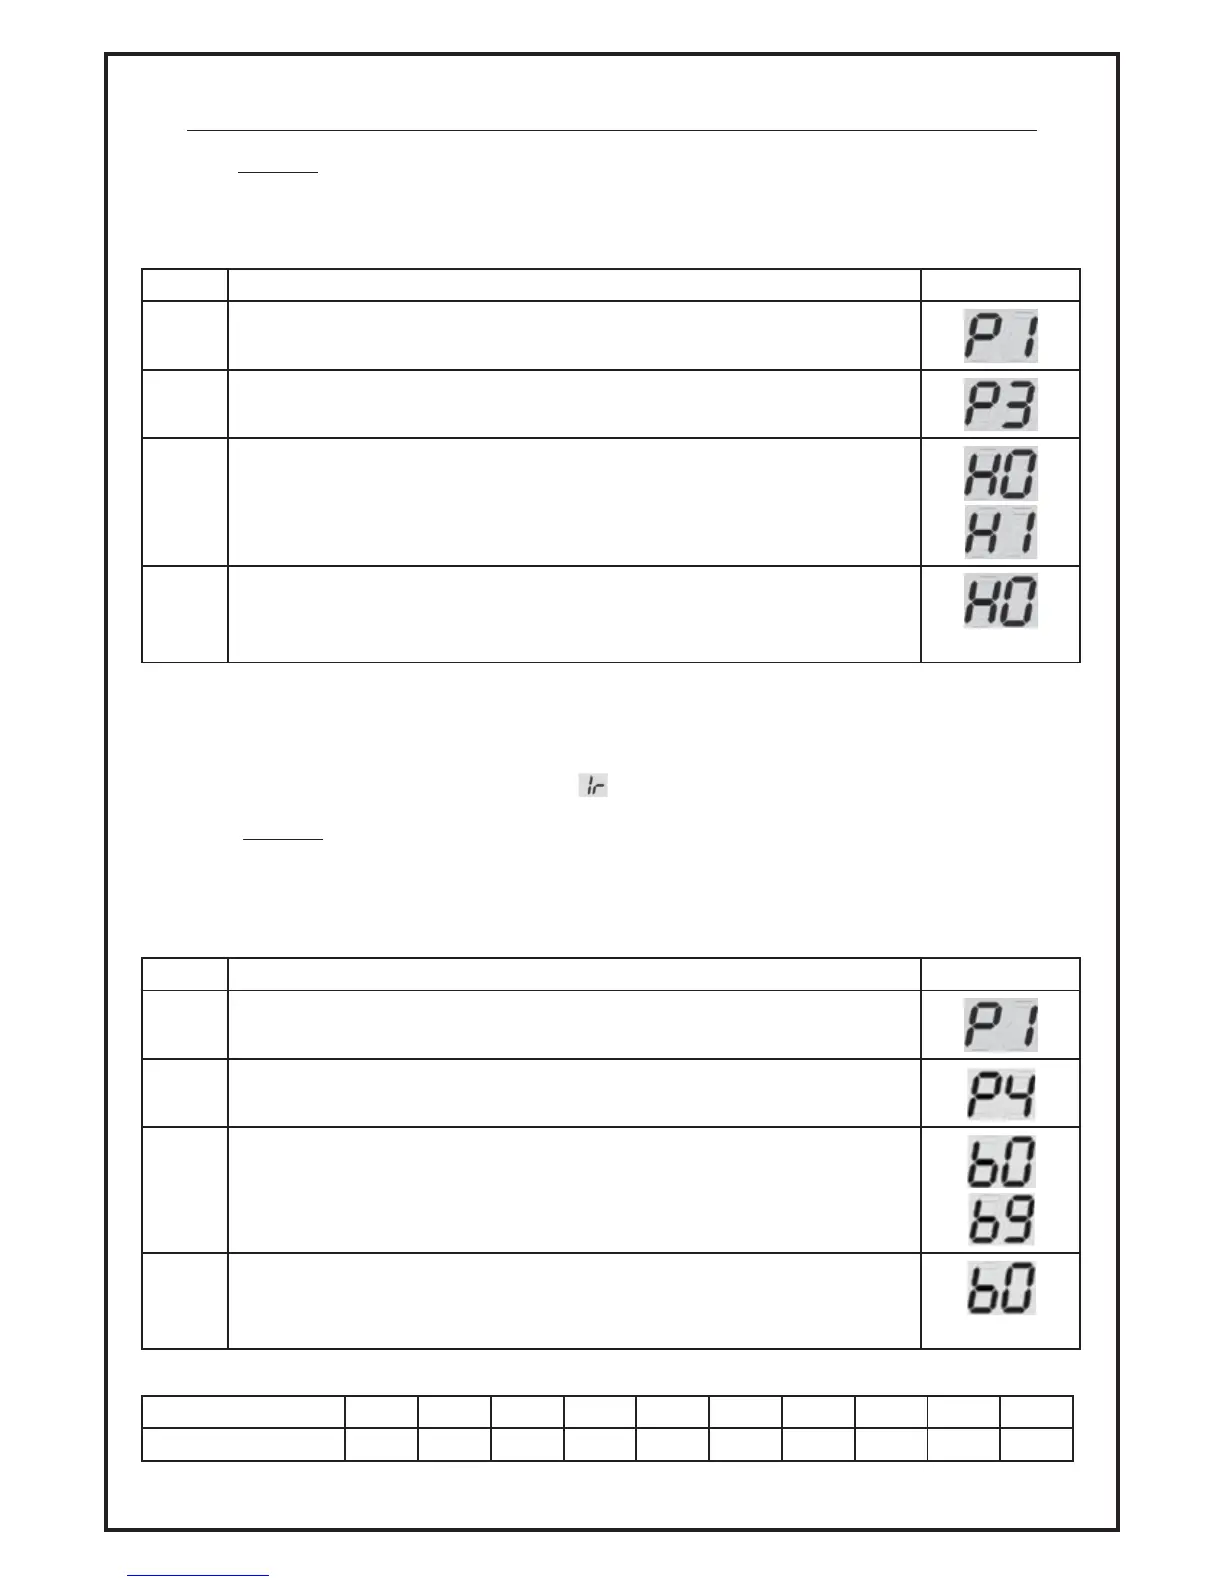
Item Description Display
5.1.1 Press ‘SET’ until ‘P1’ is visible on the display.
5.1.2 Press the ‘UP’ button twice and ‘P3’ will be visible on the display. Press ‘SET’
to confirm selection.
5.1.3 To enable functionality, press the ‘UP’ button once and ‘H1’ will be visible
on the display.
5.1.4 Press the ‘SET’ button to save selection in the units memory.
(example)
To disable, complete steps 5.1 and 5.2 then press the ‘DOWN’ button and ‘H0’ will be visible on the
display. Press the ‘SET’ button to save selection in the units memory.
Note: If Photo Sensor Beams are not connected, please ensure ‘H0’ is selected otherwise the door
will not close and the control panel will display
5.2 Enable Optional Auto-Close Setting
Please note this feature is only available for doors fitted with optional Photo Sensor Beams. The Auto
Close feature only activates once the door reaches the open position.
By default, Auto-Close is disabled (setting ‘b0’) on all units. To enable this feature please complete
the following steps:
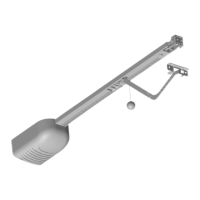
Item Description Display
5.2.1 Press ‘SET’ until ‘P1’ is visible on the display.
5.2.2 Press the ‘UP’ button three and ‘P4’ will be visible on the display. Press ‘SET’
to confirm selection.
5.2.3 Using the reference table below as a guide, use the ‘UP’ and ‘DOWN’
buttons to select your preferred Auto-Close setting.
5.2.4 Press the ‘SET’ button to save selection in the units memory.
(example)
Setting Code b0 b1 b2 b3 b4 b5 b6 b7 b8 b9
Time (sec) 0 10 20 30 40 50 60 90 120 180