•Page globalcontract.com 18
• Summer 2017
GLOBALContract
INSTALLATION GUIDELINES
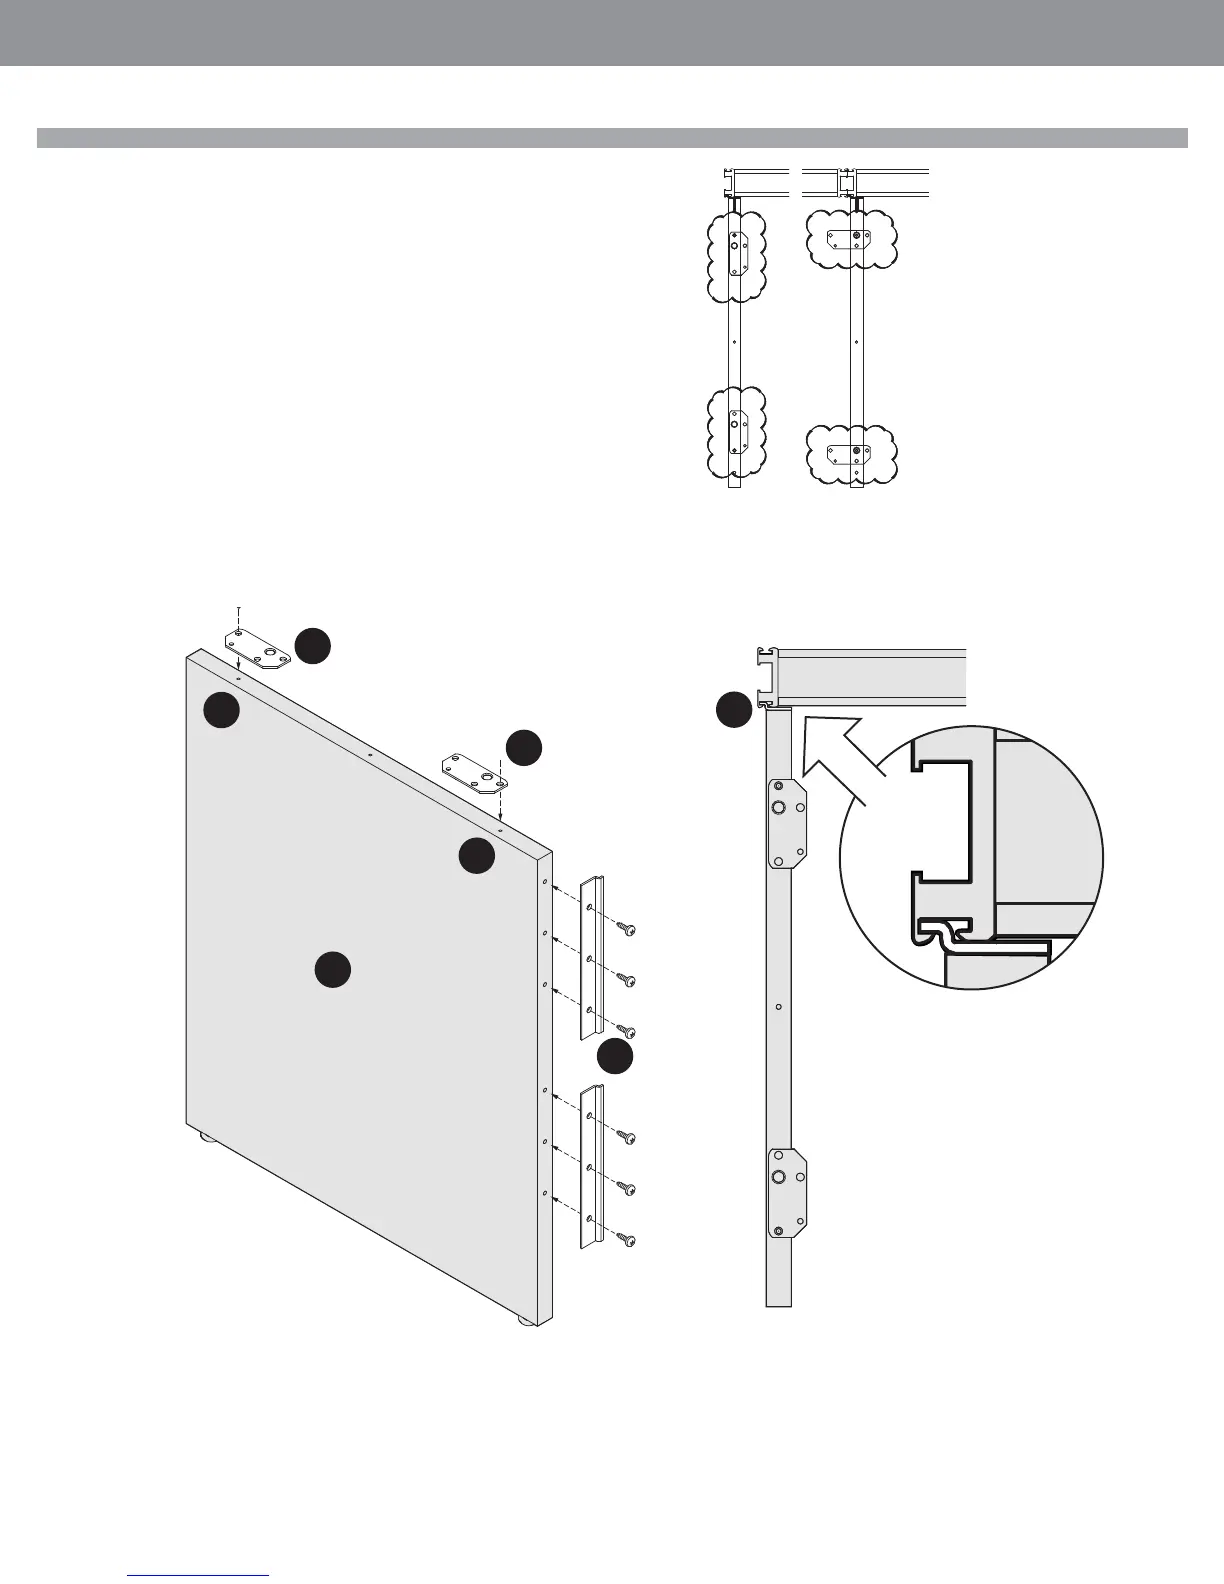
End Panel
STEP 1: Align the holes of the worksurface brackets (1) with the pilot holes (2)
on the top of the end panel (3). Drive the supplied screws into the end panel but
do not over tighten.
STEP 2: Attached the panel mounting brackets (4) to the end panel, while align-
ing the bracket holes with the pilot holes of the end panel.
STEP 3: Attach the end panel to the Compile panel’s vertical rail (5). Put it on an
angle then rotate it into its place.
STEP 4: Adjust the levelers as needed, making sure the end panel will keep the
worksurface level.
STEP 5: Proceed with the installation of the worksurfaces.
Installation Tip: Identify correct setting
of worksurface mounting brackets (left
and right, single or supporting adjacent
worksurface) and install the panel
mounting bracket accordingly.
4
2
2
1
1
3
5