Section 5 Operating Instructions
5-1
!
WARNING
THIS UNIT MUST BE USED ONLY WITH HOSPITAL GRADE EARTH-GROUNDED AC
OUTLETS.
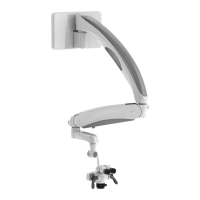
Figure 5-1 Power Button
5.1 Turning On The System
Plug in the system into a hospital grade earth-ground AC outlet. Turn power on to the system by depressing
the LED power button. The green indicator light(s) at the lowest setting will come on indicating that there is
power to the system and the intensity setting. When the LED power button is depressed again the light(s) will
extinguish indicating that the power to the system is turned off. Depress the power button again and the LED
will come on at the last intensity setting used. See Section 5.13 “M A801-LED Light Source Operation” or the
LED owner’s manual 110-013-081 for instructions.
If set up with a wall switch make sure the wall switch
is turned on and then depress the LED power button.
To safely terminate the operation of the
microscope system, unplug the microscope
or turn off the microscope via wall switch where applicable.
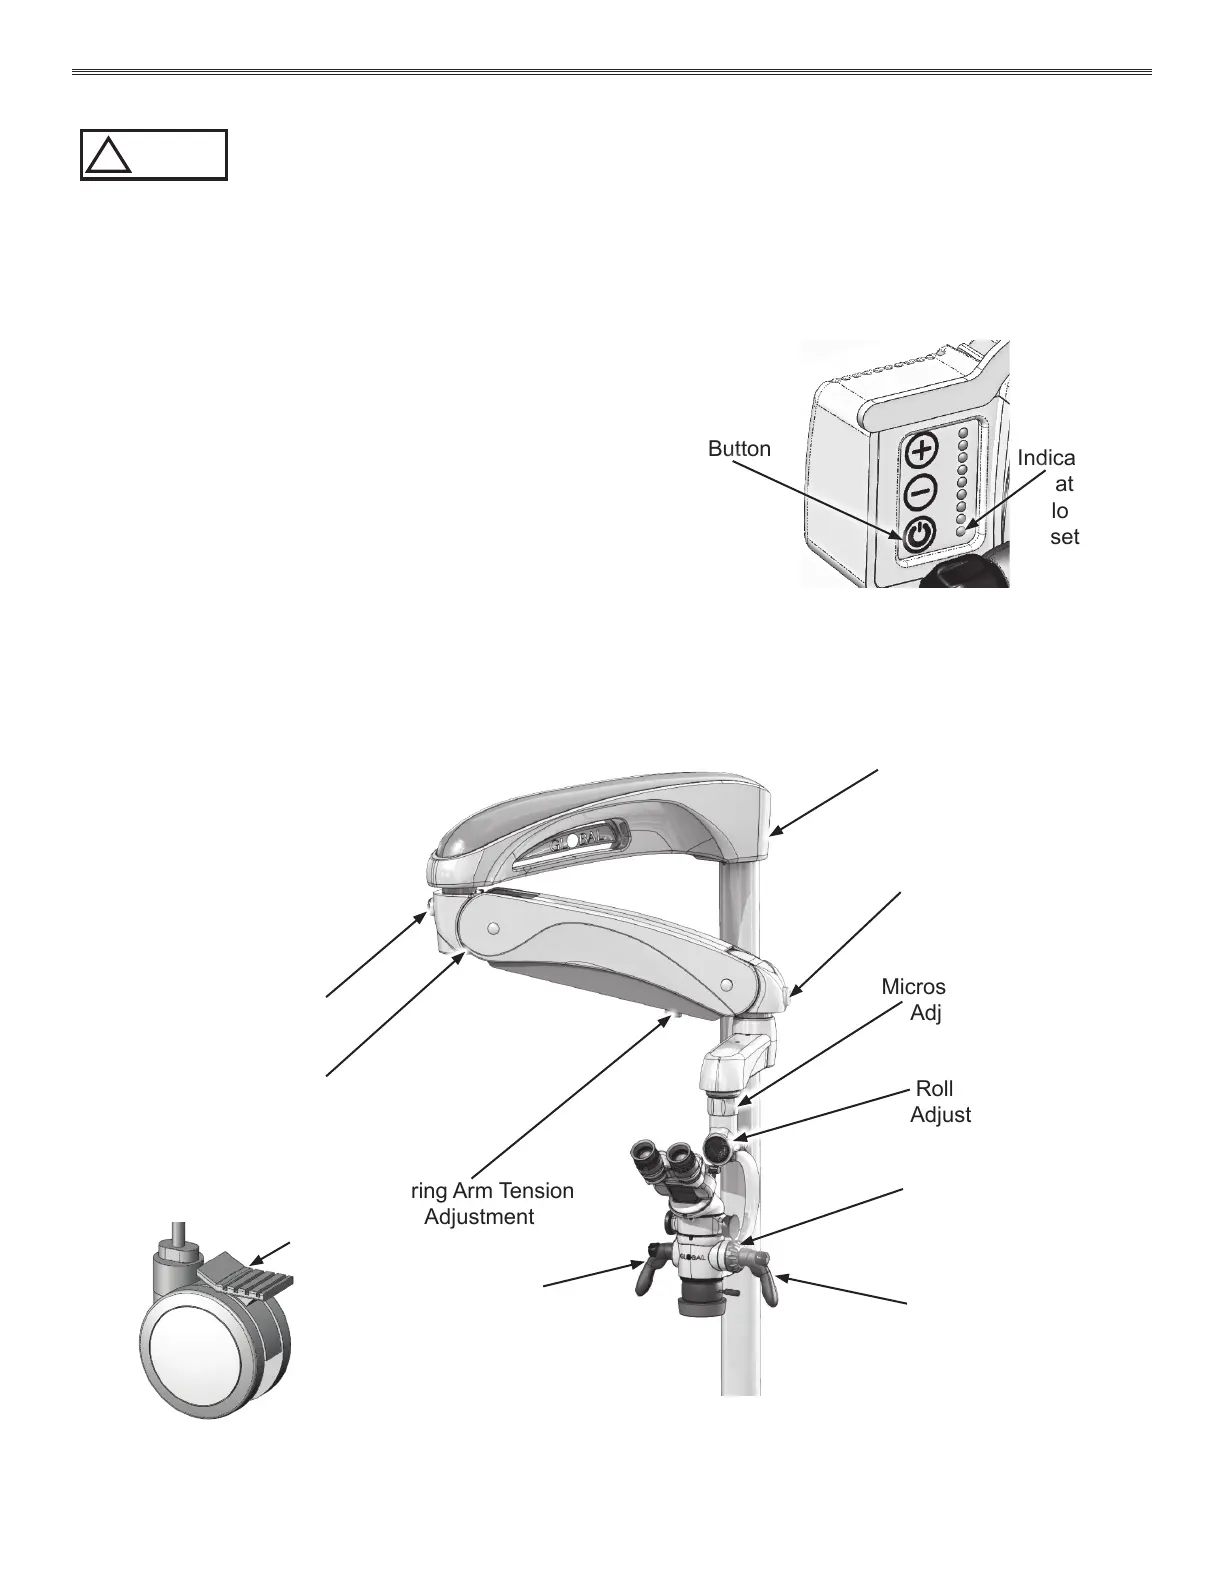
5.2 Description and Location of Controls
Figure 5-2 shows the location of the system controls.
Power Button
Indicator light
at the
lowest
setting
Microscope
Maneuvering
Handle
Roll Angle
Adjustment
Microscope Pivot
Adjustment
Straight Arm Pivot
Adjustment
Extension Arm Pivot
Adjustment
Microscope
Maneuvering
Handle
Pitch Angle
Adjustment
Spring Arm Pivot
Adjustment
Spring Arm Tension
Adjustment
Counterbalance
Adjustment
(set screw)
Locking Casters
Lock
Figure 5-2 Location of Controls
 Loading...