Section 4 Accessories
4-7
4.2 Installation of Optical Accessories
Installation of the A-Series Binocular
To install the binocular, Refer to Figure 4-2 and proceed as follows:
1. Loosen the set screw on the microscope body with a 5/64” hex wrench so it will not interfere with
the dovetail-shaped bottom of the binocular head.
2. Slide the binocular head into the retaining ring so the dovetail-shaped bottom slides under the two
wedge-shaped tabs at the rear of the retaining ring.
3. To align the binocular, position the binocular head so the U-Shaped slot at the rear of the binocular base is
installed over the slotted screw in the binocular retaining ring.
4. Tighten the set screw. When the microscope body and the binocular head are properly aligned, the
binocular head will not rotate in the binocular retaining ring.
,
NOTICE
M A1047LFM Laser Filter, M A1019 Binocular Rotation Ring, M A512 Dual Iris Diaphragm,
M A1061-D50 & M A1061-DVA50 Dual Port Beamsplitter, M A1061-SVA & M A1061-S50 Single
Port Virtual Beamsplitter, M A1017 Carr Adapter will install in very much the same way. See the
installation instructions that are included with each accessory.
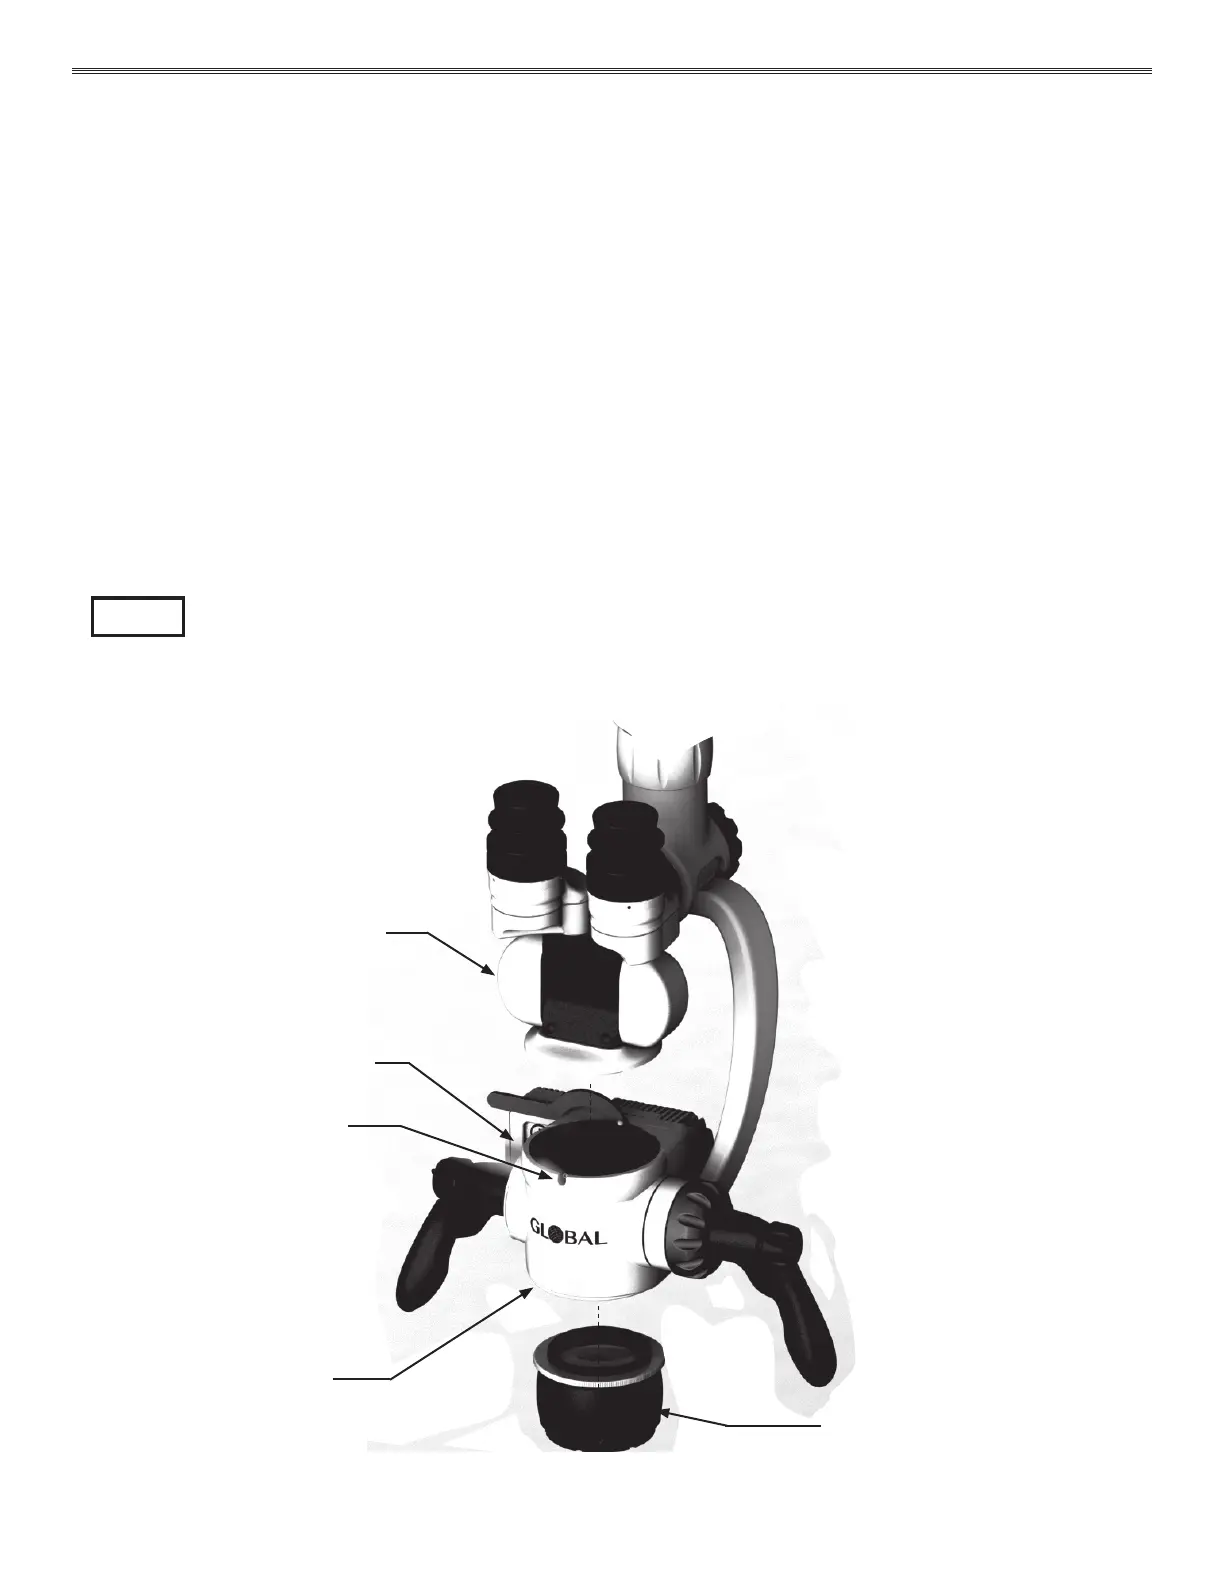
Figure 4-2 Installation of the A-Series M A1003, M A1004, and M A1006 Optics
Set Screw
Microscope Body
Binocular
Objective Lens
Microscope Body
 Loading...