0020140413_01 - 09/12 - Glow-worm
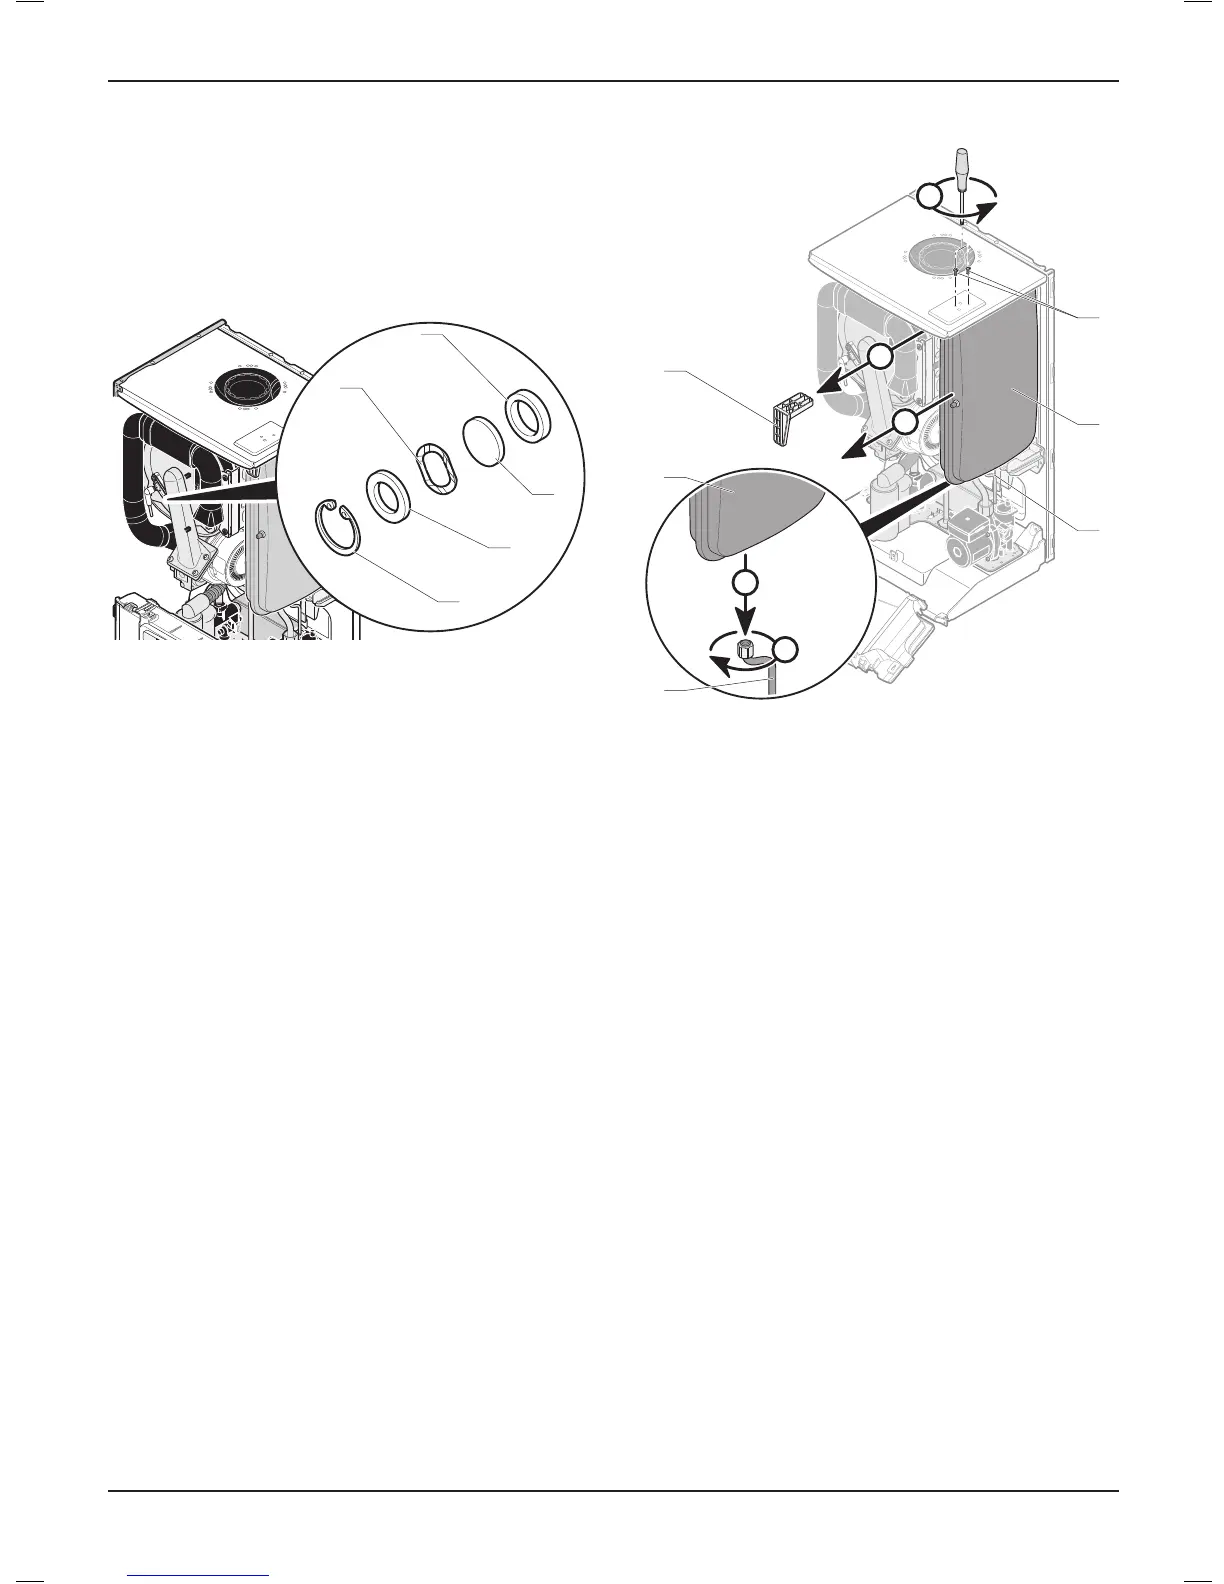
18.3 Viewingwindow
3
4
5
2
1
Key
1 Fibrewasher
2 Steelwasher
3 Glass
4 Steelwasher
5 Circlip
• Remove the circlip (5).
• Remove the steel washer (4).
• Remove bre washer (1).
• Remove the glass (3).
18.3.1 Expansion vessel
D
E
A
3
2
1
4
2
1
Key
1 Connector
2 Expansion vessel
3 Upper support bracket
4 Retainingscrew
5 Gasket
Drain the boiler heating circuit as described in the appropriate
chapter "Draining".
• Remove the two screws (4).
• Undo the connector (1) at the base of the vessel.
• Remove upper support bracket (3).
• Remove the expansion vessel (2).
• Fit a new gasket between the expansion vessel and connector.
• Rell, vent and pressurise the boiler.
MAINTENANCE
- 39 -
 Loading...