Supplied By www.heating spares.co Tel. 0161 620 6677
9 Flue Preparation and Installation
Horizontal Terminal Installation
With due consideration to terminal clearances mentioned in
Section 3.2 drill the one or two holes as required with a 90mm
core drill.
Push the horizontal terminal through the wall allowing approx.
100mm to protrude outside.
Push a grey rubber wall seal
onto either side of the wall ensur-
ing that both wall seals are pushed up to the wall surface, see
examples (b) and (c) diagram 9.25.
Vertical Terminal Installation
With due consideration to terminal clearances mentioned in
Section 3.2, project the rise of the flue pipe to roof level and
cut 150mm hole in the roof.
(a) Pitched Roof
Fit the required pitched roof weather collar over the 150mm
hole in the roof. Make good the tiling or slating around the
collar incorporating the flashing of the weather collar. Position
the angle cap over the weather collar in the correct orientation
to attain the correct angle for your roof. One way round gives
a pitch of 25°-38° and the other gives 37°- 50°.
(b) Flat Roof
Fit the aluminium weather collar over the 150mm hole in the
roof ensuring a weather tight seal.
Horizontal Pipes-Completion of Installation
Having built the pipe(s) from the boiler to the terminal(s), the
length of the final pipe piece can be determined. Cut pipes at
the opposite end to the ‘O’ ring seal making square and free
from burrs. Push the horizontal terminal through the wall to
engage the final pipe piece and pull back ensuring the grey
wall seals are fully pulled up to the outside and inside wall
faces.
Vertical Pipes-Completion of Installation
Refer to diagram 9.25.
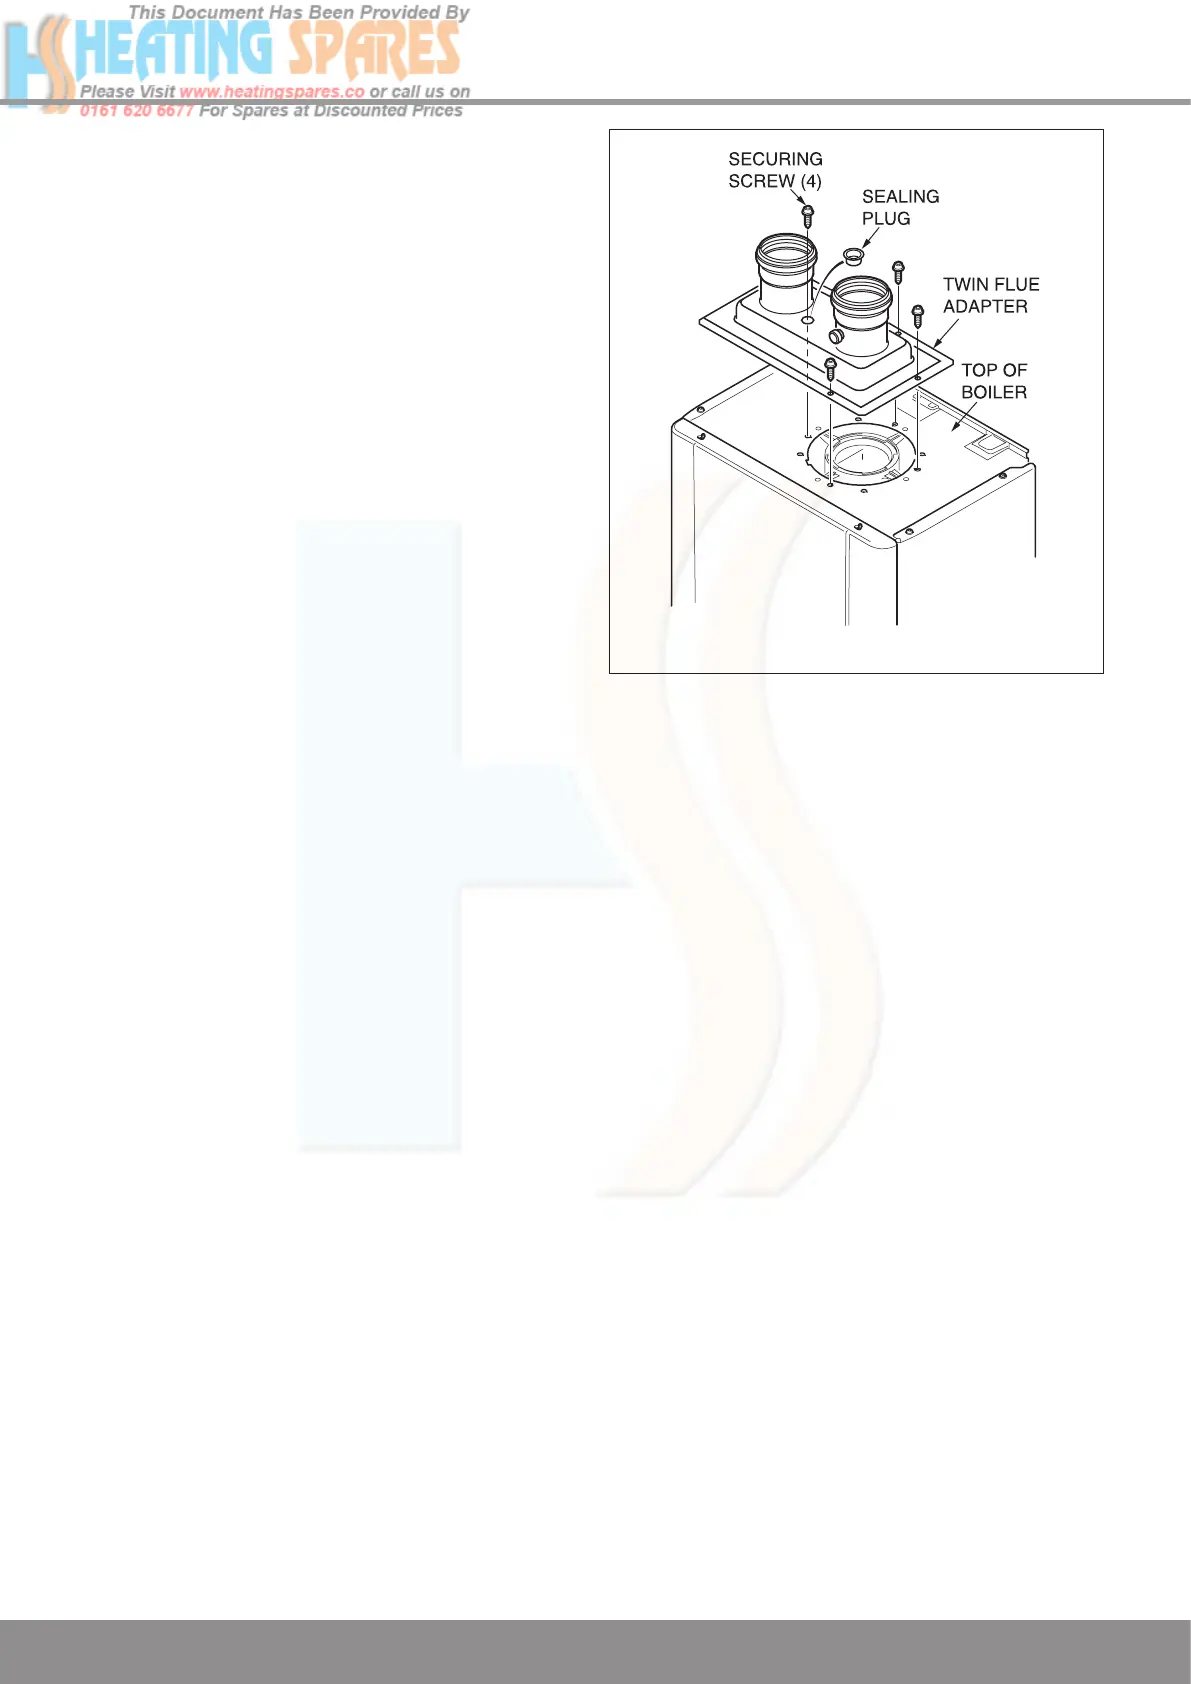
For installation of (a), attach the twin pipe to concentric flue
adaptor, part number A2011600, to the base of vertical ter-
minal assembly. For installation of (b), attach the single pipe
to concentric adaptor, part number A2011500, to the base of
vertical terminal assembly.
With the vertical terminal assembly positioned in the roof,
the length of the final pipe can be determined. Cut the fl
ue
to the desired length measuring from the ‘O’ ring seal end
and discard the plain end of the tube. The cut end should be
square and free from burrs. Carefully push the terminal as-
sembly upwards to allow room for fitting the final flue piece(s).
Fit a 100mm fixing bracket to the terminal assembly Part
No2000460486. Pull the terminal assembly down and join to
the flue system. Ensure that the terminal is making a weather
tight seal on the weather collar
. Secure the fixing bracket fitted
to the terminal to the roofing struts or a purpose made batton.
Diagram 9.24
12985
 Loading...


