Supplied By www.heating spares.co Tel. 0161 620 6677
14 Replacement of Parts
14.14 Condensate Trap
For access, refer to section 14.1.
Remove the drain outlet pipe from the base of the trap. Re-
move the condensate drain securing screw and carefully pull
the trap forward, see diagram 12.13.
On the condensate trap there is a key symbol that should be
in line with the locked padlock symbol on the condense drain.
To remove the trap turn in the direction of the unlock sym-
bol and carefully pull down clear of the condense drain, see
diagram 12.13.
Remove any solids found in the condensate trap.
Flush water through the trap to remove any remaining solids.
Check for any debris in the outlet pipe of the condensate drain
and clean as necessary.
Reassemble and refit the condensate trap.
14.15 Heating Flow Thermistor
For access refer to section 14.1.
Remove the silencer front, fan/gas valve assembly and flue
hood for access. See relevant sections.
Refer to diagram 14.4.
Remove the electrical connections from the thermistor.
Remove the retaining clip from the flow pipe.
Remove the thermistor from the retaining clip.
Note that the polarity of the wiring to thermistors is unimpor-
tant.
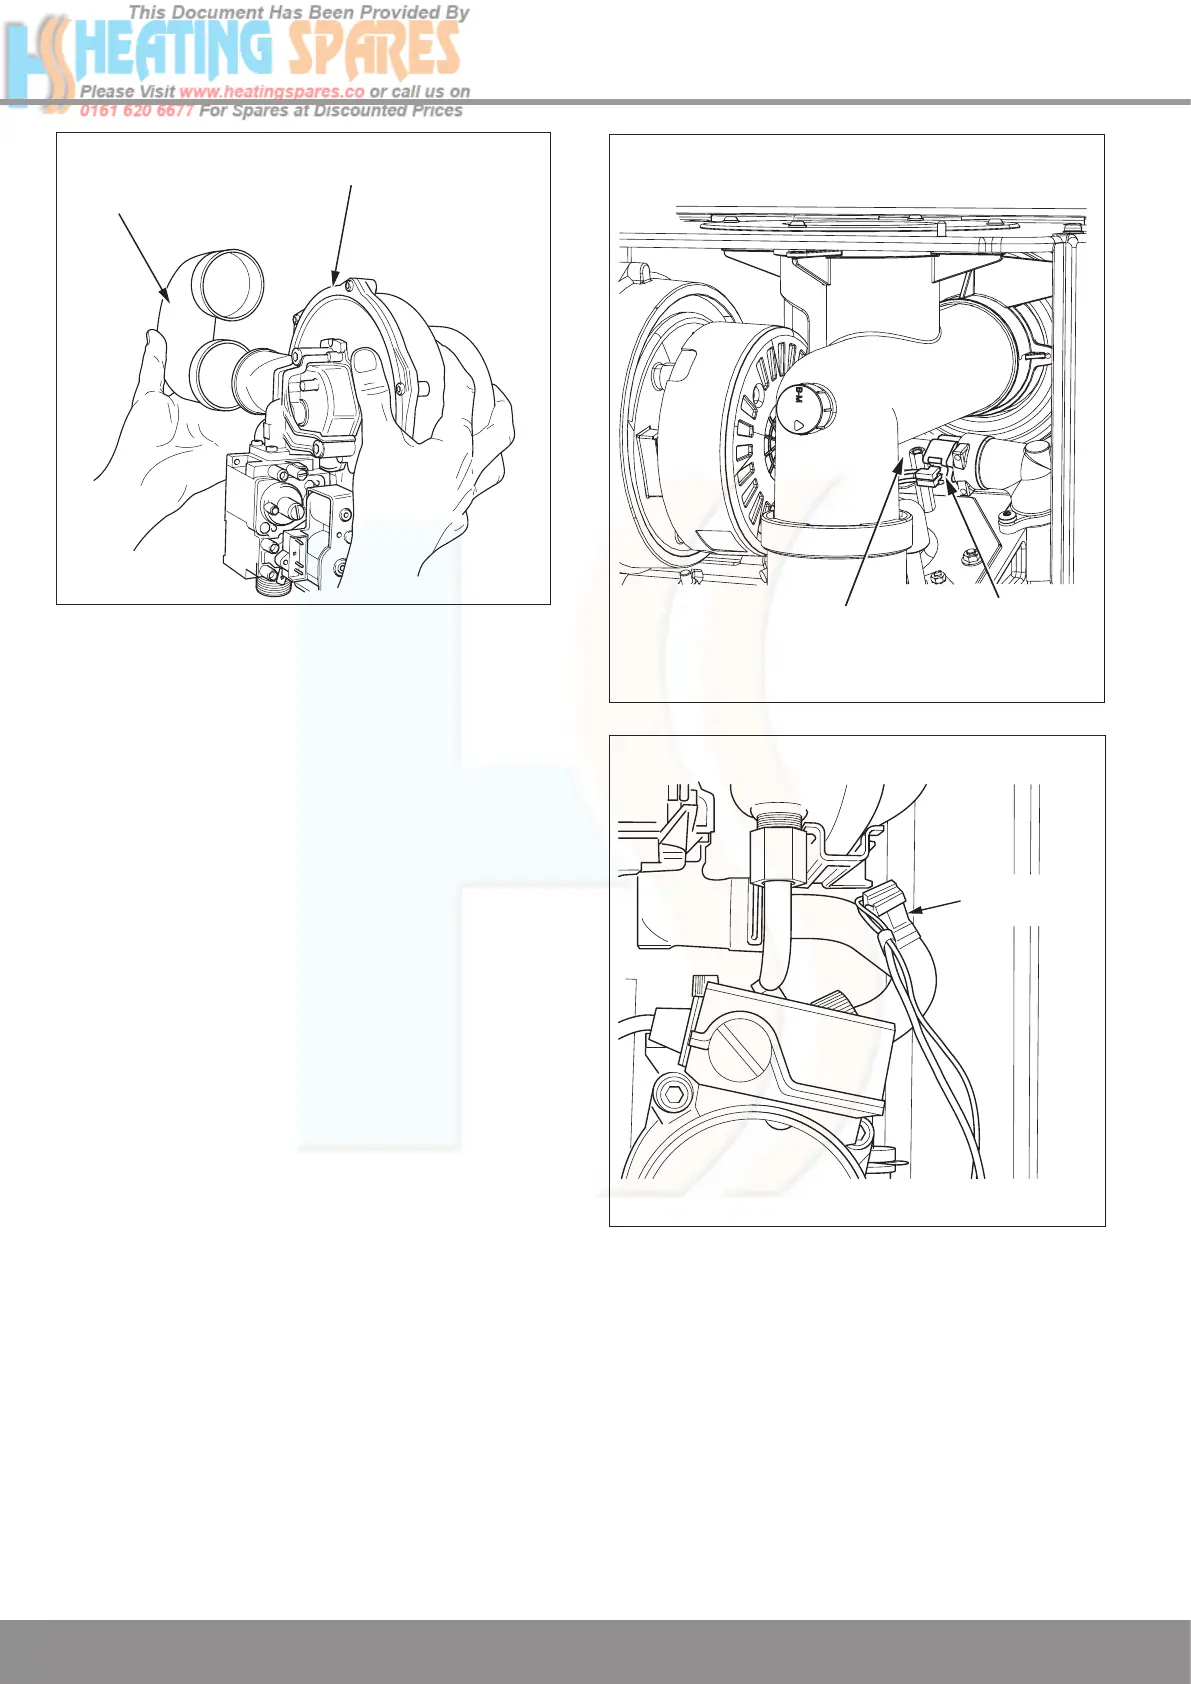
SILENCER
REAR
FAN/GAS VALVE
ASSEMBLY
Diagram 14.3
13007
HEATING FLOW
THERMISTOR
FLOW PIPE
Diagram 14.4
13027
Diagram 14.5
13060
14.16 Heating Return Thermistor
For access, refer to section 14.1.
Refer to diagram 14.5.
Remove the electrical connections from the thermistor.
Remove the retaining clip from the return pipe.
Remove the thermistor from the retaining clip.
Note that the polarity of the wiring to thermistor is unimportant.
 Loading...


