Home
Gocycle
Scooter
GX
Page 98
Gocycle GX - Page 98
117 pages
Manual
Save Page as PDF
To Next Page
To Next Page
To Previous Page
To Previous Page
Loading...
Gocycle
®
Owner’s Man
ual for GX,
April
2019
© Karbon Ki
netics Lim
ited. All Rights Reser
ved.
98
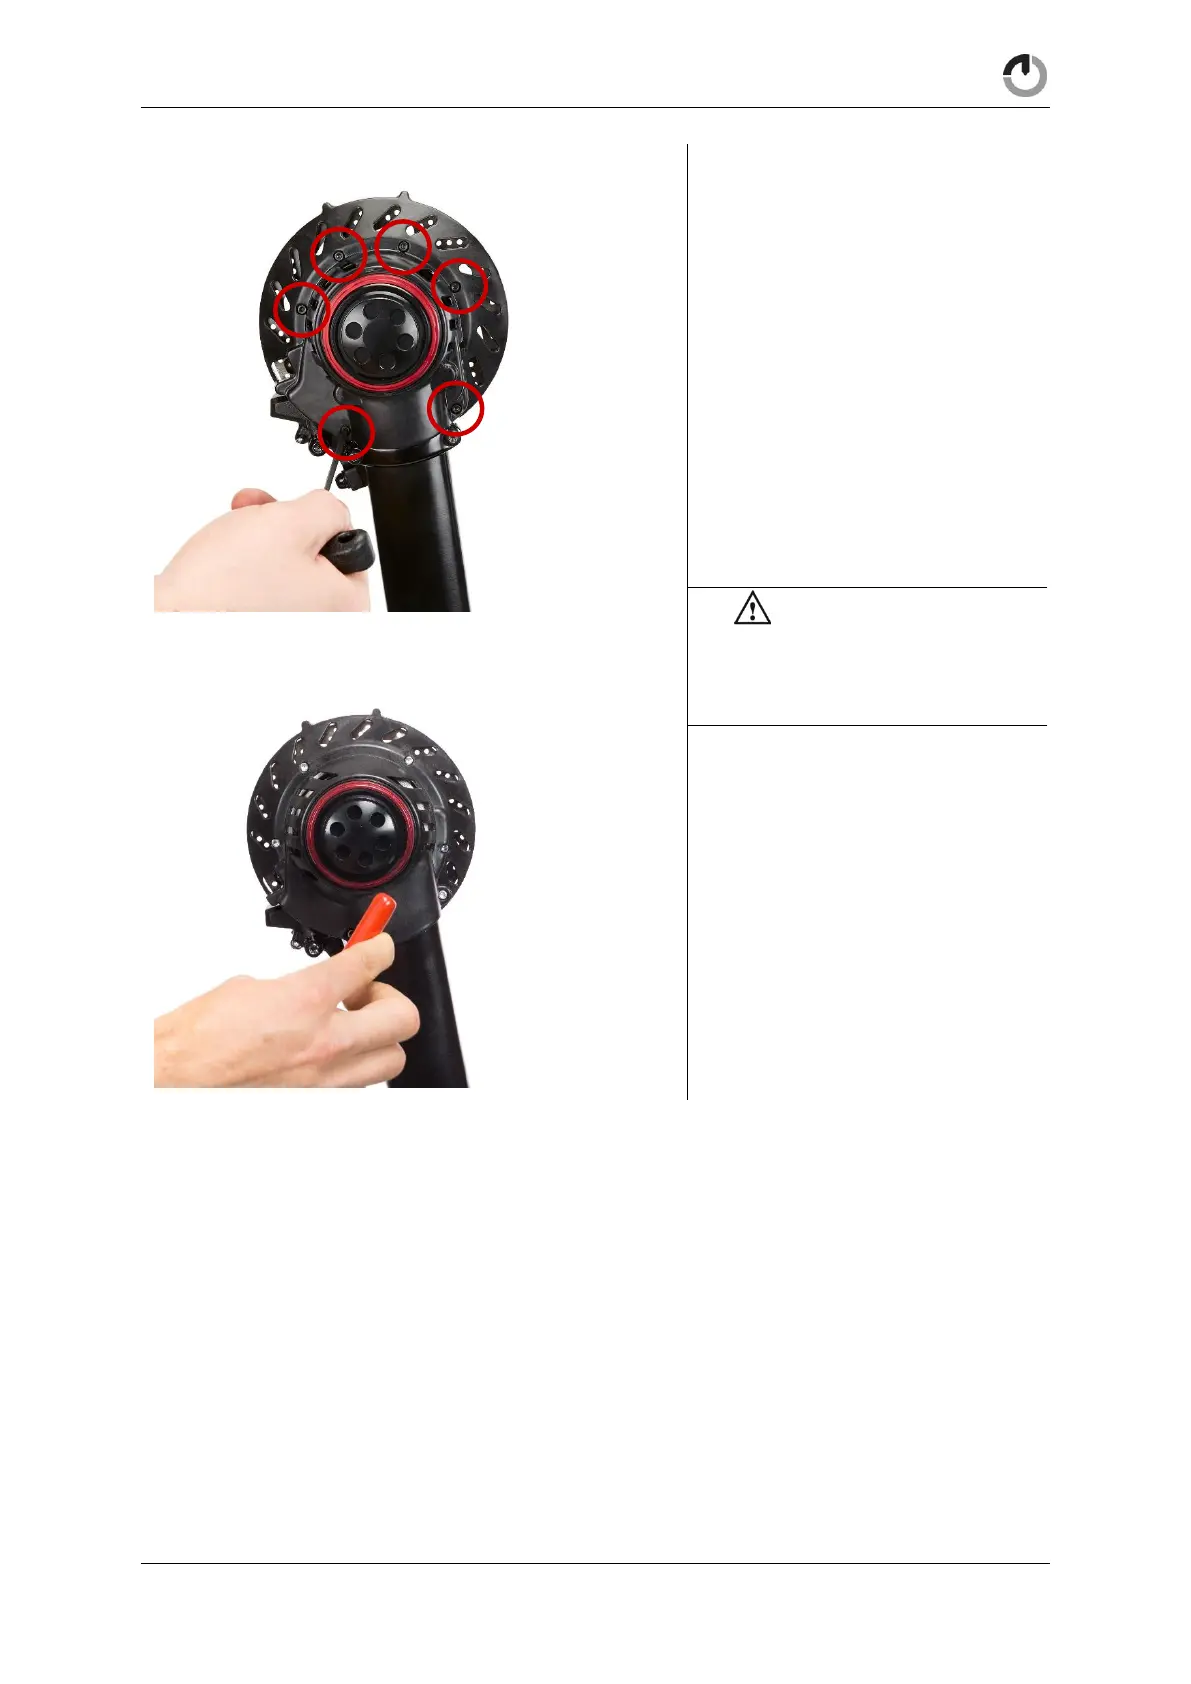
Replace the six m
otor cover securing
screws. Tighten to a tor
que of 3
–
4Nm.
WARNING! The bra
king
performance of new
brake pads
will increase ov
er time. Ensure that
you “bed
-
in”
y
our brakes
by
performing a number of s
tops.
97
99
Table of Contents
Main Page
1 Contents
3
Table of Contents
3
2 Setup, Configuration, and Getting Started
6
Setup
6
Labelling for USA Type 1 & Type 2 Configuration
7
Overview
8
2.1 Pre-Ride Checks
9
Bike Fit and Adjustment
11
Safety First
12
Mechanical Safety Check
12
First Ride
14
3 Safety
15
The Basics
15
Riding Safety
16
Stopping the Gocycle
17
Riding in Wet, Cold or Icy Conditions
17
Night Riding
18
Riding in Low Light Conditions
19
4 Charging Your Gocycle
19
How to Charge Your Gocycle
19
Important Information: Lithium-Ion Batteries
20
5 Understanding Your Gocycle
21
Quick Release Pitstopwheels
21
Fast Folding Frame and Handlebar Latches
22
Brake Controls and Features
22
Shifting Gears
23
Pedals
24
Tires and Tubes
24
6 Service
26
7 Appendix
29
7.1 Intended Use
29
Modifications and Refinishing
29
Maximum Weight Design Limit
30
The Lifespan of Your Gocycle and Its Components
30
Fastener Torque Specifications
35
Warranty, Limitations, & Contact
36
8 Un-Boxing Your Gocycle
39
Small Parts Bag
39
Unboxing and Attaching Kickstand
40
Unfolding
44
Adjusting the Saddle Height
51
Front and Rear Reflectors
53
Assembling the Bell
55
9 Charging Your Gocycle
57
Getting to Know Your Gocycle Lithium Battery
57
Charing the Gocycle Battery
58
10 Operation
70
Brakes
70
Shifting
70
Switching the Battery on (Wakes up the Battery for Use)
71
Mini Dash
71
Boost Button
71
Turning the Battery off
72
Sleep Mode
72
Riding Modes
73
Maximising Your Gocycle's Motor Performance and Reliability
76
Motor
77
10.10 Folding
78
11 Maintenance and Adjustments
84
Maintenance and Service
84
Service Interval
84
Visual Inspection Guide - (Every 3 Months/ 500 Miles)
85
Cleaning and Preventing Corrosion
89
Lubrication
89
Adjusting the Shifting
90
Adjusting the Saddle
91
Adjusting the Brakes
91
Tyres
103
11.10 Adjusting the Headset
104
11.11 Adjusting the Stem Latch
106
11.12 Adjusting the Frame Latch
110
11.13 Adjusting the Bearings on the Rear Hub
114
12 Troubleshooting
117
Diagnosis Modes
117
Log Upload
117
 Loading...