28
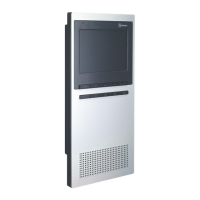
Final a mentdjust s:
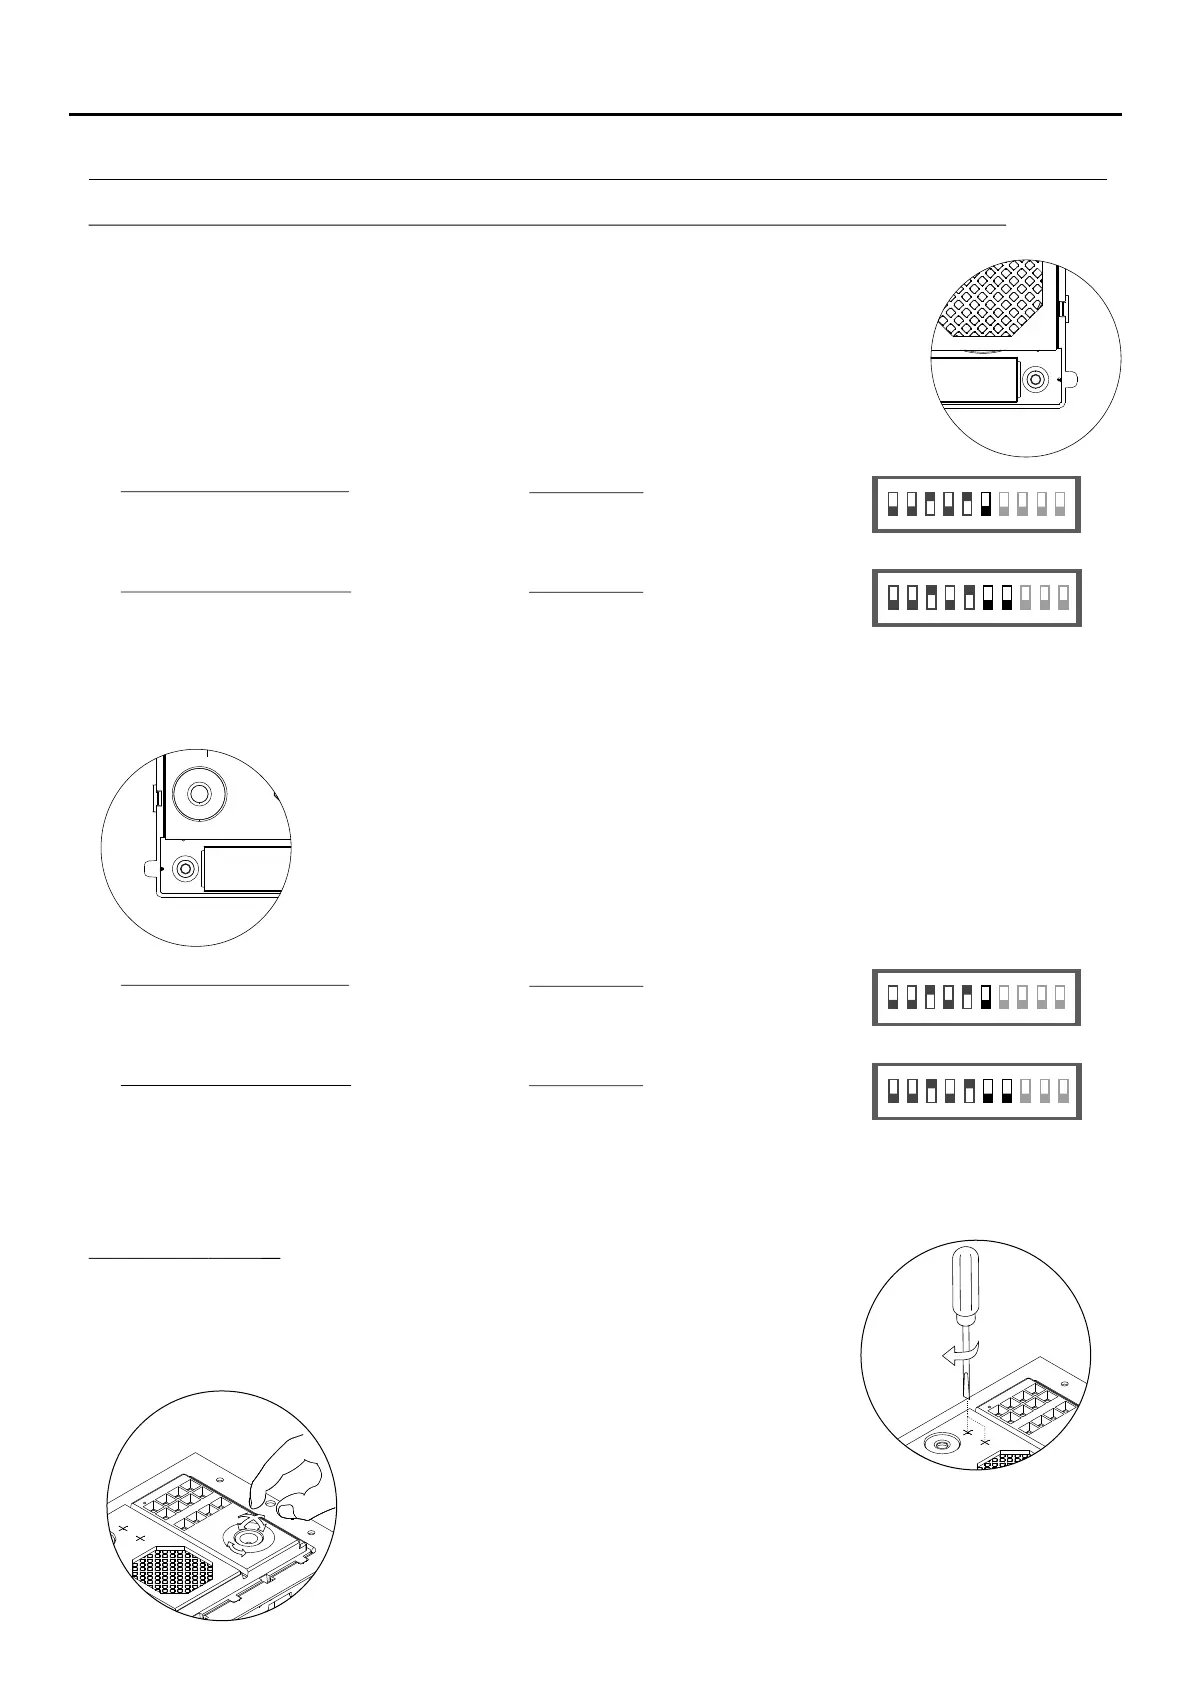
If after starting the system it’s considered that audio volume is ’t correct, proceed
with the necessary adjustments as shown in the drawing.
n
The a e has a pan and tilt mechanism built in to adjust the telecamera
position .
telec m ra
(only EL632 G2+ SE)
Change the call code of the P1 and P2 button of the EL632 G2+ SE / EL642 G2+ module:
The Dip switches placed in the OFF position have a value of zero and in the ON position they
have been assigned the values in the attached table.
The calling code will be equal to the sum of the values of the Dip switches set to ON.
1- In the sound module configuration (see page 24), setDip switch Dip8 to OFF.
2- Then: set the new call code (address
1 to 32). set the new call code (address 1 to 128).
Video door panel Dip1 to Dip6 (Dip7 must be OFF)
Audio door panel Dip1 to Dip7
If you want to change the call code of button P1 of the sound module, follow these steps:
(Factory value P1 = 32).
3- , a tone will confirm that the new call code has been successfully programmed.Set the Dip 10 ONto
4- Set the and Dips 1 to 8 as previously configured (address door panel, double / single button and
language or tone mode).
Dip 10 to OFF
If you want to change the call code of button P of the sound module, follow these steps:
(Factory value P = 3 ).
2
2 1
2- Then: set the new call code (address
1 to 32). set the new call code (address 1 to 128).
Video door panel Dip1 to Dip6 (Dip7 must be OFF)
Audio door panel Dip1 to Dip7
1- In the sound module configuration (see page 24), setDip switch Dip8 to ON.
The Dip switches placed in the OFF position have a value of zero and in the ON position they
have been assigned the values in the attached table.
The calling code will be equal to the sum of the values of the Dip switches set to ON.
3- , a tone will confirm that the new call code has been successfully programmed.Set the Dip 10 ONto
4- Set the and Dips 1 to 8 as previously configured (address door panel, double / single button and
language or tone mode).
Dip 10 to OFF
INSTALLATION OF THE DOOR PANEL
NEXA MODULAR G2+ AUDIO AND VIDEO DOOR ENTRY SYSTEM - BUILDING
1 2 3
ON DIP
4 5 6
Table of values
7 8 9 10
1 2 3
ON
Example: 0+ 0 +4+0+16 0+0+ = 20
Switch number 6 7
ue when 32 64
: 1 2 3 4 5
Val ON: 1 2 4 8 16
Table of values
4 5 6 7 8
Important (Audio door panel):
Apartment 1 (Dip1 to ON & Dip2-Dip7 to OFF)
Apartment 128 (Dip1-Dip7 to OFF)
9 10
Important (Video door panel):
Apartment 1 (Dip1 to ON & Dip2-Dip6 to OFF)
Apartment 32 (Dip1-Dip5 a OFF & Dip6 to ON)
Switch number 6: 1 2 3 4 5
Val ON: 1 2 4 8 16ue when 32
Example: 0+ 0+4+0+16 0+ = 20
1 2 3
ON DIP
4 5 6
Table of values
7 8 9 10
1 2 3
ON
Example: 0+ 0 +4+0+16 0+0+ = 20
Switch number 6 7
ue when 32 64
: 1 2 3 4 5
Val ON: 1 2 4 8 16
Table of values
4 5 6 7 8
Important (Audio door panel):
Apartment 1 (Dip1 to ON & Dip2-Dip7 to OFF)
Apartment 128 (Dip1-Dip7 to OFF)
9 10
Important (Video door panel):
Apartment 1 (Dip1 to ON & Dip2-Dip6 to OFF)
Apartment 32 (Dip1-Dip5 a OFF & Dip6 to ON)
Switch number 6: 1 2 3 4 5
Val ON 1 2 4 8 16ue when : 32
Example: 0+ 0+4+0+16 0+ = 20