11
PROGRAMMING THE MONITORS
*Factory setting
DIP 3 to DIP 10: To set the monitor address (addresses 1 to 255). The switches
set to OFF have a zero value.
The values of the switches set to ON are shown in the table below.
The monitor code is the sum of the values of the switches set to ON.
DIP 1 and DIP 2: Sets the monitor as master/slave + intercom. DIP 1 and DIP 2 to OFF
master, DIP 1 to OFF and DIP 2 to ON slave 1, DIP 1 to ON and DIP 2 to OFF slave 2, DIP 1
and DIP 2 to ON slave 3.
Example: 64+0+16+0+4+2+1=870+
Switch number:
Value when ON:
4
64
5
32
6
16
7
8
8
4
9
2
10
1
3
128
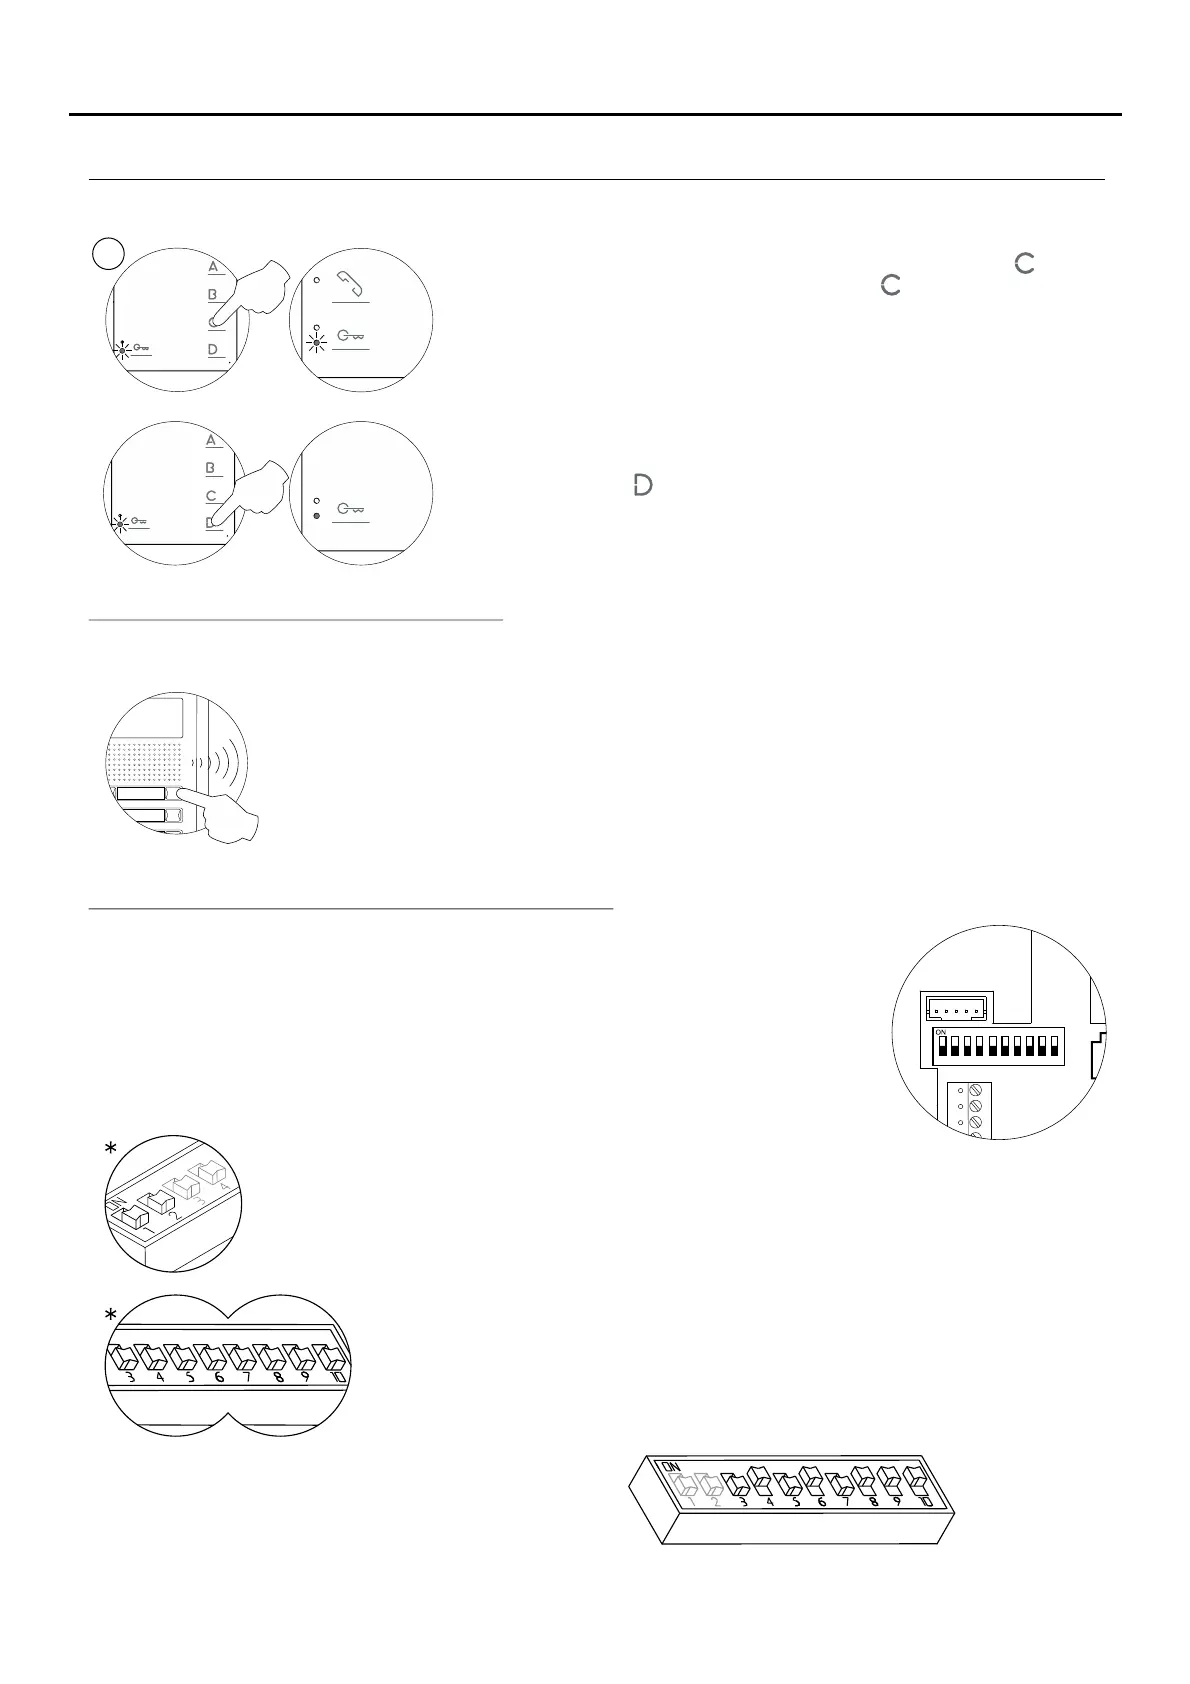
Quick programming of the Tekna S Plus monitors:
The SW1 DIP switch is located on the left-hand side of the back of the monitor.
It enables the monitor to be configured as master/slave and an address to be
assigned.
Important: This type of programming cannot be performed on a general
entrance door panel.
TEKNA-S PLUS MONITOR
To programme it as (in call), press button and theSlave without video
status LED will blink (green) once. If button is pressed again, the
monitor will return to being programmed as (in call) andSlave with video
the status LED will blink (green) twice. The door panel video will be
displayed during a call if programmed to do so:
Continued from previous page.
SV
Each apartment must only have one master unit; if there are parallel units, either monitors or telephones, they must be
configured as slaves.
Make a call to check that the monitor has been successfully programmed. Programme the other
monitors in the same way.
Once the programming has finished, set the programming switch to OFF. If this is not done, the
door panel will emit tones to indicate that the system is still in programming mode.
To exit, press button (the monitor's LED will illuminate red).
SW1
1 2 3 4
5 6 7 8 9 10
CN2
CN3
 Loading...