18 19
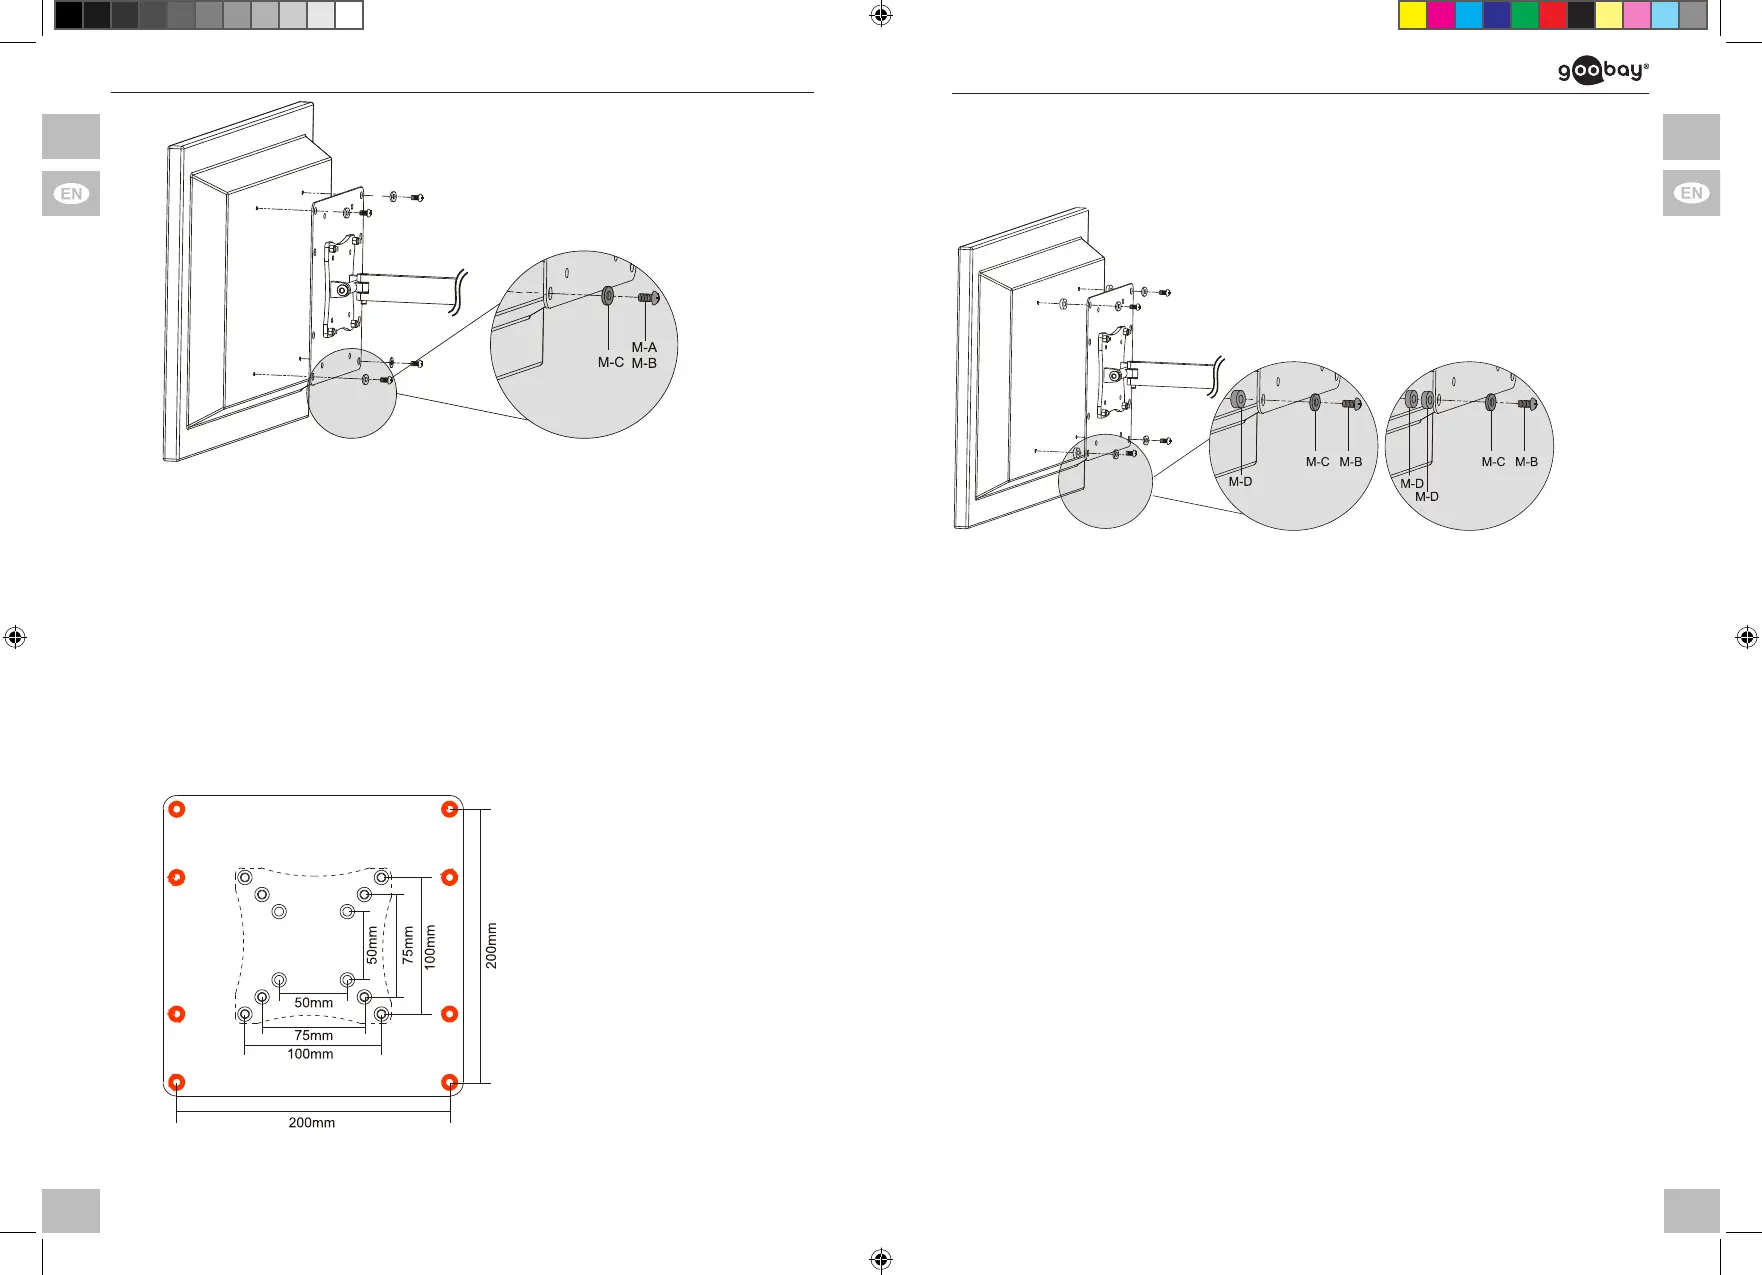
Fig. 8 : Mounting the at screen
4.3.1 TV wall mount is already installed
1. LifttheatscreentogetherwithasecondPerson.
2. MounttheVESAAdapter(A)bythescrews(M-A)/(M-B),ttingtoyourat
screen and the washers (M-C).
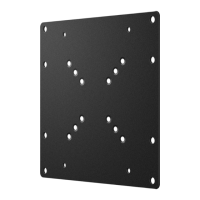
4.3.2 TV wall mount is already not installed
1. Leantheatscreenverticallyonasoft,largesurfaceorawallandprotectit
of scratches and overturning.
2. MounttheVESAAdapter(A)bythescrews(M-A)/(M-B),ttingtoyourat
screen and the washers (M-C).
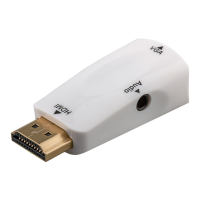
For this purpose, use one of the
outer 2 VESA hole spacings:
>> 200x100 mm or
>>
200x200mm
Fig. 9: outer VESA hole spacings
4.3.3 Mountinganarchedatscreen
In case of using arched at screens, install the TV spacers (M-D) simply or
double between VESA Adapter and at screens back side.
Fig . 10: Mounting the at screen with TV spacers
Endofinstalling.Toremove,proceedinreversedorder.
5 Warranty and Liability
• Please refer to our warranty conditions. These can be requested using the
contact details in the imprint.
• We reserve our right for misprints and changes of the device, packing, or
user`s manual.
6 Maintenance,Care,StorageandTransport
• The product must be maintained only by professional workshops.
• Protect the angles from dirt and grease them regularly with light machine oil.
• Use a dry and soft cloth to clean your product. Be careful to avoid scratches.
Useaslightlymoistclothforheavystains.Lookoutforlivecables!Donot
use any cleaning supplies. This can cause burns to the materials. Avoid
liquid entry to the device.
• Make sure no body parts will be pinched in the swivel device, when parts of
thedevicearemoved!
• Periodically check, if all attachments and screws are secured, and tighten
them again when they are loosened. This may be caused e.g. by frequent
movements. Do not overtighten screws.
• Avoid places with high temperatures, humidity, or places which can become
wet, also during maintenance, care, storage, and transport.
• Keeptheproductawayfromchildrenandstoreitatdryanddust-proofplaces!
63267_V3.indd 18-19 28.05.2018 14:37:59