pg. 10
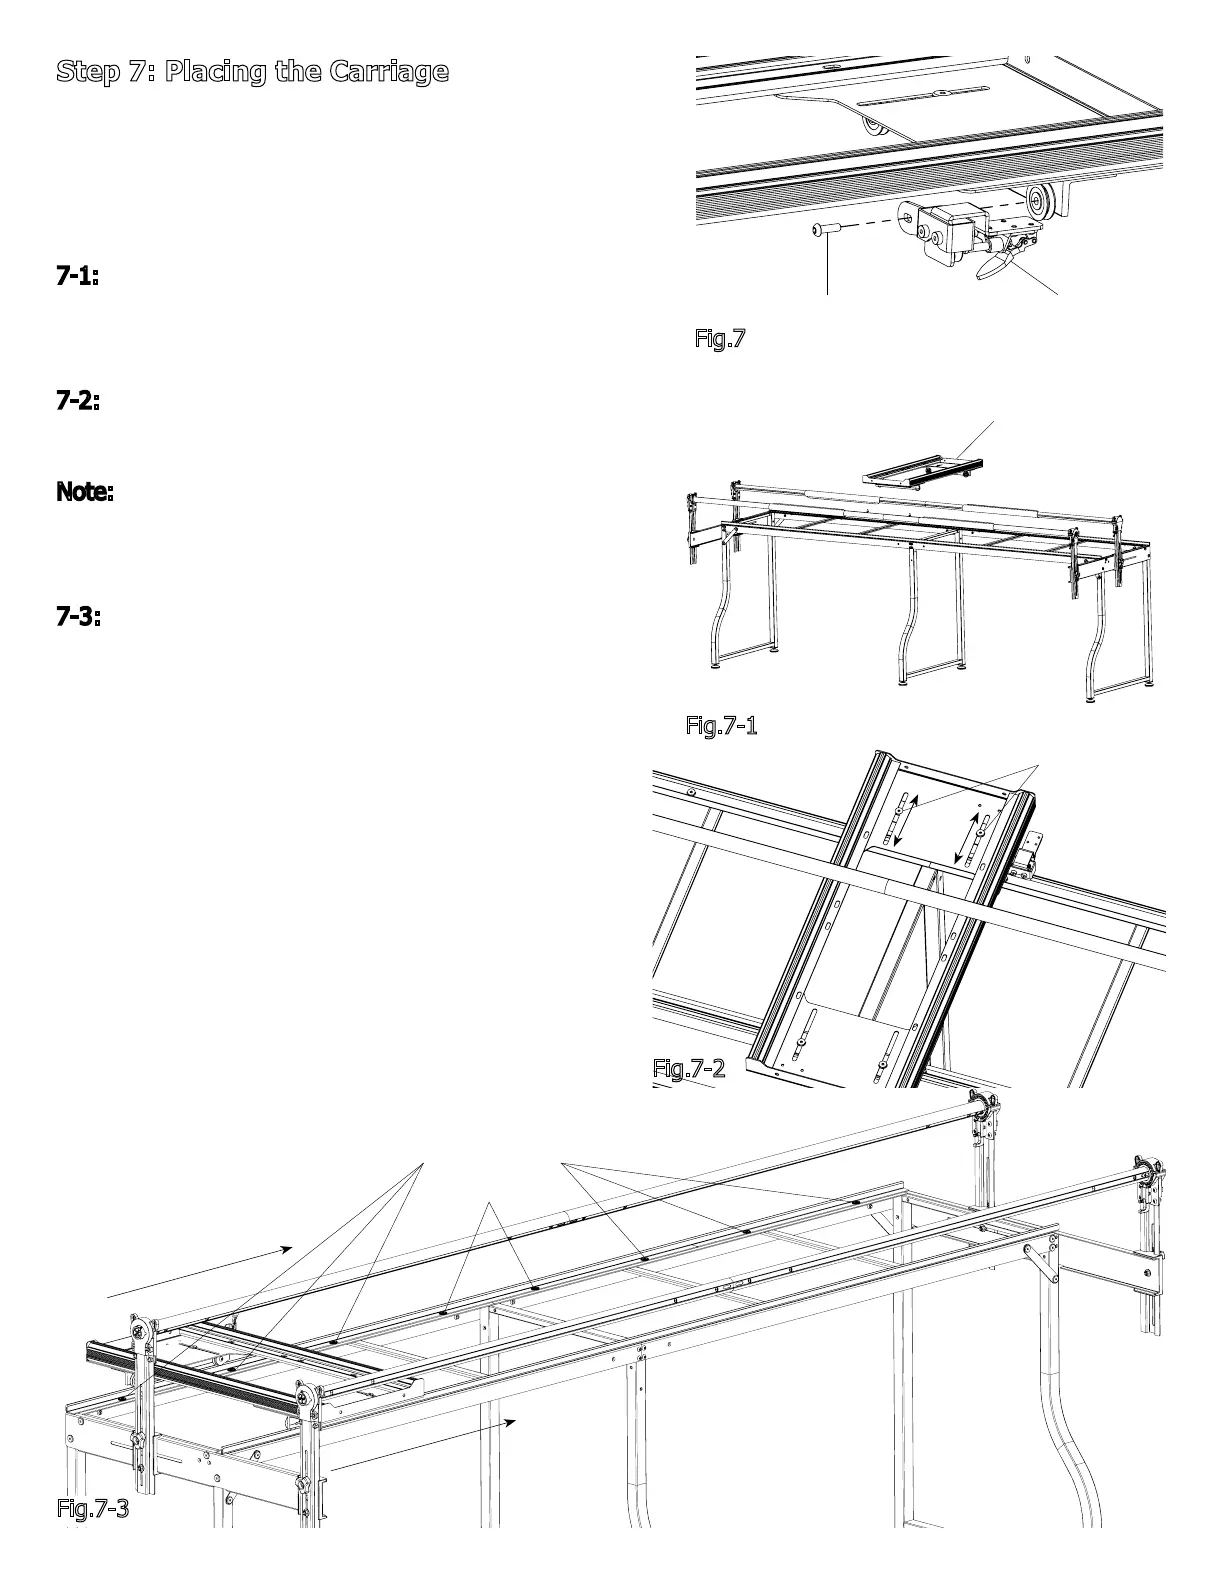
Step 7: Placing the Carriage
Parts Needed:
-Carriage (1)
-Frame body Assembly (1)
- Carriage Channel Lock (1)
7-1: Remove the right rear M6 x 20mm SBHCS from the
Carriage and install the Carriage Channel Lock as shown,
see Fig.7.
7-2: Place the Carriage onto the frame as shown, see
Fig7-1.
Note: It may be neccessary to adjust the rear Carriage
wheels. Loosen the (2) M6 Connector Bolts and adjust
the Carriage to t to the track, see Fig7-2.
7-3: Align track by slowly moving the Carriage along
Plastic Track, tightening each M6 x 10mm Connector
Bolts on the rear track starting at one side of the frame
to the opposite side, see Fig 7-3
Fig.7
Carriage Channel Lock
M6 x 20mm SBHCS
Carriage
Fig.7-1
M6 Connector
Bolt
Fig.7-2
Fig.7-3
M6 x 10mm
Connector Bolt