pg. 17
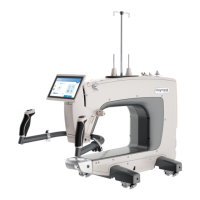
Bungee Clamp
Bungee Button
Fig.3-1
Step 3-1: Attach the Bungee Clamps
to the Rail Holder Brackets by putting
the cord through the holes. Attach the
Bungee Clamps to the fabric and pull
evenly and pull cord down to lock into
place. Secure using the Bungee Buttons
as shown. See Fig. 3-1.
Step 3: Attaching the Bungee Clamps
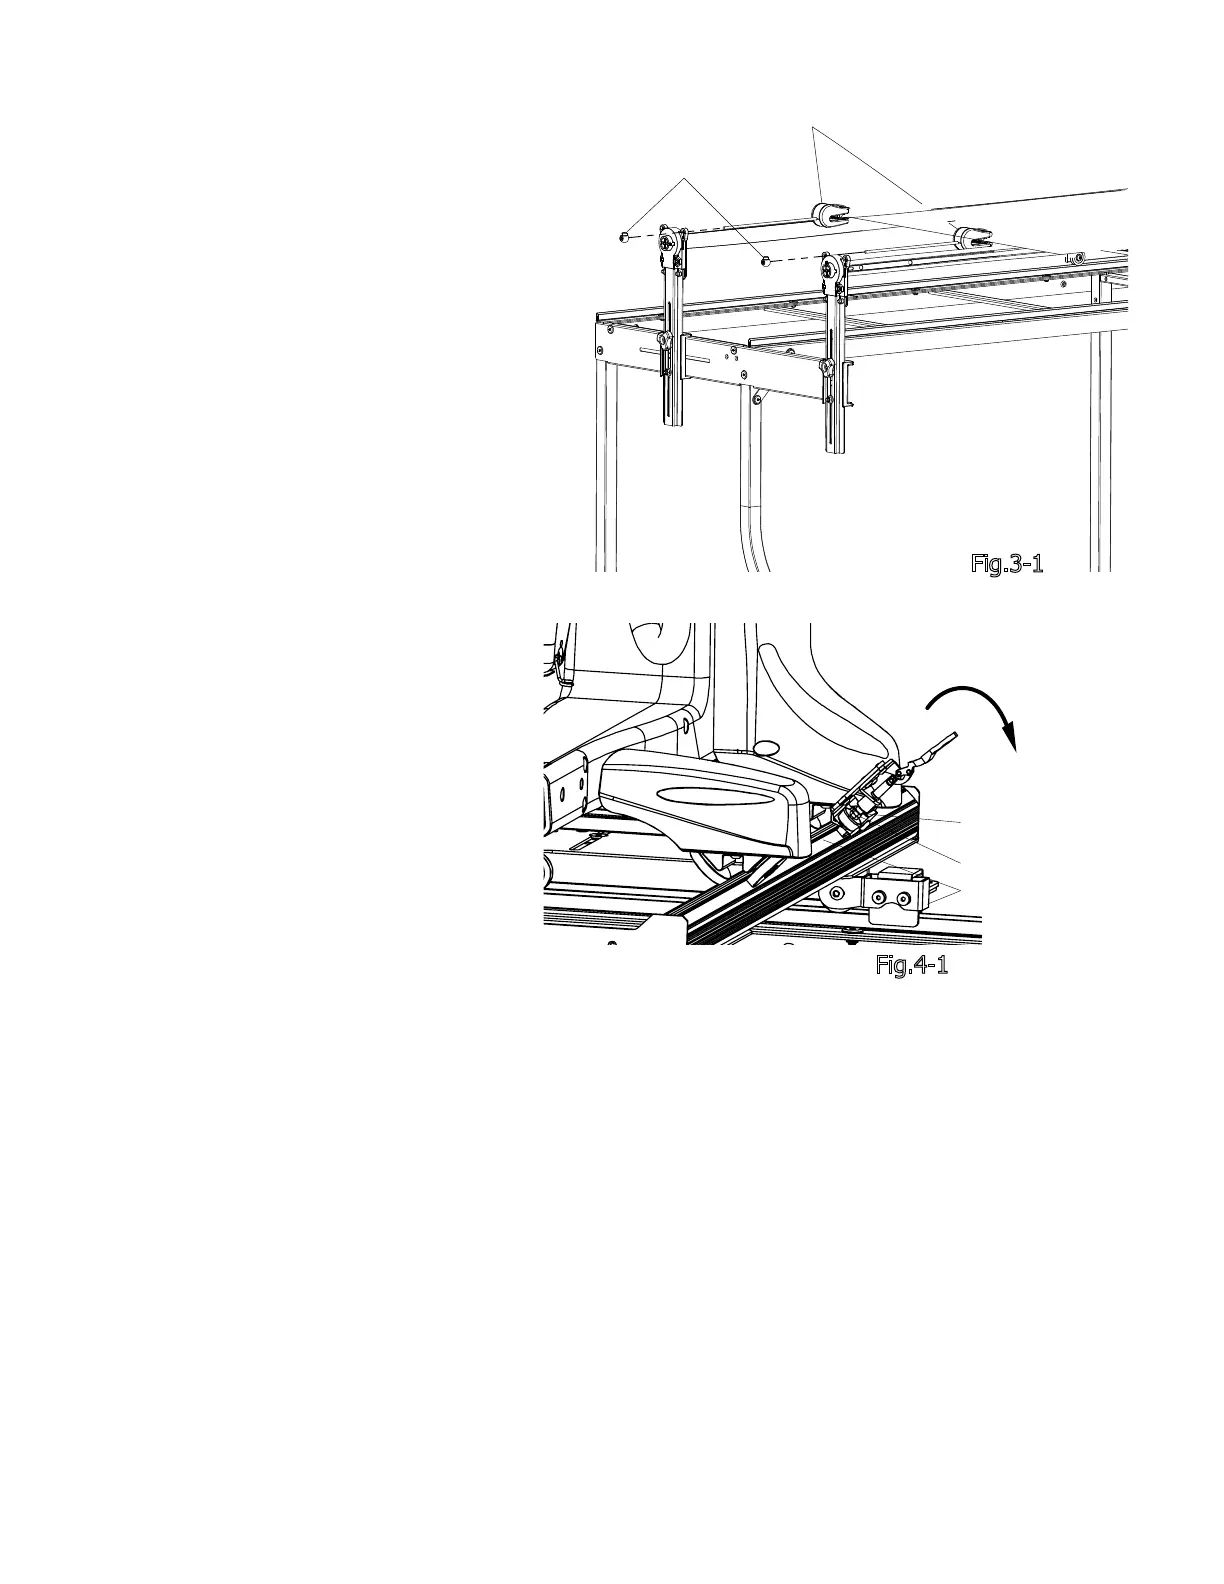
Step 4: Channel Lock Setup
Step 4-1: Rotate the Channel Lock
handle down. To adjust the Channel
Lock, loosen the upper nut. Twist the
Rubber Foot clockwise until it is snug
against the track. Turn the upper nut
counter clockwise until it is snug against
the channel lock barrel. See Fig 4-1.
Step 4-2: Repeat Step 4-1 for the
Carriage Channel Lock.
Note: The Channel Locks will be used for
straight lines. To create a straight line
along the length of the frame, rotate the
handle of the Sewing Machine Channel
Lock down. To create a straight line
along the length of the Carriage, rotate
the handle of the Carriage Channel Lock
down.
Upper Nut
Channel Lock Barrel
Track
Fig.4-1