Do you have a question about the Grace Continuum II and is the answer not in the manual?
Lists legs, rail arms, braces, handwheels, couplers, clamps, and tools.
Lists long plastic tracks, table sections, and short plastic tracks.
Lists handwheel rail sections and ratchet rail sections.
Lists bottom carriage, channel locks, screws, and leader cloth sets.
Instructions for adjusting the frame's vertical height before assembly.
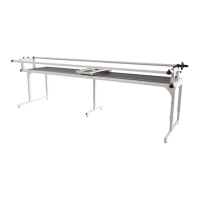
Steps to assemble the main table structure of the frame.
Instructions for attaching the gliding tracks for the quilting machine.
Attaching the front and take-up rail arms to the frame legs.
Steps to attach the bottom carriage that holds the quilting machine.
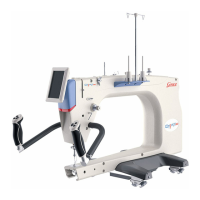
Instructions for mounting the quilting machine onto the assembled frame.
Adjusting the frame legs to ensure it is stable and level.
Attaching the three main rails (handwheel, front, backing) to the frame.
Attaching the handwheel to the take-up rail for quilt advancement.
Attaching bungee clamps to hold quilt edges and provide tension.
Fine-tuning the position and height of the front and take-up rails.
Applying Velcro tape to the rails for attaching leader cloths.
Attaching leader cloths to the rails for quilt mounting.
Instructions for adjusting the crib frame's vertical height.
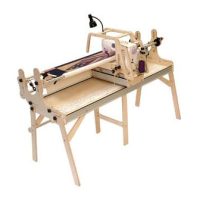
Steps to assemble the main table structure for the crib frame.
Attaching the gliding tracks for the crib frame.
Attaching the front and take-up rail arms to the crib frame.
Attaching the bottom carriage for the crib frame.
Mounting the quilting machine onto the crib frame.
Adjusting the crib frame legs for stability and levelness.
Attaching the three main rails to the crib frame.
Attaching the handwheel to the crib frame's take-up rail.
Attaching bungee clamps for quilt tension on the crib frame.
Adjusting the distance and height of rails on the crib frame.
Applying Velcro tape to the crib frame rails for leader cloths.
Attaching leader cloths to the crib frame for quilt mounting.
Instructions for cutting quilt backing and batting to the correct size.
Mounting the quilt backing, batting, and top onto the frame.
How to use channel locks for straight line quilting.
| Brand | Grace |
|---|---|
| Model | Continuum II |
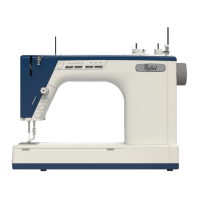
| Category | Sewing Machine |
| Language | English |