Compressor
10
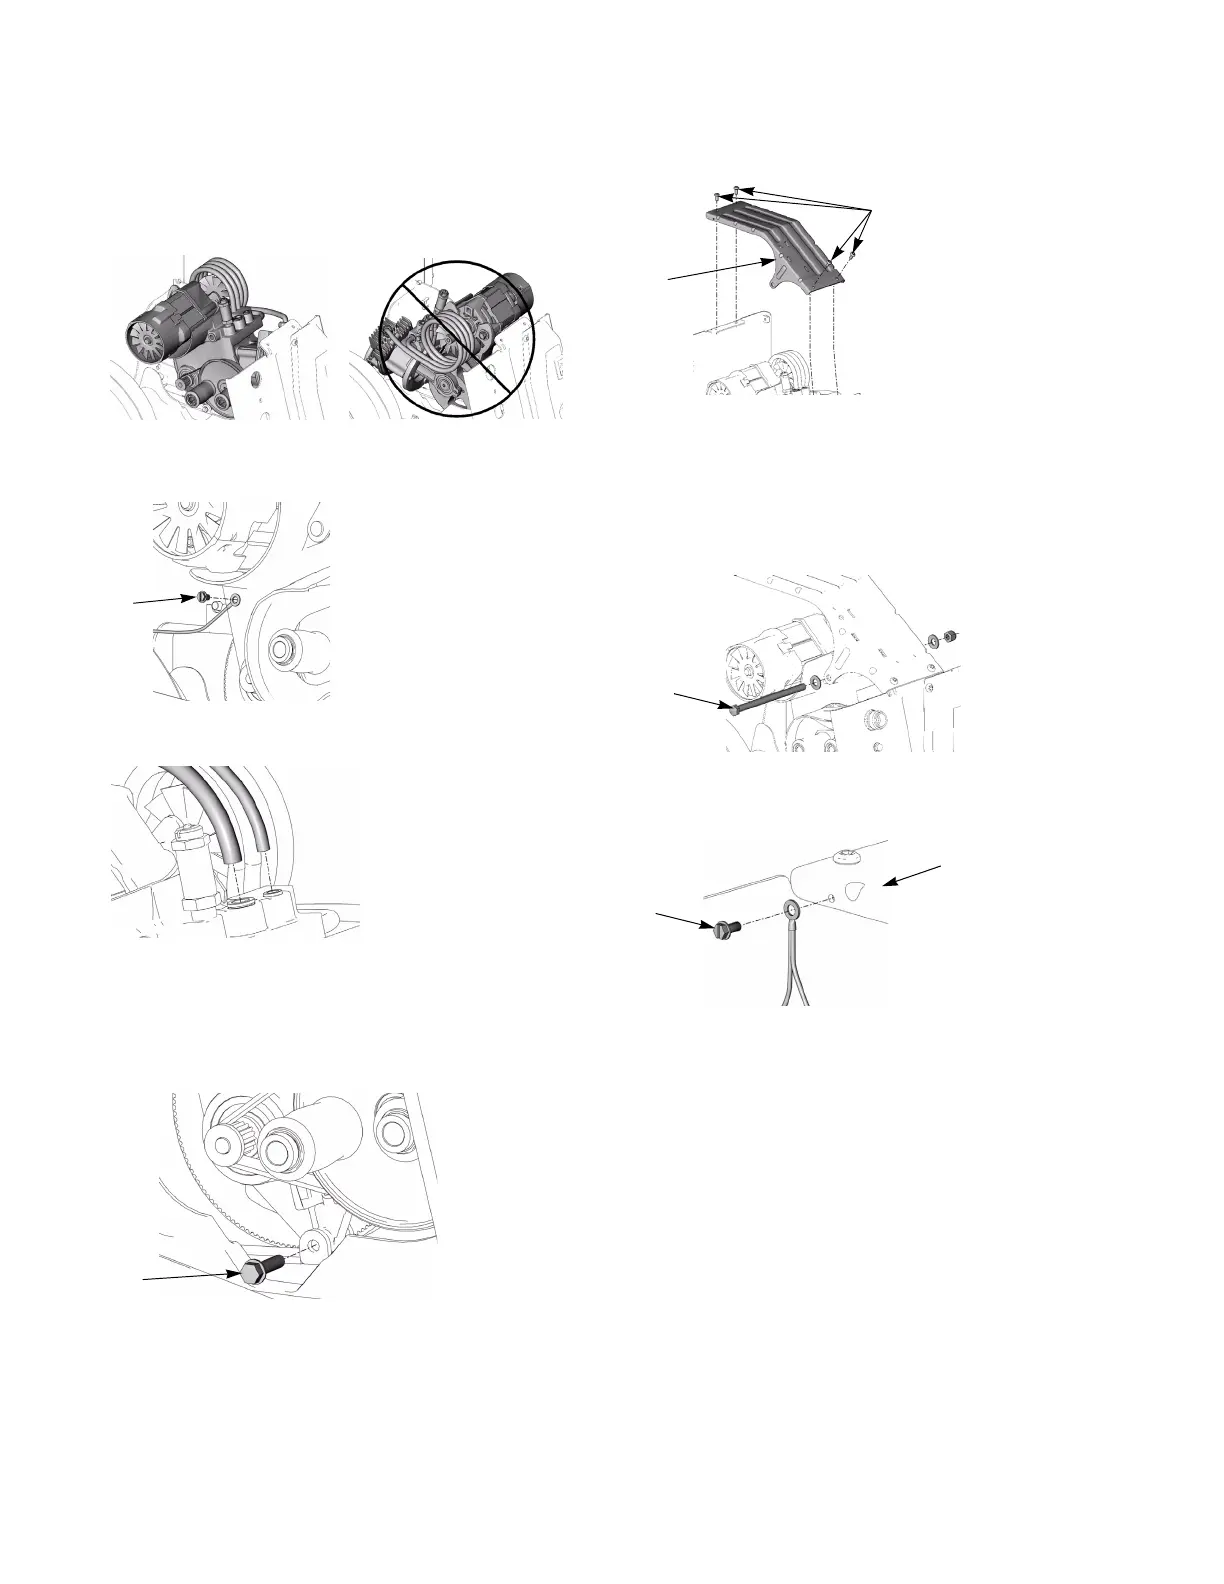
Reassembly
1. Carefully position compressor back into sprayer
body. Make sure piston head facing front of sprayer.
2. Replace and tighten grounding screw (49).
3. Reattach air lines to compressor.
4. Reattach 2 wires to compressor see Wiring
Diagram, page 25.
5. Replace air cylinder and tighten shoulder bolt (35) to
lock into place.
6. Replace bracket (21) and tighten 4 screws (29).
7. Replace in. grounding screw (49) and tighten onto
bracket (21).
8. Replace pivot bolt (26) and use 9/16 in. socket and
wrench to tighten into place. Tighten screw until
spring washers are flattened.
9. Replace and tighten second grounding screw (49) to
bracket (21).
10. Replace RotoFlex
™
II Pump hose; page 8.
11. Replace Shroud, page 7.
ti9442a
ti9443a
49
ti8941a
ti8873a
ti8879a
35
ti9440a
29
21
ti9438a
26
49
21
ti9013a
 Loading...