General Repair Information
6 311797S
General Repair Information
1 Keep all screws, nuts, washers, gaskets, and electrical
fittings removed during repair procedures. These parts
are not normally provided with replacement assemblies.
2 Test repair after problem is corrected.
3 If sprayer does not operate properly, review repair
procedure to verify procedure was done correctly. If
necessary, see Troubleshooting Guide, page 7, for other
possible solutions.
4 Install belt guard before operation of sprayer and replace
if damaged. Belt guard reduces risk of pinching and loss
of fingers; see preceding WARNING.
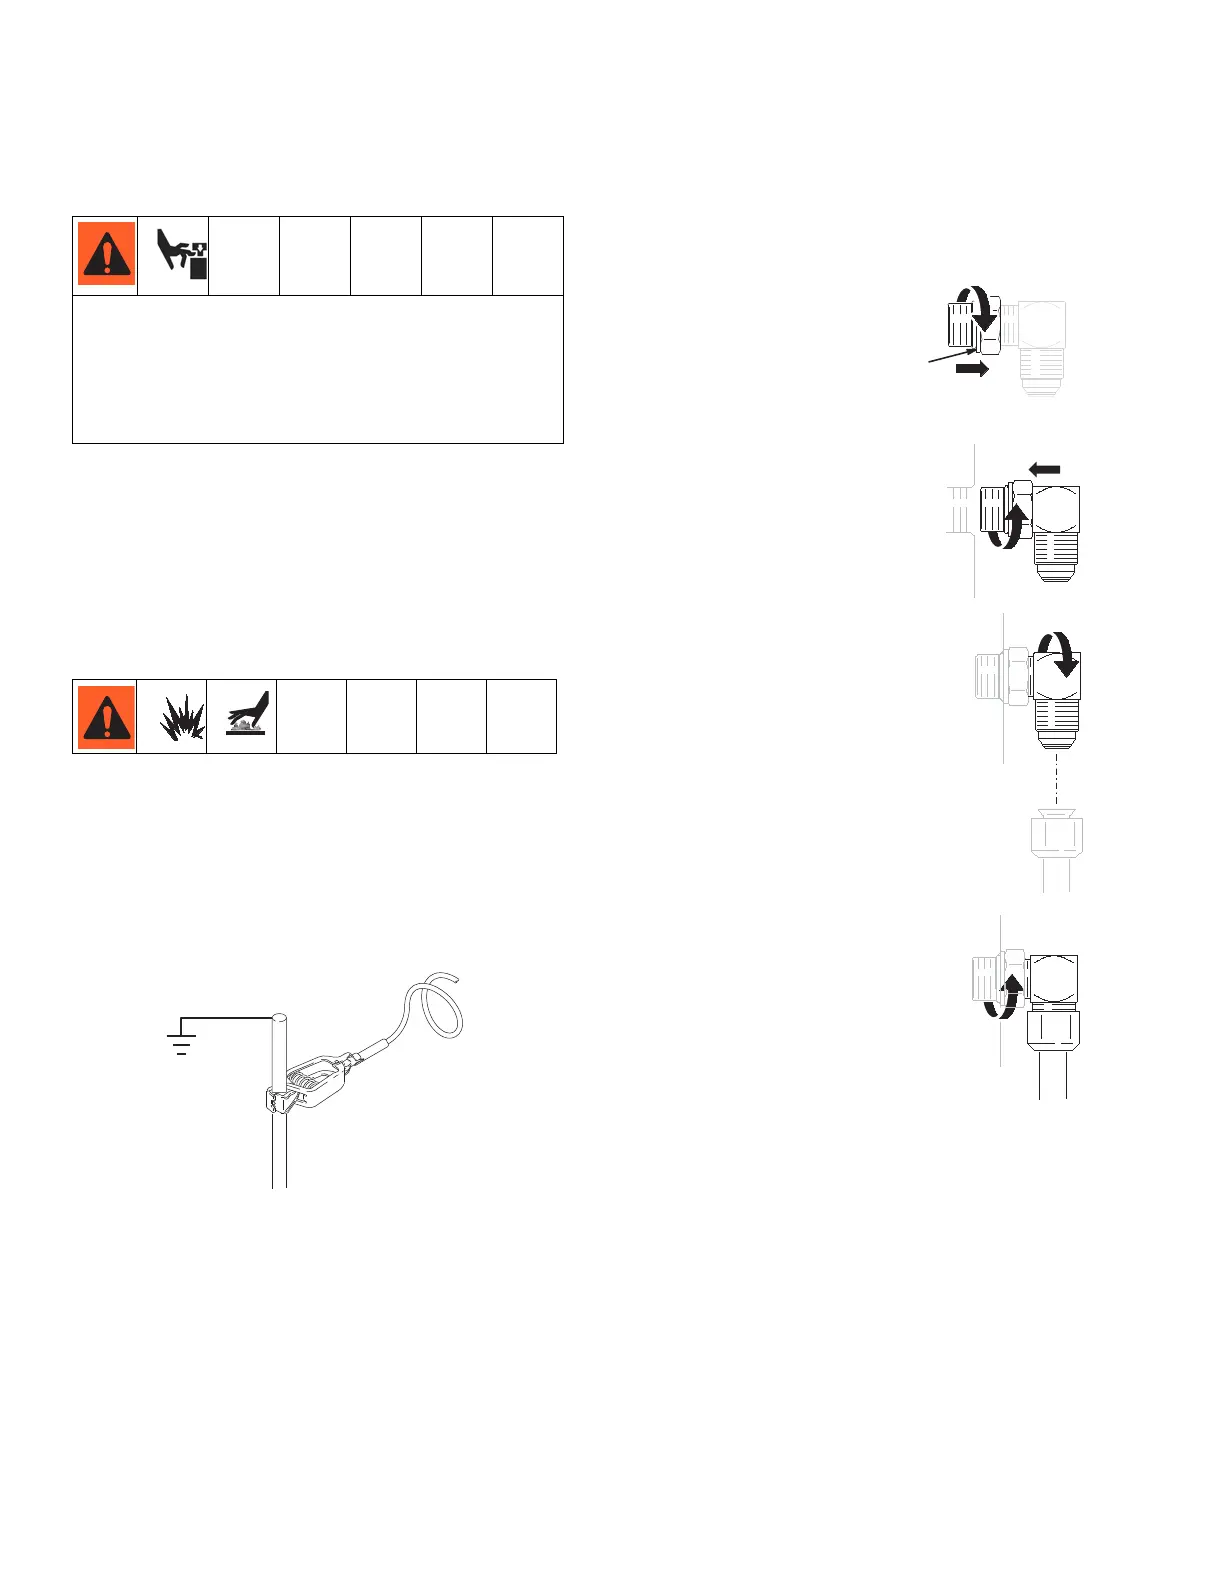
Grounding
Ground sprayer with grounding clamp to earth ground
for safe sprayer operation when using solvent-based
materials. Fig. 1.
F
IG. 1
SAE O-Ring Installation
1 Unscrew lock nut to touch fitting.
2 Lubricate o-ring (A).
3 Screw in fitting hand tight.
4 Unscrew fitting until oriented
properly.
5 Tighten lock nut to indicated torque.
(Make sure washer is seated properly
without pinching o-ring).
To reduce risk of serious injury, do not touch
moving parts with fingers or tools while testing
repair. Shut off sprayer when repairing. Install all
covers, gaskets, screws and washers before
operating sprayer