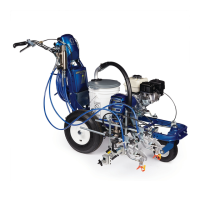
Reassembly
7. Be
sure the face of the
rotor (4b)
and the field is
free of all oil and contaminants. Install the rotor
,
lockwashers (1
1) and capscrews (16). T
orque the
capscrews to 7 ft–lb (9.5 N.m). See Fig. 31.
8.
Pull the engine recoil rope to assure the engine
turns freely
, and there is no friction between the
rotor (4b) and the field (6). If there is friction, losen
the setscrews (12) and repostiion the field as
necessary. T
ighten the setscrews oppositely and
evenly to 25 in-lb (2.8 N.m). Also make sure there
are no burrs on the outside edge of the rotor
.
NOTE:
With the autogap style armature, the gap be
-
tween the rotor and the armature is critical for proper
operation. The clutch kits with an autogap style arma
-
ture include a cardboard spacer (p/n 186–857) to set
the proper gap. This spacer is for use
only
during
installation.
9.
Clean the face of the
armature (4a)
. With the flat
side of the armature facing the rotor (4b), slide the
armature onto the hub (F) in the drive/pinion
assembly just until the chamfered end of the hub
(19f) protrudes through the armature. See Detail
B, Fig. 31. There will be significant resistance. At
-
tach the cardboard spacer
, supplied with the clutch
kit, to the face of the armature. Engage the tabs
on the spacer with the slots in the armature.
Brace the cart against a wall to keep it from rolling.
Push the drive/pinion assembly onto the clutch
housing (2). There will be significant resistance.
When the mating surfaces of the drive/pinion as
-
sembly and the clutch housing (2) are flush, re
-
move the drive/pinion assembly
.
Remove the
cardboard spacer
.
10.
Assemble the
pinion housing (19)
to the clutch
housing (2), using the capscrews (10) and lock
-
washers (1
1). See Fig. 31.
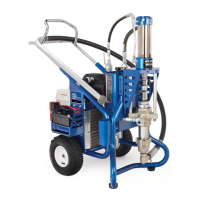
Fig. 31
34
80
15
9
61 or 100
1
10
11
2
4b
11
16
4a
14
19
29
66
66
A
12
E
Detail B
0051
19n,19k
View
from under engine mounting
plate on upright cart
V
iew from under engine mounting
plate on lo–boy cart
WHITE
RED
BLACK
RED
WHITE
BLACK
0157
3
1
2
4
4
1
3
4
2
T
orque to 7 ft–lb (9.5 N.m)
Chamfered end of hub (19f)
Face
must be clean
To
engine
4a
F

 Loading...