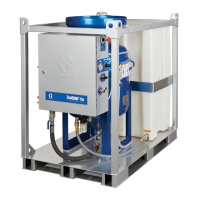
Setup
3A2797ZAA 27
Setup
Perform this setup procedure to secure all necessary
machine connections for machine operation.
1. Locate system.
a. Locate system on a level surface. See Dimen-
sions on page 119 for space requirements.
b. Do not expose system to rain.
2. Electrical requirements. See Models on page 4
for detailed electrical requirements information.
3. Ground system
a. System: grounded through power cord. See
step 4 on page 27.
b. Fluid supply containers: follow your local code.
c. Object being dispensed into: follow your local
code.
d. Solvent pails used when flushing: follow your
local code. Use only metal pails, which are con-
ductive, placed on a grounded surface. Do not
place pail on a nonconductive surface, such as
paper or cardboard, which interrupts grounding
continuity.
e. To maintain grounding continuity when flushing
or relieving pressure, hold a metal part of dis-
pense gun firmly to the side of a grounded
metal pail, then trigger gun.
4. Install Drip Pan
a. Install front pan with studs going through the
frame.
b. Install side pans using the stud on the frame to
locate.
c. Use the supplied fasteners to complete the drip
pan installation.
5. Connect electrical cord to system.
NOTE: See Power Line Voltage Surges information on
page 28.
Installing this equipment requires access to parts
which may cause electric shock or other serious
injury if work is not performed properly. Have a quali-
fied electrician connect power and ground to main
power switch terminals, see step 4 in this setup pro-
cedure. All electrical wiring must be done by a quali-
fied electrician and comply with all local codes and
regulations.
This equipment must be grounded.

 Loading...