Cleanup
3A4980B 23
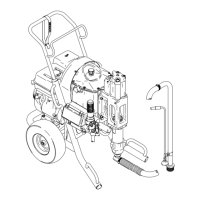
3. Move trigger slide from SPRAY position
(A) to NEEDLE REMOVAL position (B).
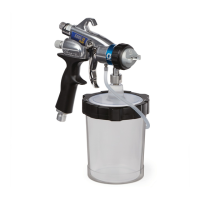
4. Remove needle from front of gun.
5. Wipe or flush fluid from nozzle and
needle. If necessary, clean retaining
ring, air cap, air cap guide, and spring.
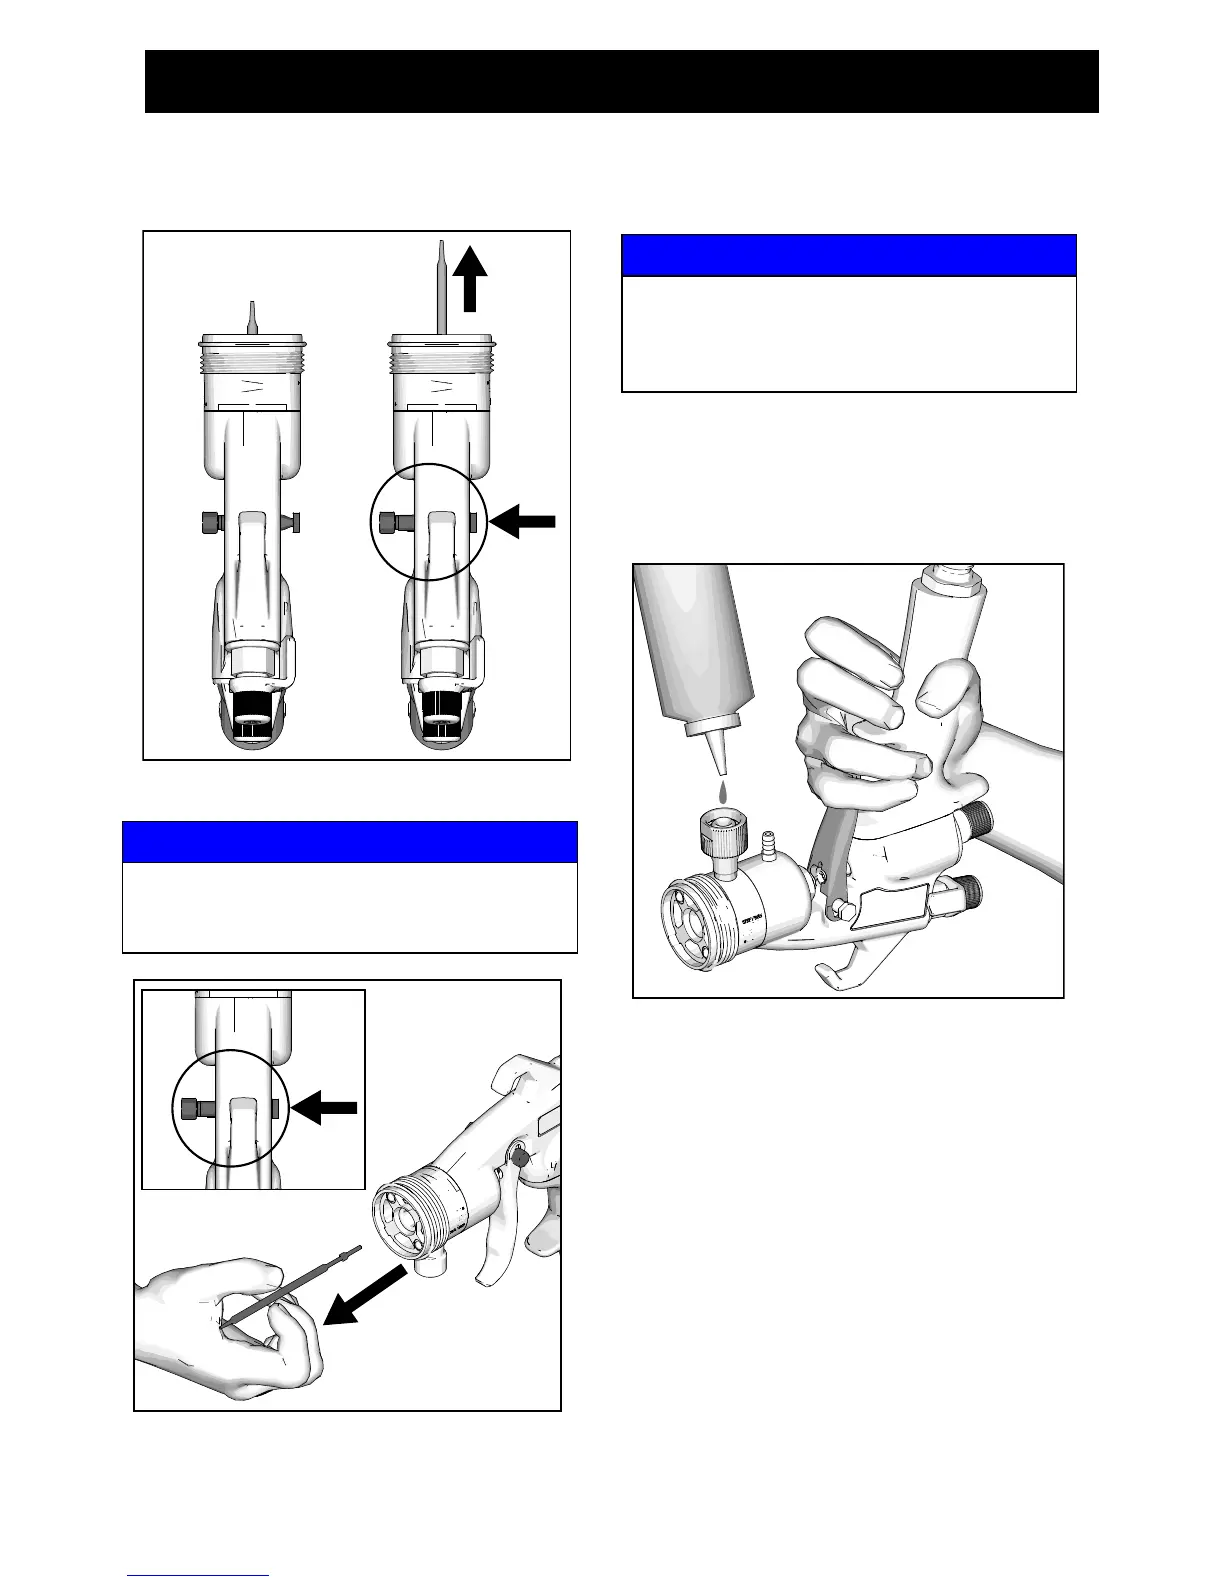
6. Using a squeeze bottle, flush cleaning
fluid through the gun. Hold the gun
upside down, pull the trigger, and
dispense cleaning fluid into the cup
connection.
7. Re-install needle and move trigger slide
from NEEDLE REMOVAL position (B) to
SPRAY position (A).
8. Trigger the gun and install spring, air cap
guide, and fluid nozzle. Install air cap
and retaining ring.
NOTICE
Do not use a pliers to remove needle.
Damage to the needle tip will cause leaking
at the fluid nozzle.
ti30852a
NOTICE
Do not use metal tools to clean the fluid
nozzle or air cap holes as this may scratch
them, causing fluid leaks and a distorted
spray pattern.
ti30853a
 Loading...