Repair
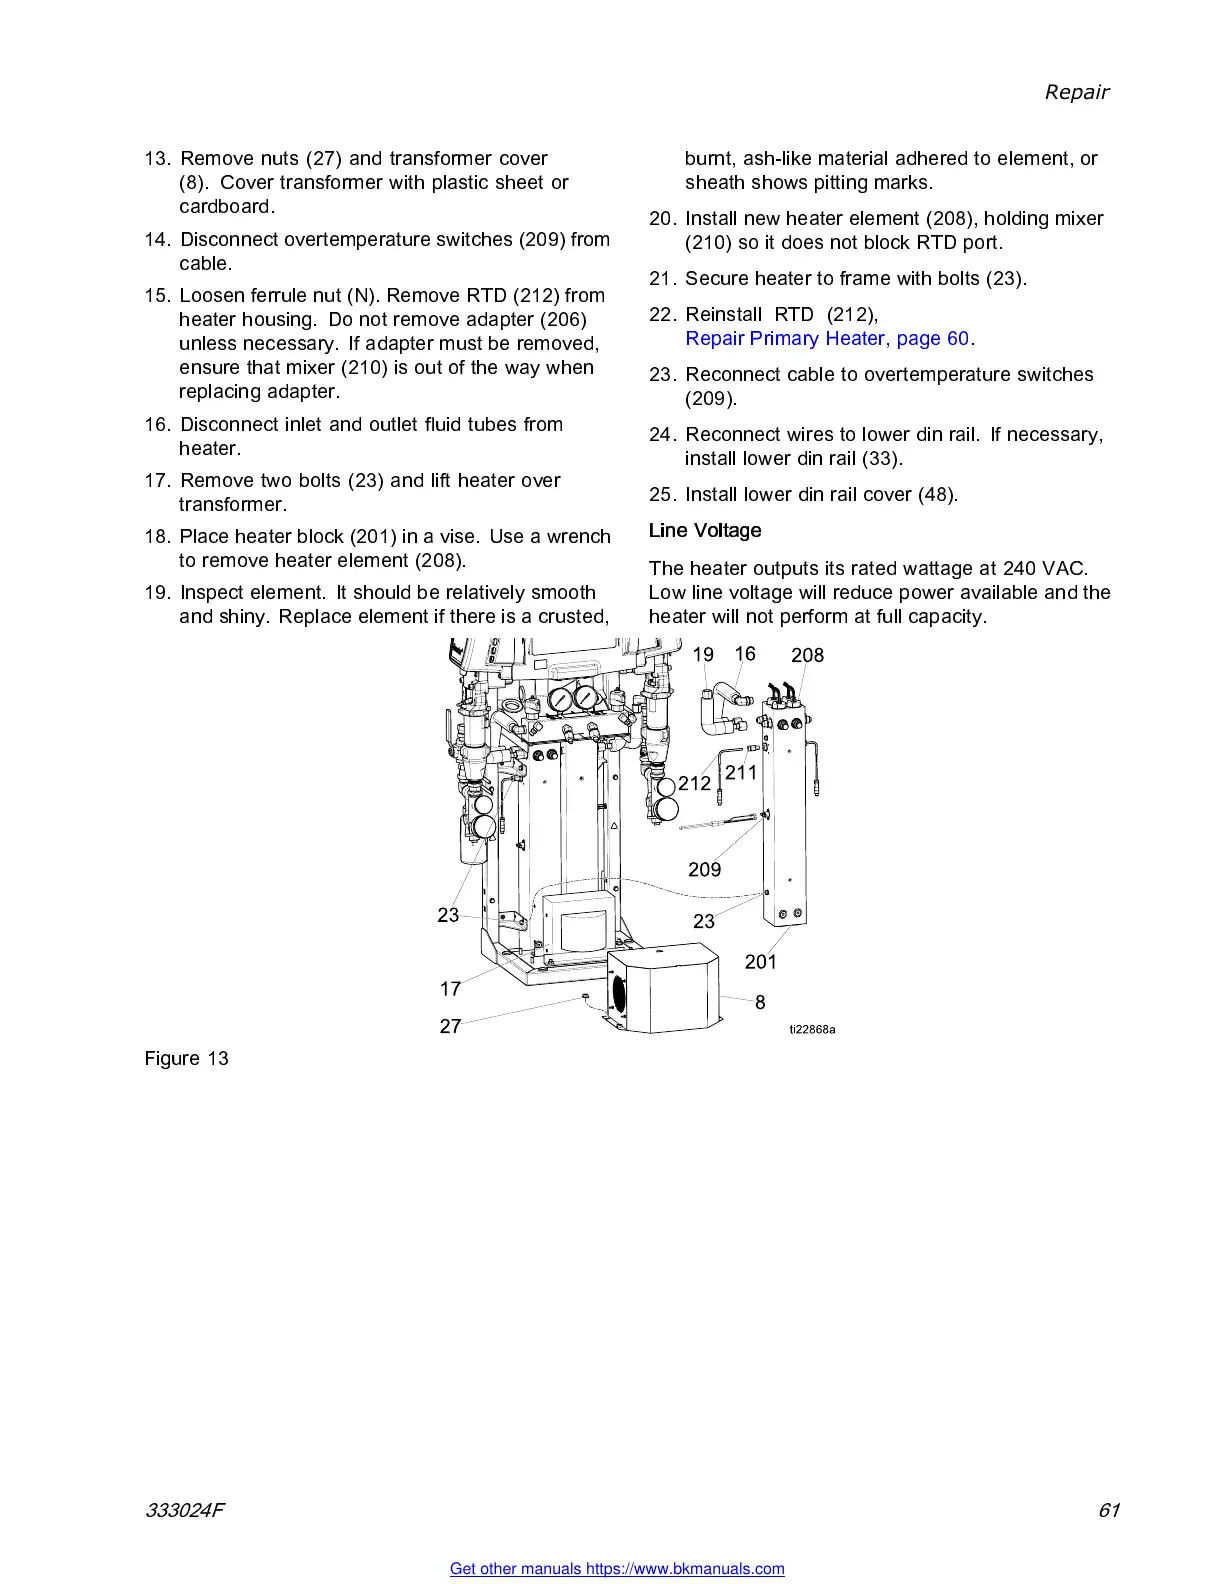
13. Remove nuts (27) and transformer cover
(8). Cover transformer with plastic sheet or
cardboard.
14. Disconnect o vertemperature switches (209) from
cable.
15. Loosen fe rrule nut (N). Remove R TD (212) from
heater housing. Do not remove adapter (206)
unless necessary. If adapter must be removed,
ensure that mixer (210) is out of the way when
replacing adapter.
16. Disconnec t inl et an d outl et flu id tub es from
heater.
17. Remove two bolts (23) and lift heater over
transform e r.
18. Place heater block (201) in a vise. Use a wrench
to remove heater element (208).
19. Inspect eleme nt. It shou ld be rel ati ve ly smo oth
and shiny. Replace element if there is a crusted,
burnt, ash-like material adhered to element, or
sheath shows pitting marks.
20. Install new heater element (208), holding mixer
(210) so it does not block RTD port.
21. Secure heater to frame with bolts (23).
22. Reinstall RTD (212),
Repair Primary Heater, page 60.
23. Reconnec t cable to overtem p erature switches
(209).
24. Reconnec t wires to lower din rail. If necessary,
install lower din rail (33).
25. Install lower din rail cover (48).
Line Voltage
The heater outputs its rated wattage at 240 VAC.
Low line voltage will reduce power available and the
heater will not perform at full capacity.
Figure 13
333024F 61
Get other manuals https://www.bkmanuals.com