Thank you for purchasing the Graupner HoTT 2.4 System Please read through this entire manual before
you attempt the installation and usage of your Graupner HoTT 2.4 System!
These operating instructions are part of this product. They contains important notes to the operation and
handling. Please take this into consideration when you pass on the product to third parties. Neglect of
the operating instructions and the safety instructions lead to expiring the warranty.
Graupner constantly work on the advancement of all remote control systems; changes of the scope of deli-
very in form, technology and equipment we must reserve ourselves therefore. Please have understanding
for the fact that from data and illustrations of this operating instructions no requirements can be derived.
Please keep these instructions for further reference!
1. GENERAL NOTE
When switching on or adjusting the radio control system it is essential to keep the transmitter aerial at
least 15 cm away from the receiver aerials at all times. If the transmitter aerial is too close to the receiver
aerials, the receiver will be overloaded, causing the green LED starts ashing. The transmitter responds
by emitting a beep once every second; the red LED also goes out. The radio control system is now in
Fail-Safe mode.
If this should occur, simply increase the distance between the aerials until the audible warning signal
ceases, and the red LED on the transmitter lights up again; at the same time the green LED on the
receiver should glow constantly.
2. FUNCTIONS
2.1. Binding
When you wish to use the Graupner HoTT 2.4 GHz receiver with a particular transmitter, the rst step
must always be to “bind” the unit to “its” Graupner HoTT 2.4 GHz RF module (transmitter). This “binding”
procedure only needs to be carried out once for each combination of receiver and RF module. The units
supplied in the set are already bound to each other at the factory, i.e. the binding procedure described in
the following section only needs to be carried out when you wish to use an additional receiver. However,
it can also be repeated at any time if required, e.g. after changing transmitters. When binding is required,
this is the procedure:
a) transmitters with HoTT module upgrade
• Switch the transmitter and receiver on.
• Locate the BIND / RANGE button on the back of the transmitter, and hold it pressed in while you
press and hold the SET button on the receiver. Both LEDs on the back of the transmitter now glow
constantly, and the green LED on the receiver ashes.
• If the green ashing LED on the receiver begins to glow permanently within about ten seconds,
this indicates that the binding process is complete. You can now release both buttons, and your
transmitter / receiver combination is ready for use.
• However, if the green LED on the receiver continues to ash for longer than ten seconds, then the
binding process has failed. If this should occur, repeat the whole procedure.
b) new HoTT transmitters with internal telemetry
• Press and hold the SET button on the receiver until the green LED starts to ash.
• Briey press the central SET button of the right-hand four-way button to initiate the so-called binding
process between a receiver and the current model memory. At the same time the word “BINDING”
starts ashing on the screen in the frame of the “rx bind” line, instead of the three “---”:
• If the receiver LED glows a constant green within about ten seconds, then the binding process has
been completed successfully; you can now release the receiver’s SET button.
• Your model / receiver combination is now ready for use.
• Conversely, if the green LED on the receiver ashes for longer than about ten seconds, then the
binding process has failed. In parallel with this the screen will display three “---” once more. If this
should occur, alter the relative position of the aerials, and repeat the whole procedure.
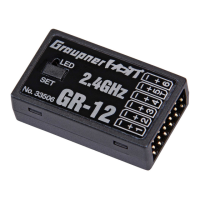
01 Manual Receiver GR-12 Graupner HoTT 2.4

 Loading...