28
Installation and Maintenance
indoor electrical wire
display board
Fig.13
Fig.15
Fig.14
4. Use protective sleeve to wrap the wiring terminal, stick the
protective sleeve and then use cable tie to bundle them tightly.
Note:
1. The fixing position of cable must be at both ends of wiring
terminal.
2. Before installing the front panel of indoor unit, put the thermal
insulating jacket on top of the air duct.
sheath
wind-path
Fig.16
Fig.17
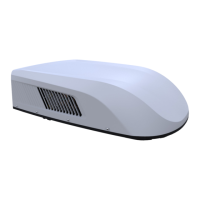
8.8 Completing The Installation
To complete the installation and system checkout requirements, the
following steps must be performed.
1. Check the thermostat position. Make sure the thermostat is
routed through the holding guide and is not touching any metal
surface
.
2. Secure the ceiling grille to the ceiling assembly wind-path with 4
screws. (see Fig.17).
3. Install the healthy lter and air intake grill. Press “PUSH” and
lock with clasps.
4. Switch on the power supply and check the unit work or not.
5. Once the indoor unit is assembled, if the gap between the panel
and the top of vehicle is not even, please ask the manufacturer to
adjust it according to the assembly status.
wind-path
front panel
 Loading...