110
Installation and Maintenance
Service Manual
Valve supprt
Liquid valve
gas valve
Step Procedure
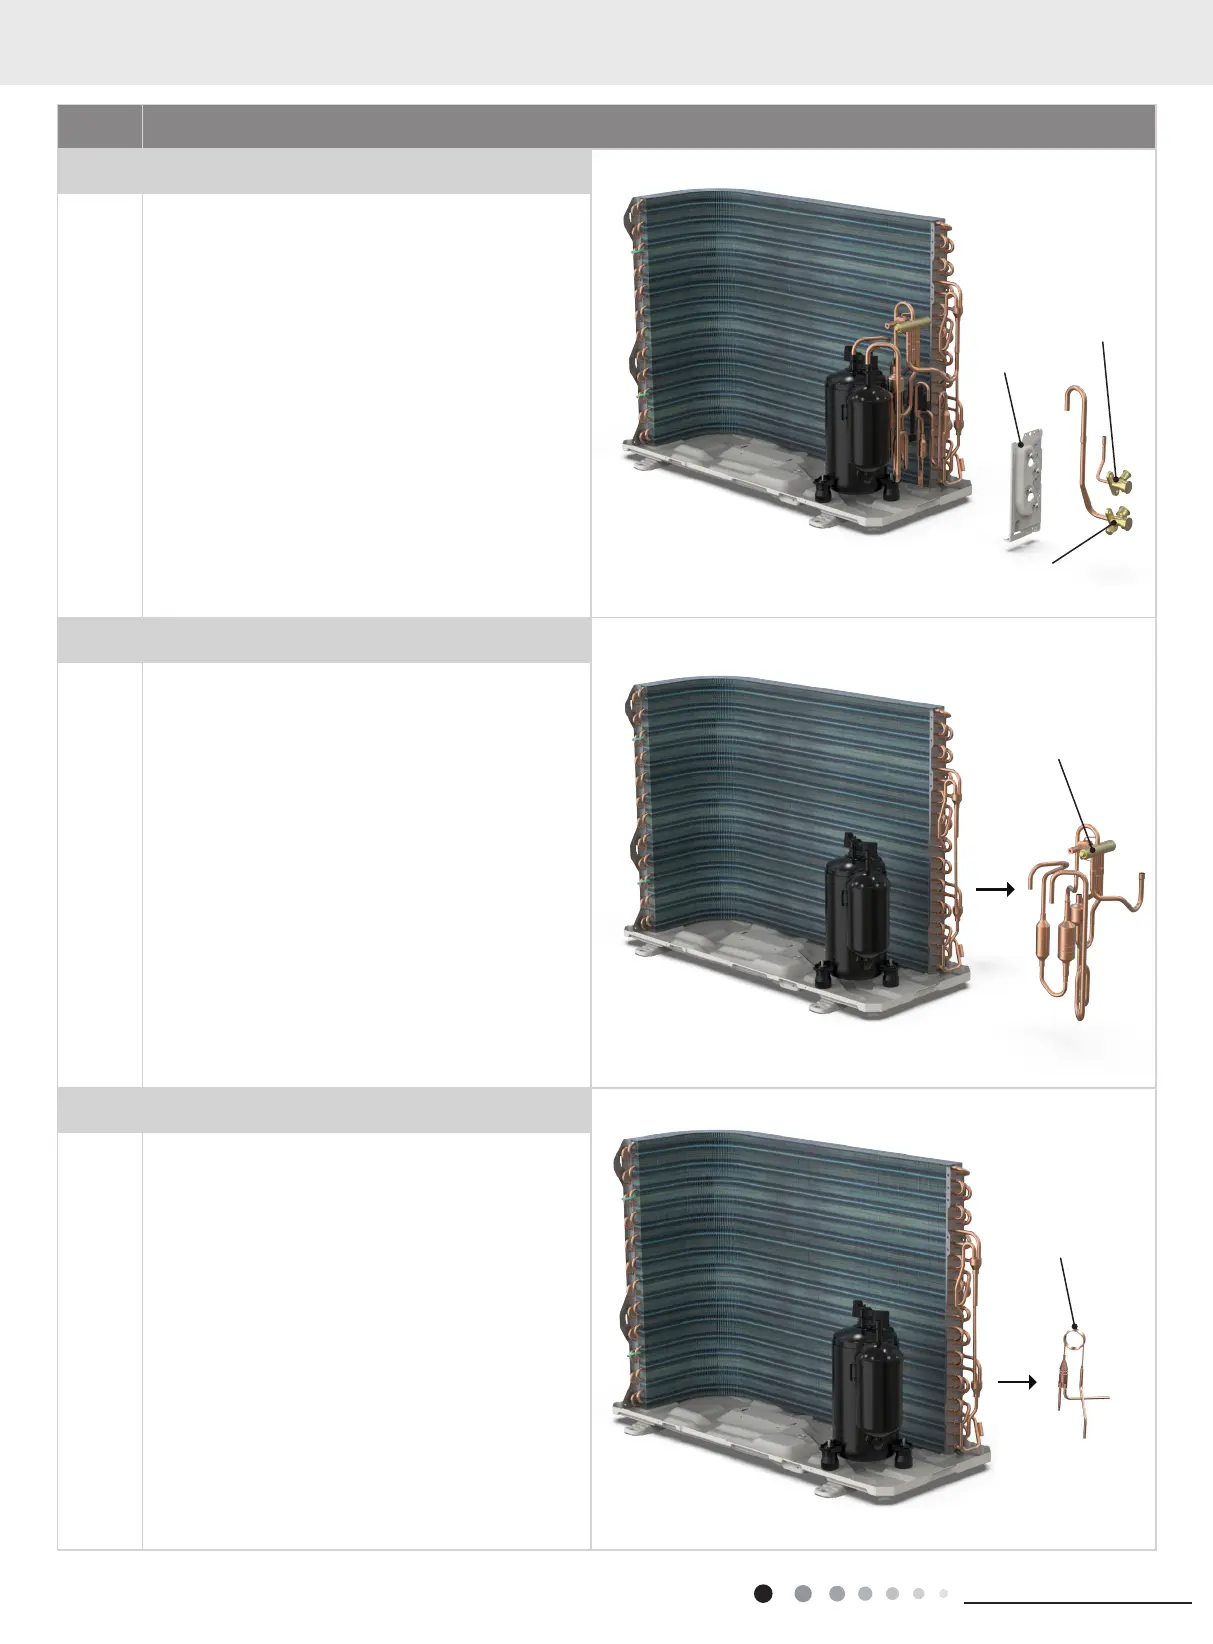
10. Remove gas valve, liquid valve and valve suppprt
Remove the valve support bolck, remove the screws
fixing the gas valve and the liquid valve,unsolder the
welding joint connecting the gas valve and the liquid
valve, remove them.
Note:
Discharge the refrigerant completely befor unsoldering;
when unsoldering, wrap the gas valve with a wet cloth
completely to avoid damage to the valve caused by
high temperature.
Remove the screws xing valve support, then remove
the valve support.
11. Remove 4-way valve assy
Unsolder the welding joints connecting the 4-way valve
assy, remove the 4-way valve.
Note:
Before unsoldering the welding joint, wrap the 4-way
valve with a wet cloth completely to avoid damage to
the valve caused by high temperature.
12. Remove Capillary Sub-assy
Unsolder the spot weld of Capillary Sub-assy and
condenser, and then remove the Capillary Sub-assy.
Note:
When unsoldering the spot weld, wrap the Capillary
Sub-assy with wet cloth completely to avoid damaging
the valve due to high temperature.
4-way valve assy
Capillary Sub-assy
 Loading...