Fabra Hood Gravity Ventilator8
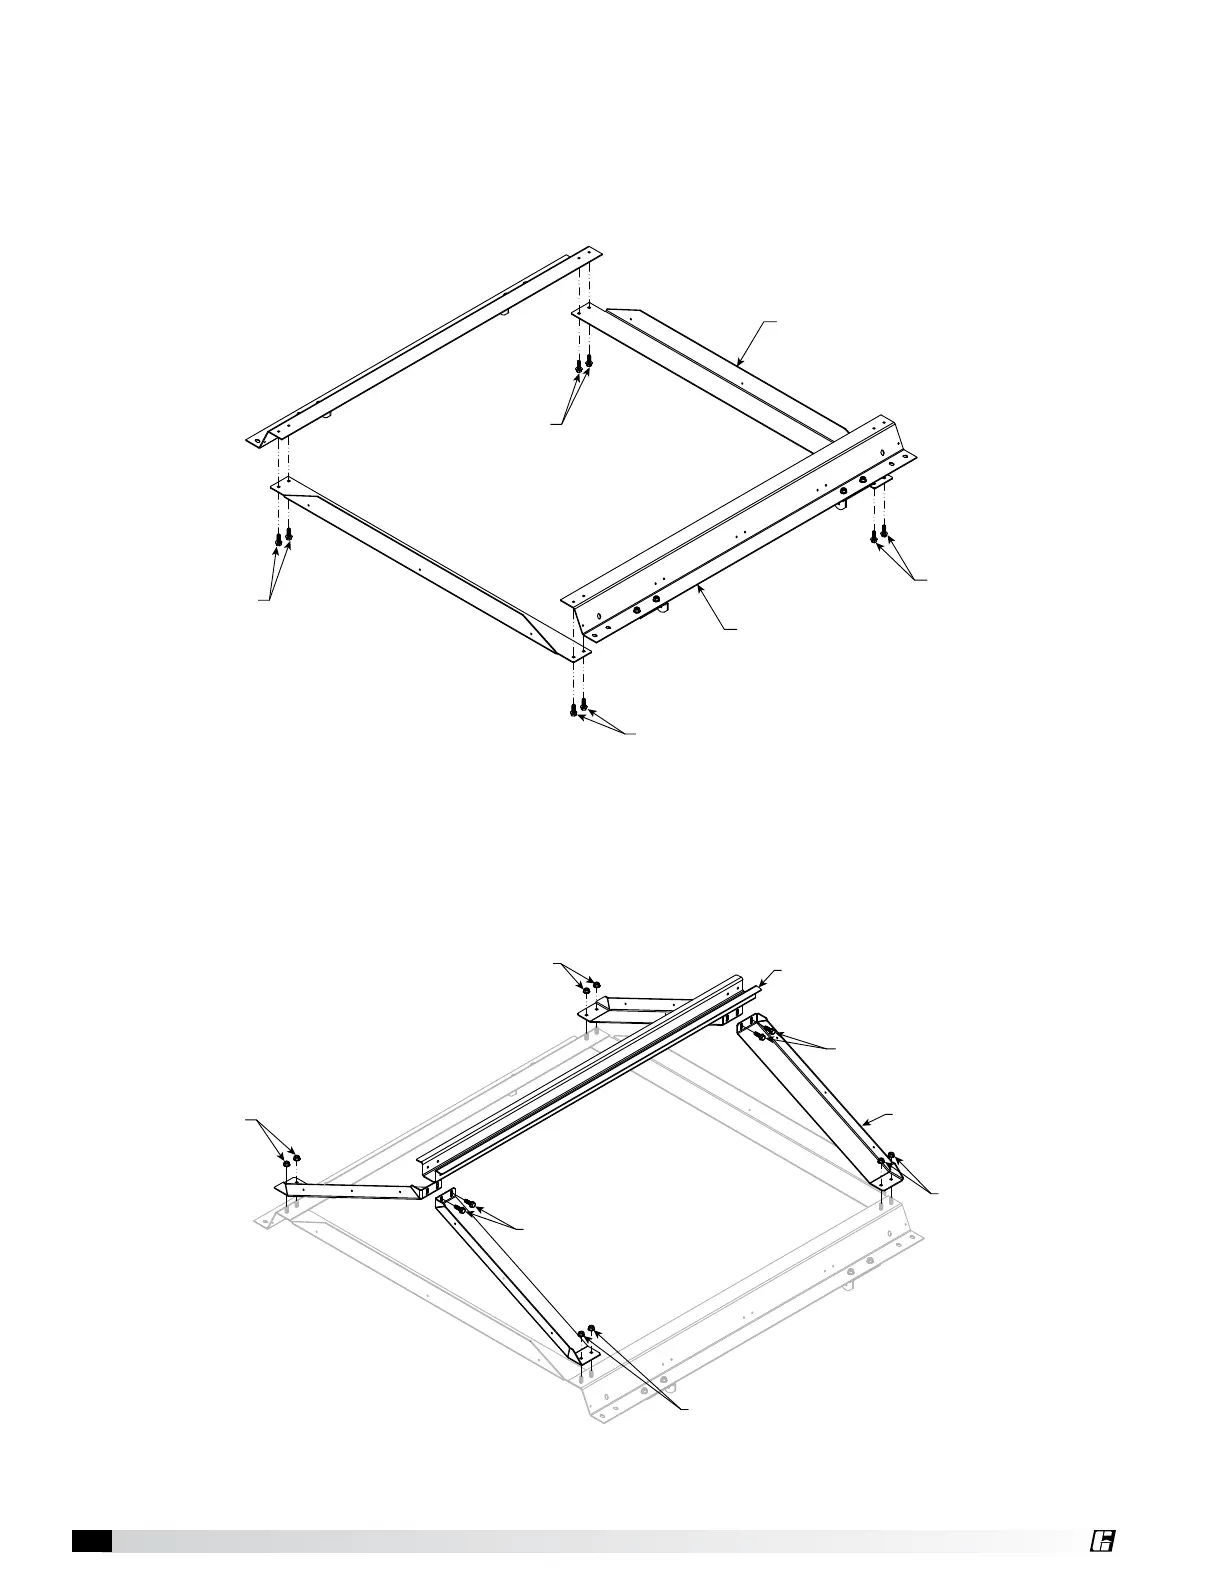
Step – 7 HOOD RAIL ASSEMBLY
NOTE: For easier assembly and lifting elevate hood rail assembly on blocks.
Lay out hood rail assembly and hood end angles, see Figure 6. Install 5/16-18 x 1 inch thread cutters (hardware kit
# 916687) from underneath, first through hood end angles and second hood rail assembly.
NOTE: Use a builders square to ensure the corners of the frame are as close to 90º as possible.
HARDWARE KIT # 916687
5/16 -18 x 1 in.
THREAD CUTTER
HARDWARE KIT # 916687
5/16 -18 x 1 in.
THREAD CUTTER
HARDWARE KIT # 916687
5/16 -18 x 1 in.
THREAD CUTTER
HARDWARE KIT # 916687
5/16 -18 x 1 in.
THREAD CUTTER
High Wind - 1 Fabra hood B #471321
HOOD END ANGLE
HOOD RAIL ASSEMBLY
Step 8 – Install HAT CHANNEL
Place diagonal end panel supports with the formed angle running the length of the part facing out and slots next to
hat channel. Fasten diagonals with 5/16-18 inch whiz nut (hardware kit # 917544). Leave wiz nuts snug and DO NOT
tighten. Lift hat channel into place. The diagonals will support the hat channel as it is being installed. Use 5/16-18 x 1
inch thread cutters (hardware kit # 916687) to attach the hat channel to the diagonal end panel supports. Tighten wiz
nuts.
HARDWARE KIT # 917544
5/16 -18 in. WHIZ NUT
HAT CHANNEL
HARDWARE KIT # 916687
5/16 -18 x 1 in.
THREAD CUTTER (BOTH SIDES)
High Wind - 2 Fabra hood B #471321
DIAGONAL END PANEL SUPPORT
HARDWARE KIT # 917544
5/16 -18 in. WHIZ NUT
HARDWARE KIT # 917544
5/16 -18 in. WHIZ NUT
HARDWARE KIT # 917544
5/16 -18 in. WHIZ NUT
HARDWARE KIT # 916687
5/16 -18 x 1 in.
THREAD CUTTER (BOTH SIDES)
NOTE: Adjustment of the hat channel may be needed. Ensure there is no more than an 1/8 inch gap between the hat
channel and hood panel.
Figure 6
Figure 7