Fabra Hood Gravity Ventilator 9
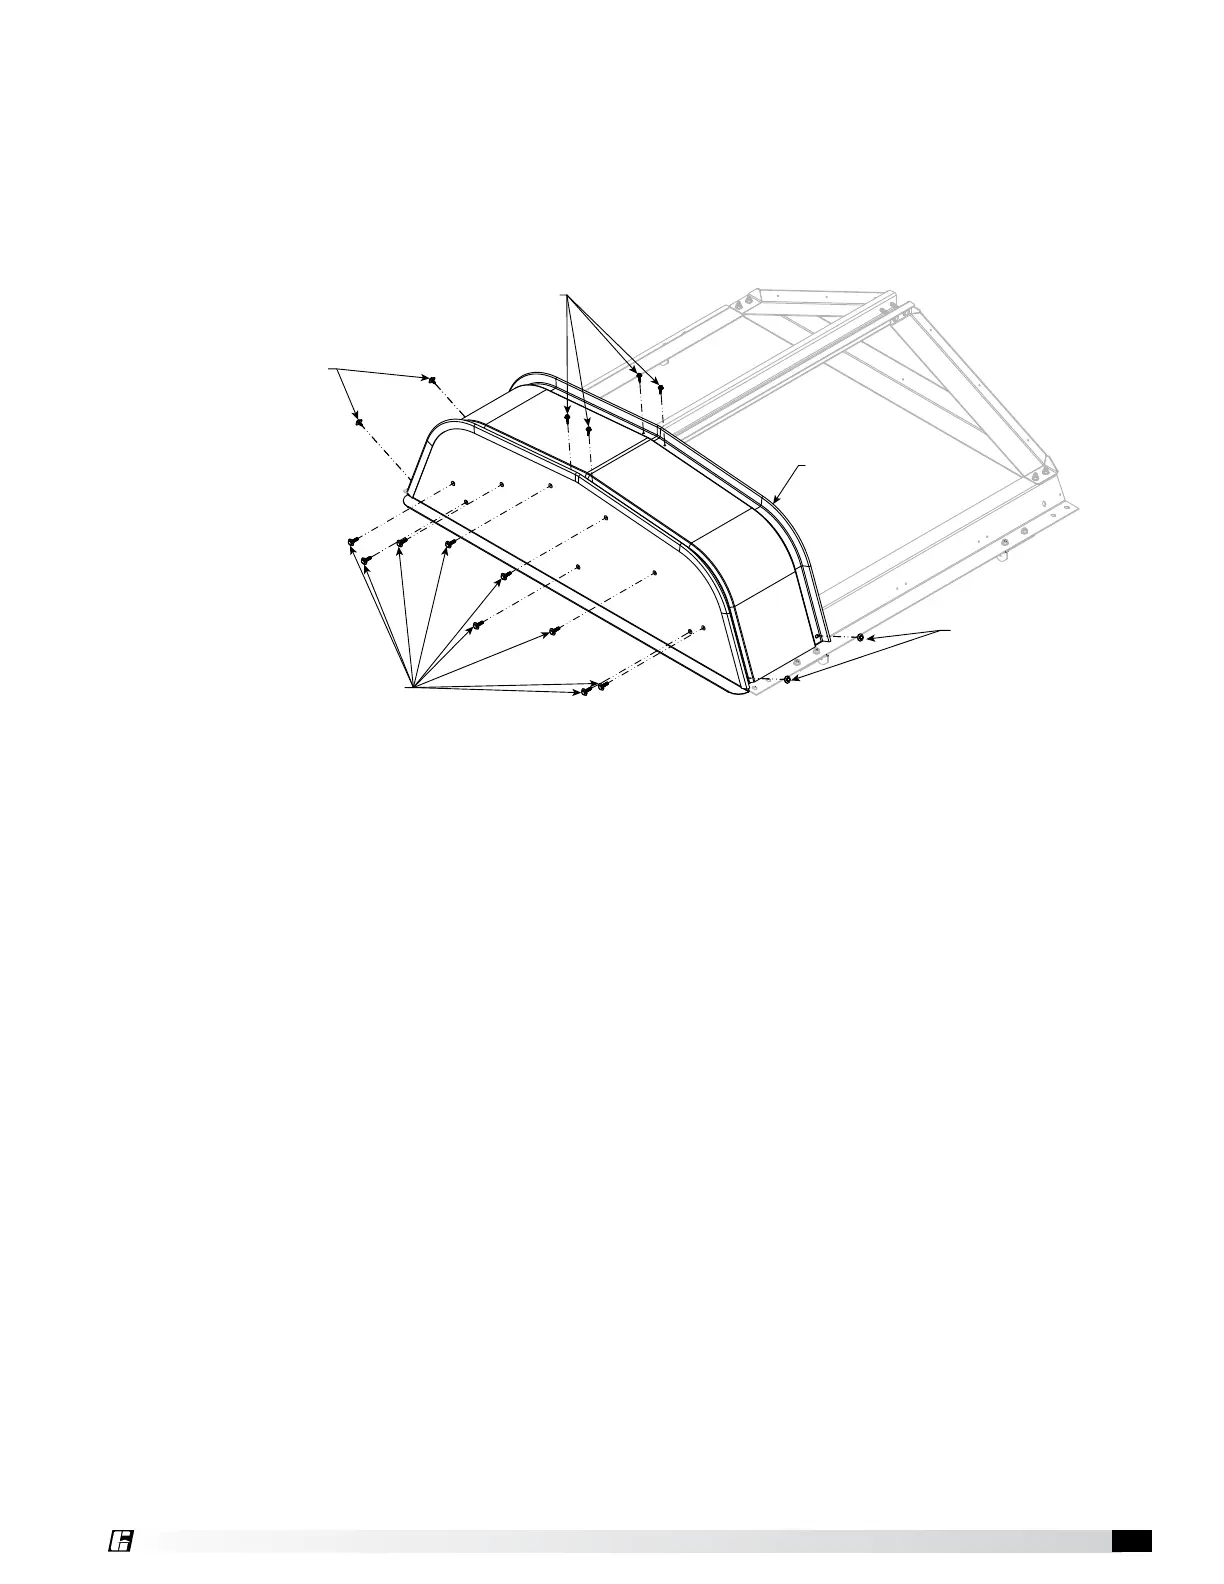
Step 9 – Install HOOD END PANEL (MALE RIB)
Lift the hood end panel (male rib) into place. Use the 1/4-20 x 1 inch thread rolling screws with washer (hardware kit
# 916688) to attach hood end panel to the diagonal end panel supports using holes in the hood end panel that line
up with holes in the diagonal end panel supports.
Use quantity four #12-14 x 1 inch self-tapping screws (hardware kit # 916689) to attach the hood panel to the hat
channel. Use quantity four #12-11 x 5/8 inch sheet metal screws (hardware kit # 916691) to attach the hood panel to
the hood rail assembly.
HOOD PANEL/END PANEL
ASSEMBLY
HARDWARE KIT # 916689
NO. 12-14 x 1 in.
SELF TAPPING SCREW
HARDWARE KIT # 916691
NO. 12-11 5/8 in.
SHEET METAL SCREW
HARDWARE KIT # 916691
NO. 12-11 5/8 in.
SHEET METAL SCREW
HARDWARE KIT # 916688
1/4 -20 x 1 in.
THREAD ROLLING SCREW WITH WASHER
High Wind - 3 Fabra hood B #471321
Step 10 – Install HOOD PANELS to HOOD RAIL ASSEMBLY
Place the remaining hood panels by interlocking each panel as shown in Figure 9, Detail E (page 9). Secure each
hood panel to the hat channel as it is put in place, using quantity four #12-14 x 1 inch self-tapping screws (hardware
kit # 916689). The hood end assembly with the “female rib” is to be installed last.
NOTE: Hoods over 9 feet wide are supplied with special hood clips. See Figure 9, Detail F (page 9). Hood panels
have predrilled holes for hood clip installation. Install clips as hood panels are being put in place, using one 12 x 5/8
inch sheet metal screw with sealing washer per hood clip. To install clips in the last panel, leave the end birdscreen
assembly out to provide access to the underside of the hood. The end birdscreen assembly can be easily replaced
after the hood is completely assembled.
For each hood panel, use quantity four #12-11 x 5/8 inch sheet metal screws (hardware kit # 916691) to attach the
hood panel to the hood rail assembly.
Use quantity 10 #12-11 X 3/8 inch sheet metal screw with sealing washer (hardware kit # 916690) to secure each
male and female rib joint together.
IMPORTANT: Do not drive sheet metal screws all the way through both sides of the ribs as this could allow water to
leak through the hood. Screws are to fasten only the first 2 layers of the rib joint.
Place the remaining hood end panel (female rib) in place. Use the 1/4-20 x 1 inch thread rolling screws with washer
(hardware kit # 916688) to attach hood end panel to the diagonal end panel supports using holes in the hood end
panel that line up with holes in the diagonal end panel supports.
Figure 8