54
INSTALLING THE OUTDOOR VENTS
INSTALLATION TYPES
Example only – duct configuration may differ depending on the model.
1. Stale air is drawn from areas requiring
local exhaust (bathroom, kitchen, laundry
room).
2. Fresh air is distributed to habitable rooms
(bedrooms, living room)
3. The HRV’s airflow must be balanced after
installation using the procedure found in
the section “AIRFLOW BALANCING.”
Suggested for:
• Hydronic baseboard
• In oor heating
• Electric baseboard
• Mini split heat pump
Benets:
Provides the best fresh air distribution in
the house; lowest operation cost since the
furnace/air handler unit is not needed.
1. The furnace blower is set to run
continuously or interconnected with HRV
for proper fresh air distribution. See
furnace electrical connection on page 12.
2. Stale air is drawn from areas requiring
local exhaust (bathroom, kitchen, laundry
room).
3. Fresh air is supplied to the return air
plenum of the furnace.
4. Due to the difference in pressure, HRV's
airflow must be balanced on site using the
procedure found in the section “AIRFLOW
BALANCING.”
* In the case of a multi-zone system, please
contact Greentek customer service prior to
installing any installation type requiring the use
of the furnace interlock
Suggested for:
• Central furnace
• When ducting fresh air to living area is
not possible or practical
Benets:
Conditions the fresh air prior to distributing
it throughout the house
1. The furnace blower is set to run
continuously or interconnected with HRV
for proper fresh air distribution. See
furnace electrical connection on page 12.
2. A minimum separation of 1m (39’’) is
recommended between the two direct
connections.
3. The HRV’s exhaust air connection should be
upstream of the HRV’s supply air
connection to prevent exhausting any fresh
air.
4. Due to the difference in pressure, HRV's
airflow must be balanced on site using the
procedure found in the section “AIRFLOW
BALANCING.”
* In the case of a multi-zone system, please
contact Greentek customer service prior to
installing any installation type requiring the use
of the furnace interlock"
Suggested for:
• When bathroom and kitchen already have
local exhaust system
• May be suitable for retrofitting
Benets:
Least expensive installation type
HRV DUCTING FOR FULLY
DEDICATED SYSTEM
HRV/FURNACE DUCTING FOR
PARTIALLY DEDICATED SYSTEM
HRV/FURNACE FOR
SIMPLIFIED INSTALLATION
BEST BETTER GOOD
Make sure the HRV is
capable of meeting the
required airow rate.
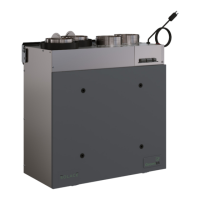
RECOMMENDED INSTALLATION
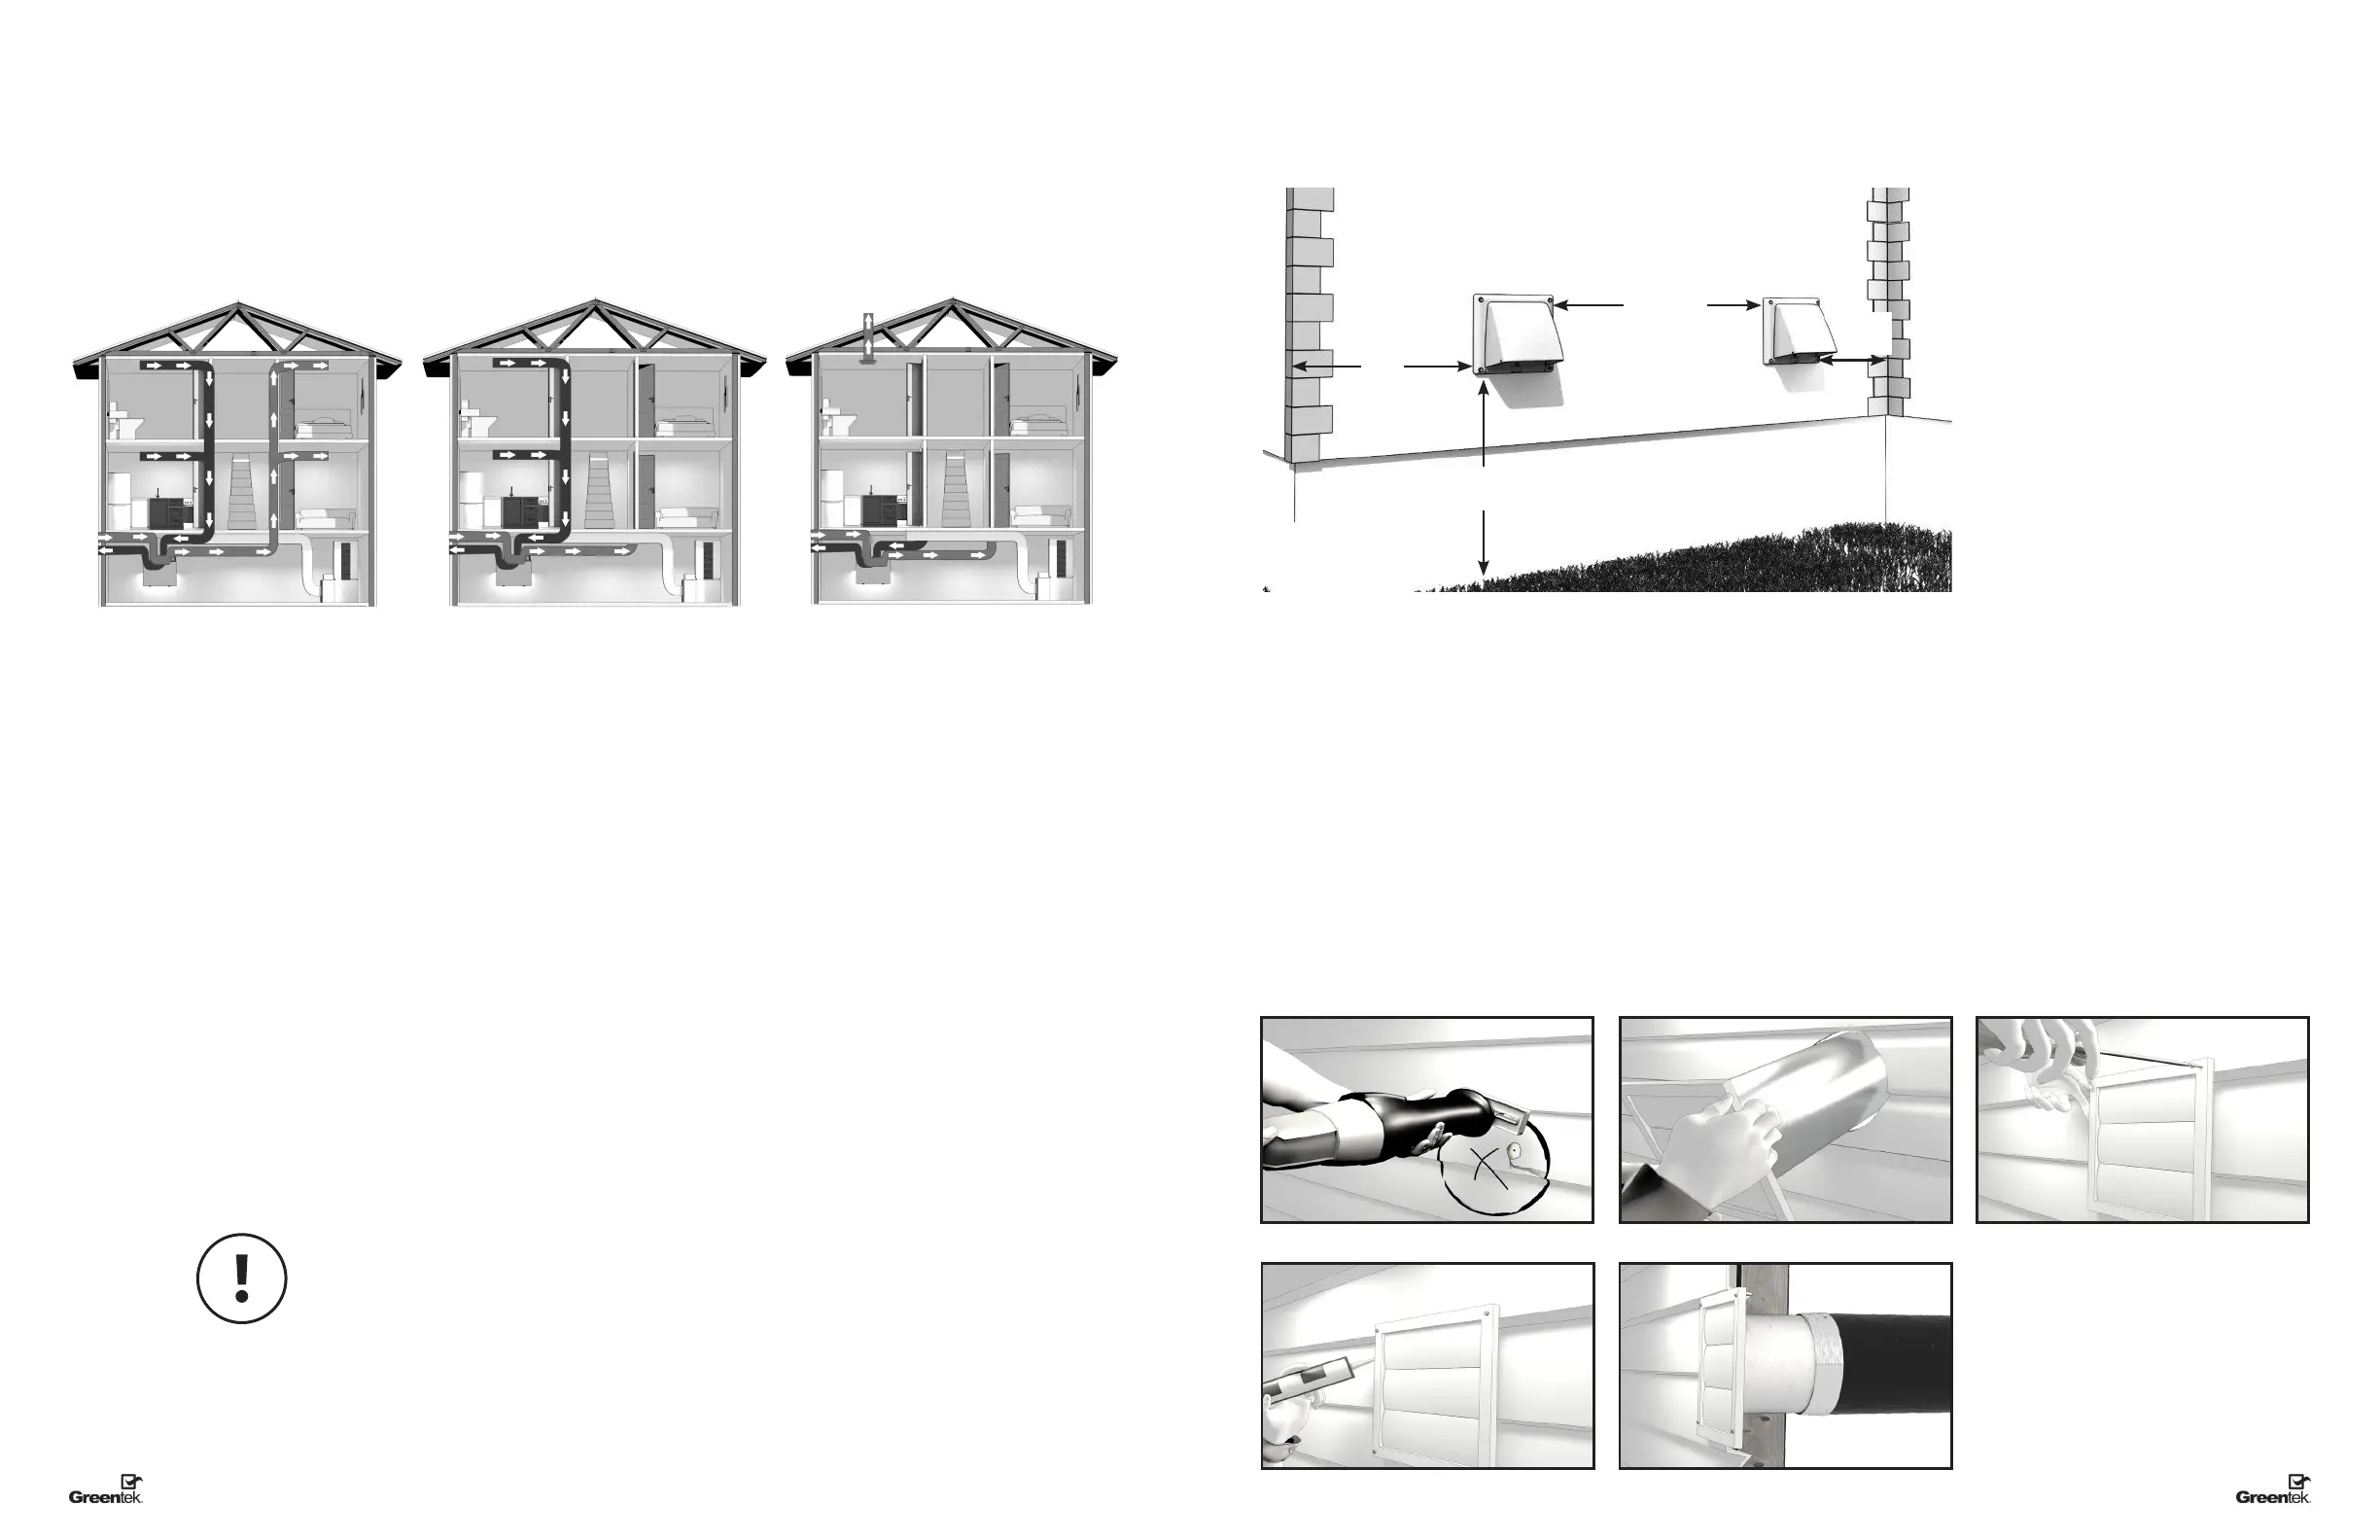
INSTALLING THE VENTS
18" 18"
(460mm)(460mm)
36" 36"
(1m)(1m)
3' 3'
(900mm)(900mm)
min.min.
36" 36"
(1m)(1m)
Intake
• Should be located upstream of prevailing
winds from exhaust
• At a minimum of 900 mm (3') away from
dryer vents and furnace exhaust (medium
or high efficiency furnaces), driveways, oil
fill pipes, gas meters, or garbage
containers.
• Do not locate in the garage, attic, crawl
space, or underneath deck.
Locating the Exhaust Weatherhood
• Not near a gas meter, electric meter or a
walkway where fog or ice could create a
hazard
• Do not locate in a garage, workshop or
other unheated space
A well designed and installed ducting system will
allow the HRV to operate at its maximum
efficiency.
• The inner liner of the flexible insulated duct
must be secured to the sleeve of the hood
(as close to the outside as possible) and to
the appropriate duct connection on the HRV.
• The insulation should remain full and not
crushed.
1. Cut hole between wall studs
3. Secure vent with proper screws
4. Seal using outdoor rated caulking 5. Attach insulated duct from inside and tape
2. Insert vent
• The outer liner, which acts as a vapor
barrier, must be completely sealed to the
outer wall and the HRV using tape and/or
caulking.
• A good bead of high quality caulking
(preferably acoustical sealant) will seal the
inner flexible duct to both the HRV duct
connection and the hood prior to securing
them.
• To minimize airflow restriction, the flexible
insulated duct that connects the two
outside weatherhoods to the HRV should
be stretched tightly and be as short as
possible.
• Twisting or folding the duct will severely
restrict airflow.
 Loading...