This document provides the operator manual for the Greenworks STA808 String Trimmer, model number 21142. It covers the device's function, important technical specifications, usage, and maintenance.
Function Description:
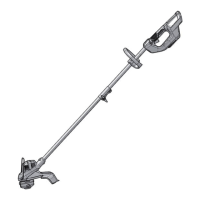
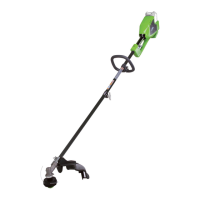
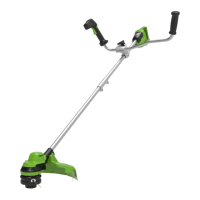
The Greenworks STA808 String Trimmer is designed for cutting grass, light weeds, and other similar vegetation at or around ground level. The cutting plane should be approximately parallel to the ground surface. It is not intended for cutting or chopping hedges, shrubs, bushes, flowers, or compost. The machine operates with a cutting line that is automatically released and trimmed to the correct length by a cut-off blade as it wears down during operation.
Important Technical Specifications:
- Input: 120V/60Hz, AC only, 10 Amps
- No-load speed: 6000 (±10%) RPM
- Cutting line diameter: 0.08" (2 mm)
- Cutting path diameter: 18 in. (330 cm)
- Feed Type: Auto Feed
- Weight: 9.9 lbs (4.5 kg)
- Recommended ambient temperature range for storage: -4°F (-20°C) to 158°F (70°C)
- Recommended ambient temperature range for operation: 32°F (0°C) to 104°F (40°C)
The device features double insulation, eliminating the need for a three-wire grounded power cord and protecting the user from electric shock. It is crucial to use only identical manufacturer's replacement parts and accessories to avoid hazards or product damage.
Usage Features:
Before operation, users must read and understand all safety regulations and operating instructions.
- Starting the machine: Push the lock-out button and pull the trigger. The lock-out button can be released once the machine is running.
- Stopping the machine: Release the trigger.
- Extension Cords: When using an extension cord, ensure it is in good condition and heavy enough to carry the product's current to prevent voltage drop, overheating, and power loss. The manual provides a minimum gauge chart for extension cords based on length and ampere rating. For outdoor use, the extension cord must be designated "W-A" or "W" on its jacket. To prevent accidental disconnection, users can tie a knot in the cord as shown in the manual or use plug-receptacle retaining straps/connectors.
- Operation Tips: Maintain clearance between the body and the machine, keep a firm hold with both hands, and cut tall grass from the top down. Do not operate the machine without the guard in place. If grass winds around the trimmer head, stop the machine, unplug it, and remove the grass.
- Cutting Tips: Tilt the machine towards the area to be cut, use the tip of the cutting line, and move the machine from right to left to prevent thrown debris. Avoid cutting in the danger area or forcing the trimmer head into uncut grass. Be aware that wire fences, picket fences, stone walls, brick walls, curbs, and wood can cause cutting line wear and breakage.
- Adjusting Cutting Line Length: While operating, hit the trimmer head against the ground to automatically release and trim the cutting line.
Maintenance Features:
Regular maintenance is crucial for the machine's performance and longevity.
- General Information: All maintenance not specified in the manual should be performed by an authorized service center. Before any maintenance, stop the machine, remove the battery pack, allow the motor to cool, store the machine in a cool and dry place, and wear appropriate protective gear (clothing, gloves, safety glasses).
- Cleaning: Clean the machine after use with a moist cloth dipped in neutral detergent. Avoid aggressive detergents or solvents on plastic parts and handles. Keep the trimmer head free of grass, leaves, or grease. Ensure air vents are clean to prevent overheating. Do not spray water onto the motor or electrical components.
- Replacing the Cutting Line:
- Remove the spool cover by pushing the tabs on the sides of the spool retainer and pulling it off.
- Remove the remaining spool.
- Cut a new piece of nylon cutting line (0.08" / 2 mm diameter) approximately 3m long.
- Fold the line in half and hook the loop into the slot at the center rim of the spool, ensuring it locks into place.
- With a finger between the lines, wind the lines evenly and tightly around the spool in the indicated direction.
- Place the lines into the guide slots.
- Do not wind the lines beyond the edge of the spool.
- Extend approximately 15 cm of cutting line from the new spool before installation.
- Insert the ends of the cutting lines through the holes in the trimmer head.
- Extend the cutting line to release it from the guide slot on the spool.
- Press the tabs and install the spool cover onto the spool retainer until it clicks into position.
- Assembling/Removing the Trimmer Head:
- To remove, insert a metal rod into the specified angle transmission hole to fix the trimmer head, then turn the trimmer head counterclockwise. Do not remove the spacer from the shaft.
- To assemble, insert a metal rod into the specified angle transmission hole, assemble the trimmer head, and turn it clockwise to tighten. The cut-off blade must be installed when using the trimmer head.
- Storage: Remove the battery pack before transportation and storage. Store the machine indoors in a dry, high, or locked-up place, out of reach of children and away from corrosive agents like garden chemicals and de-icing salts. Protect the machine during transport to prevent damage.