• Keep the air vents clean and free of debris to avoid
overheating and damage to the motor or the battery.
• Do not spray water onto the motor and electrical
components.
9.3 REPLACE THE SPOOL
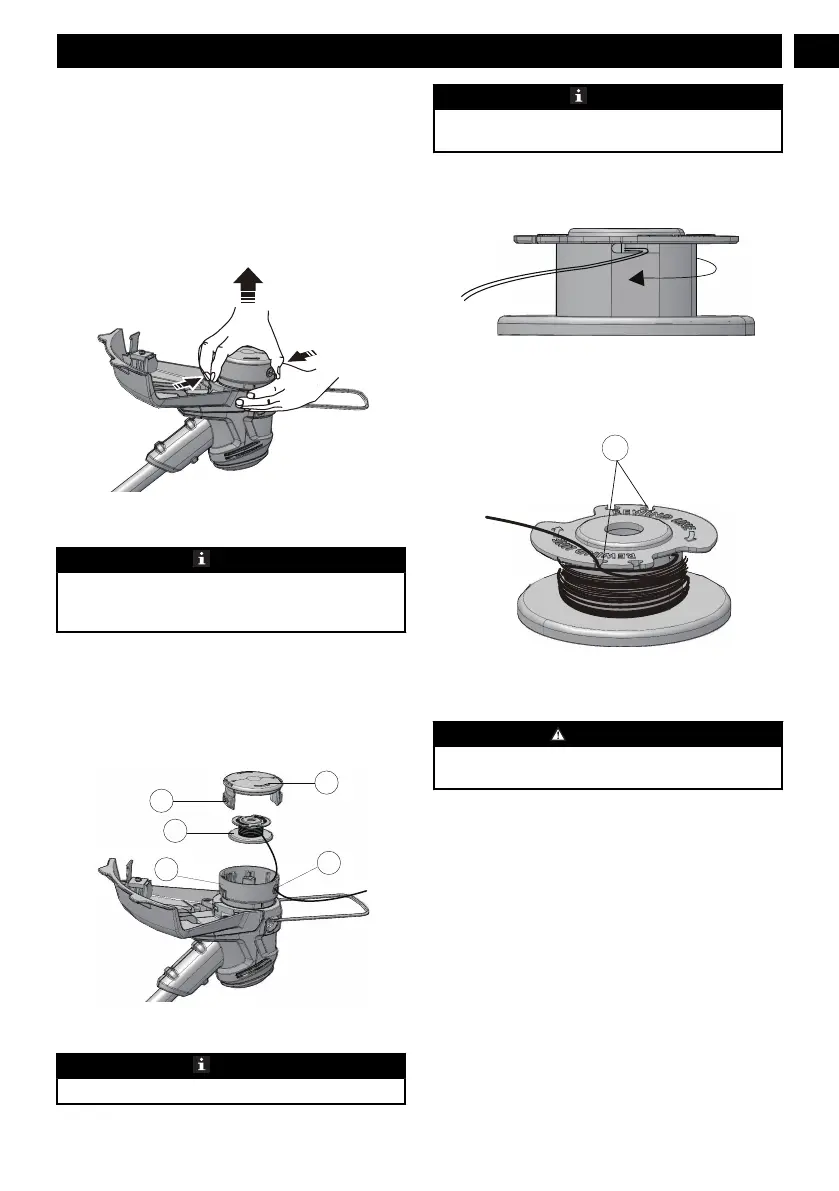
1. Push the tabs (16) on the sides of the trimmer head at the
same time.
2. Pull and remove the spool cover (19).
3. Remove the spool (17).
4. Replace with a new spool.
NOTE
Make sure that the cutting line is in the guide slot on the
new spool, and is extended approximately 5 in. before you
install the new spool.
5. Put the end of the cutting line through the eyelet (20).
6. Extend the cutting line to release it from the guide slot in
the spool.
7. Push the tabs and install the spool cover onto the spool
housing (18).
8. Push the spool cover until it clicks into position.
9.4 REPLACE THE CUTTING LINE
NOTE
Remove the remaining cutting line on the spool.
NOTE
Use only with the nylon cutting line of 0.065" (1.65 mm)
diameter.
1. Cut a piece of cutting line approximately 3m long.
2. Bend one end of the line 1/4 of an inch (6.35mm) .
3. Insert the line into the anchor hole of the spool.
4. Wind the cutting line around the spool tightly in the
indicated direction.
5. Put the cutting line in the guide slot.
6. Do not wind the cutting line beyond the edge of the spool.
10 TRANSPORTATION AND
STORAGE
WARNING
Remove the battery pack from the machine before
tranportation and storage.
10.1 STORE THE MACHINE
• Remove the battery pack from the machine.
• Make sure that children cannot come near the machine.
• Keep the machine away from corrosive agents such as
garden chemicals and de-icing salts.
• Secure the machine during transportion to prevent
damage or injury. Clean and examine the machine for any
damage.
11
English
EN