14
GRILLCHEF
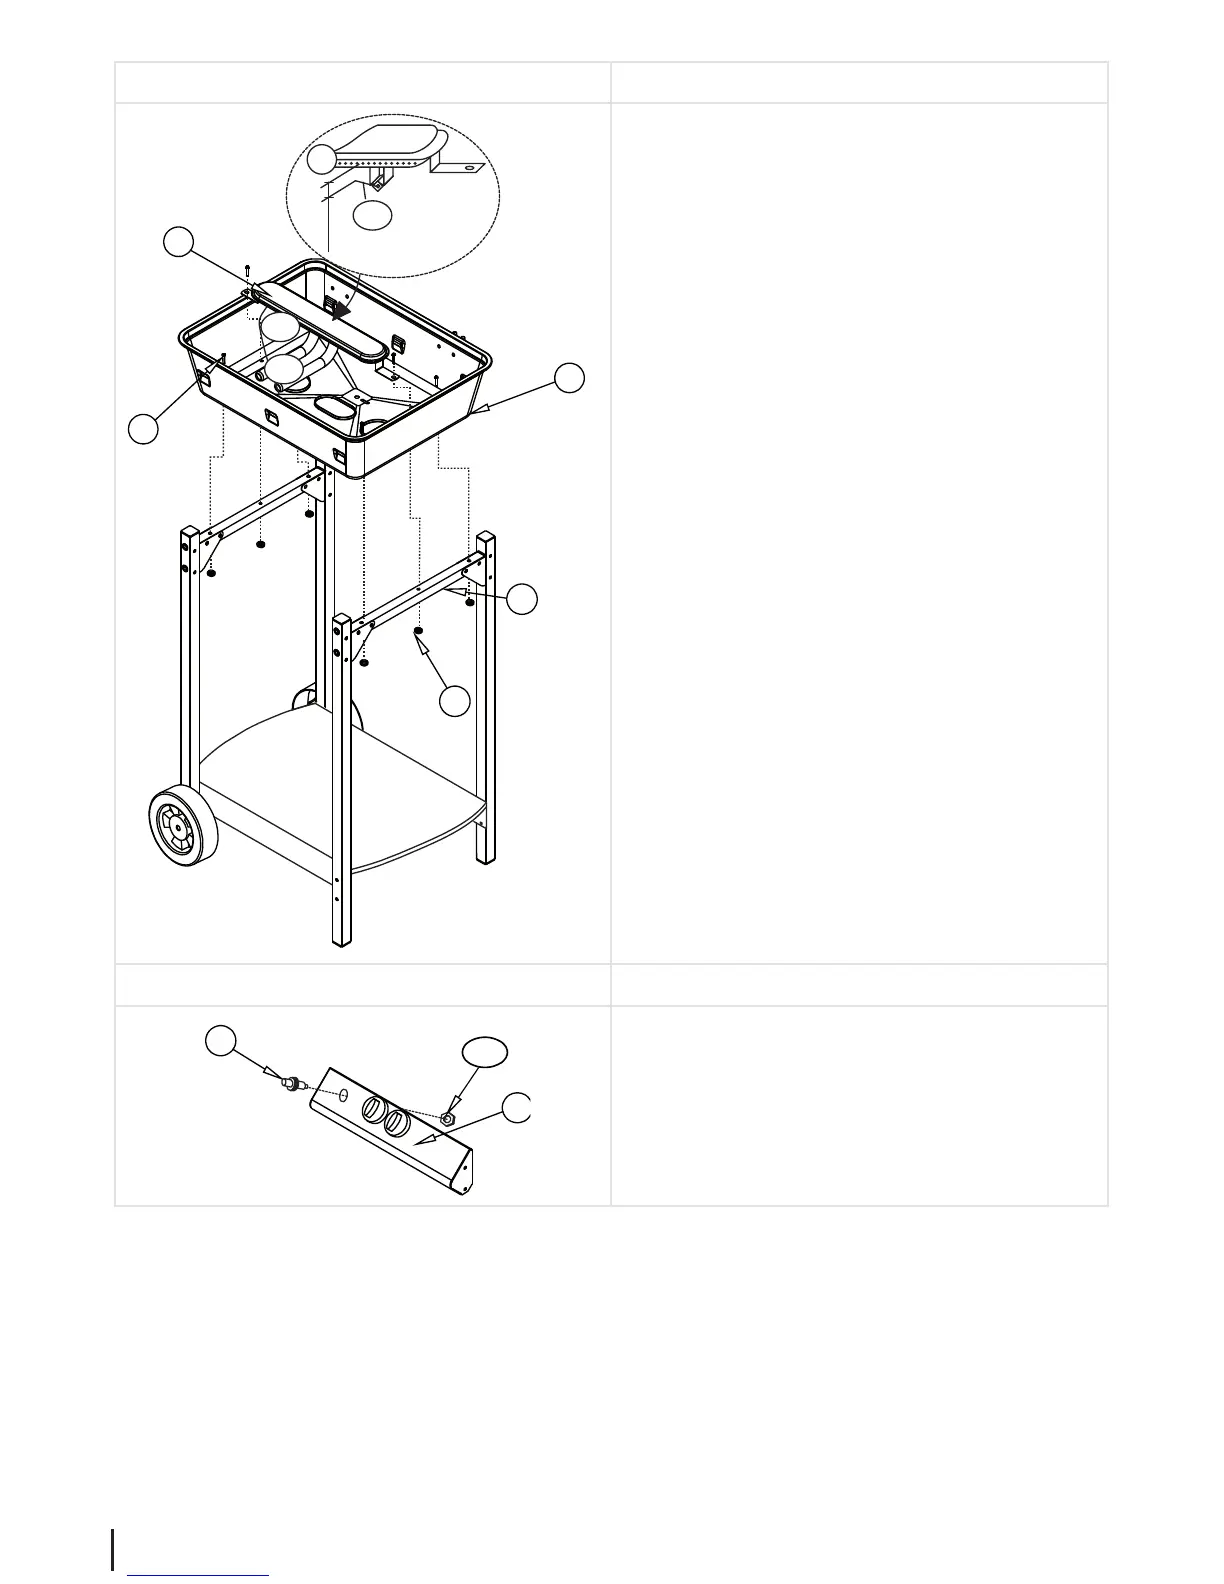
Assembly step 3
17
10
13
30
28
10
10c
2 mm
10a
10b
• Carefully position and align the re bowl (13) on the
frame.
• Secure the re bowl in place (13) with both cross bars
(17)
– Do this using four M5x30 bolts (30) and M5 nuts
(28).
Do not t both centre bolts at this stage - only t the
four outer bolts.
• Inspect the burner (10) and check the distance between
the spark plug (10c) and the gas outlets. The gap must
be approximately 2 mm. Adjust if necessary.
• Check to make sure that the burner hoses (10a) are
correctly positioned. Turn to the correct position if
necessary:
– Ignitor cable (10b) left
– Burner hoses (10a) point forwards
–
– Pass the burner hoses (10a) through the oval ope-
ning in the base of the re bowl so that the burner
hoses are facing forwards.
• Pass the igniter cable (10b) through the round left-
hand opening of the re bowl base.
• Secure the burner (10) to the base of the re bowl with
the cross bars (17) (medium bolts)
– Do this using two M5x30 bolts (30) and M5 nuts
(28).
Assembly step 4
16
33a
33
• Loosen the lock nut (33a) on the Piezo-igniter (33),
pass the Piezo igniter through the opening on the
front panel (16) and then tighten the lock nut (33a).