Translation of the Original Instructions
HANDLEBAR ADJUSTMENT
To adjust the height of the handlebar unlock the appropriate lever (fig. 3, n. 10), raise or lower the
handlebar and then release the lever to lock its position. To turn the handlebar use the lever (fig.
3A, n. 12), turn the handlebar to right or to the left and then release the lever to lock its position.
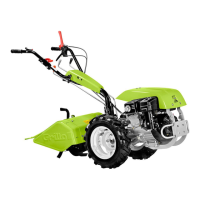
STARTING WORK (walking tractor version)
To engage the rotary tiller push forward the PTO lever (fig. 3A, n. 13) until the engagement click is
heard. If the PTO does not engage immediately, do not force the lever but press and release it
repeatedly until the PTO engages.
CAUTION: When pressing first the grey safety device (fig. 3A, n. 25) and then the red clutch
lever (fig. 3A, n. 1), the machine starts moving and the tiller starts rotating.
CAUTION: When the tiller is on never put your hands and feet under the hood and do not
open the tiller door. This door must be kept adherent to the ground to ensure a safe use of
this machine. To disengage the rotary tiller pull backwards the PTO lever (fig. 3A, n.13).
IMPORTANT:
- To avoid problems to the clutch during the functioning of the machine, please keep the red lever
firmly depressed. Do not use the machine whilst only partially depressing the red lever or damage
to the clutch may result.
- while operating in the walking tractor version, if the operator engages the reverse gear the safety
system device (fig. 4, n. 7) immediately disengages the PTO.
REVERSE GEAR
To engage the reverse gear use the appropriate lever (fig. 3A, n. 2) located on the right side of the
handlebar. IMPORTANT: Before pressing down the red clutch lever to start the machine,
always check which gear is engaged; before engaging the reverse gear, make sure that
there are no obstacles behind (objects, walls, trees...). Be very careful when using the
machine in reverse and avoid engaging the 3
rd
gear in reverse. IN CASE OF DANGER
RELEASE THE RED CLUTCH LEVER (fig. 3A, n. 1), THE MACHINE WILL IMMEDIATELY
STOP.
CAUTION: for safety reasons on all Grillo walking tractors it is not possible to engage the reverse
gear when the PTO lever is engaged. A safety device will immediately disengage the PTO if the
operator engages the reverse gear.
SERVICE BRAKES
The machine is equipped with service brakes, one on each wheel, engaged via the levers located
on the right side of the handlebar (fig. 3A, n. 26 – 27). Using the brakes makes steering easier
when the machine is moving, especially with heavy attachments. Should the machine be parked on
slopes never forget to engage the brakes (fig. 3A, n. 26 – 27) and to secure them via the
appropriate device (fig. 3A, n. 34).
ENGAGEMENT AND DISENGAGEMENT OF THE DIFFERENTIAL DEVICE
The walking tractor is equipped with a differential on the wheel axle. A lever is located on the left
side of the handlebar (fig. 3A, n. 22) enabling the operator to lock (lever forward) or to unlock (lever
backward) the differential. Under normal working conditions the differential is unlocked (lever
positioned forward – fig. 3A, n. 22) to ensure the manoeuvrability of the machine and to make
steering easier. When working on slopes or on grounds where higher adherence is needed, it
is recommendable to use the differential lock (fig. 3A, n. 22 lever pulled backwards).
SWITCHING OFF THE PETROL ENGINE
Set the throttle lever into “0” position (fig. 3, n. 21).
SWITCHING OFF THE DIESEL ENGINE
Fully press the off lever ENGINE STOP located on the left side of the handlebar (fig. 4A, n. 33).
IMPORTANT: if the machine is equipped with the electric starter, once the engine has been
switched off, turn the starting key in anti-clockwise direction to disconnect the battery (fig. 4A, n.
30). If the starting key remains into the starting position the battery will completely discharge.