Model G0708 (Mfd. Since 1/15)
-17-
17. Re-install the baffle and install both side
doors with the eight M5-.8 x 10 flat head
screws and hex nuts already in the cabinet.
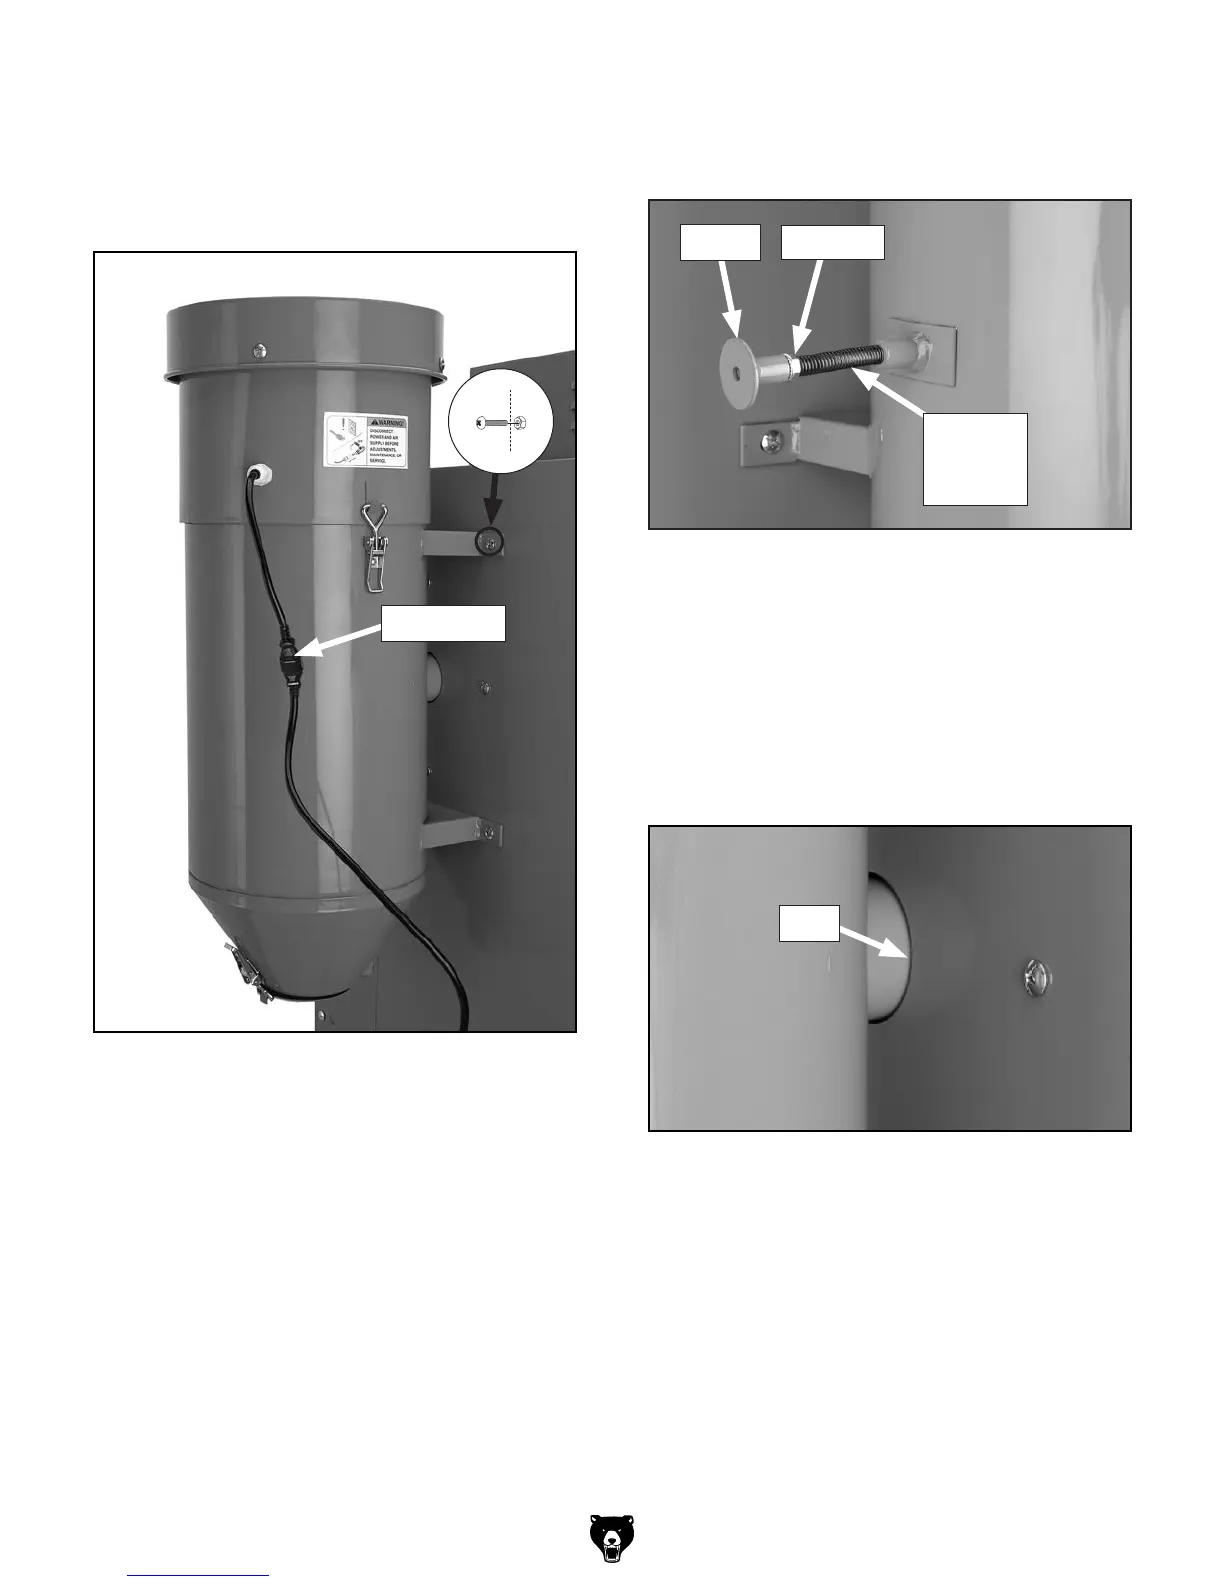
Figure 12. Dust collector suction port.
9.
Using four cabinet screws and flange nuts,
fasten the dust collector to the rear of the
cabinet, so the suction port protrudes through
the hole cut into the back of the cabinet
(Figure 10).
10.
Plug the dust collector into the in-line power
supply plug protruding from the control box
(Figure 10).
11.
Unlatch the dust collector motor (Figure 10),
lift the dust collector out of the canister, and
set it aside.
12.
Working from inside of the canister, insert the
canister plunger through the canister wall so
it can be seen protruding from the outside of
the canister.
Figure 10. Dust collector.
14.
Re-install the dust collector into the canister.
15. Using a 10mm wrench, tighten the jam nut
against the knob.
16.
Using silicone (not supplied), seal the gap
between the suction port and the hole in the
cabinet wall (Figure 12).
Figure 11. Canister plunger.
13.
Place the spring on the plunger shaft, and
thread the jam nut and knob onto the plunger,
as shown in Figure 11.
Knob Jam Nut
Spring
and
Plunger
Gap
In-line Plug