-38-
Model G0922 (Mfd. Since 07/20)
Dismantling Print Head
If a clog is located higher up in the print head, or
if "heat creep" has occurred—molten plastic ris-
ing into the heat sink and cooling—then the print
head may need to be disassembled and cleaned.
Tools Needed Qty
Pair of Work Gloves ........................................... 1
Small Crescent Wrench ..................................... 1
Open-End Wrench 10mm .................................. 1
Hex Wrench 2mm .............................................. 1
Blowtorch or Heat Gun ...................................... 1
To dismantle print head:
1. Unload filament (refer to Changing Filament
on Page 28).
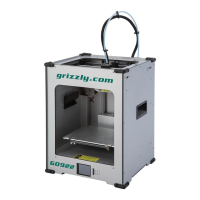
2. Remove (2) button head cap screws and air
flow case from print head (see Figure 50).
3. Preheat heating block to printing temperature
(refer to Preheating Nozzle on Page 26).
Before proceeding with the next step, put on
leather gloves to protect your hands while
handling the hot nozzle and heating block.
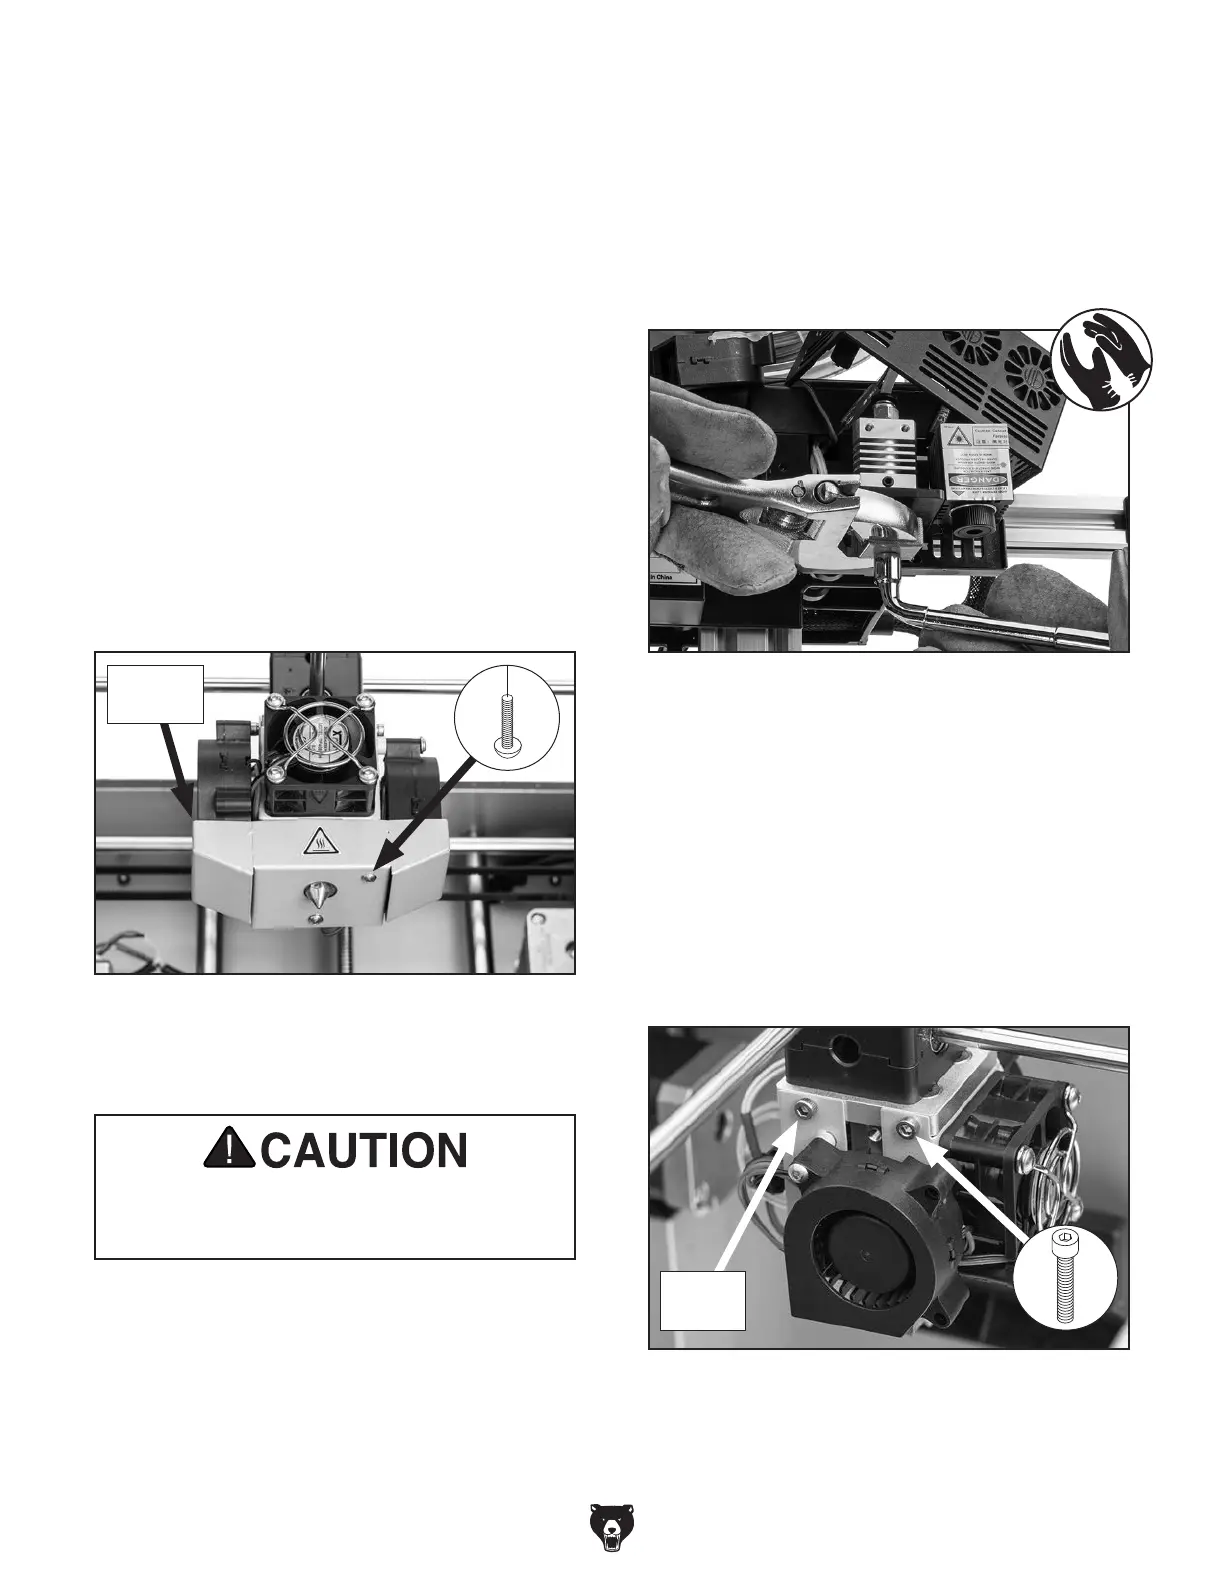
4. Hold heating block in place using crescent
wrench while removing nozzle with 10mm
open-end wrench (see Figure 51).
IMPORTANT: Do not loosen, remove, or
tighten nozzle unless heating block is heated.
Heating block and nozzle threads may be
damaged if threaded while cold.
Figure 51. Example of removing nozzle from
heating block.
Figure 50. Air flow case.
x 2
Air Flow
Case
Figure 52. Fan bracket and cap screws.
5. Quickly move heat gun or blowtorch over
nozzle to burn filament and debris away.
IMPORTANT: DO NOT hold heat in place
over nozzle. Direct heat can melt or deform
nozzle.
6. Remove (4) cap screws, then remove fan
bracket from print head by sliding it forward
(see Figure 52).
x 4
Fan
Bracket
 Loading...