EasyManua.ls Logo

Grizzly G7947 - User Manual

Grizzly G7947
60 pages
Print Icon
To Next Page IconTo Next Page
Loading...
COPYRIGHT © AUGUST, 2005 BY GRIZZLY INDUSTRIAL, INC. REVISED JANUARY, 2021 (JL)
WARNING: NO PORTION OF THIS MANUAL MAY BE REPRODUCED IN ANY SHAPE
OR FORM WITHOUT THE WRITTEN APPROVAL OF GRIZZLY INDUSTRIAL, INC.
#TR7410 PRINTED IN CHINA
G7947 G7948
V3.01.21
MODEL G7947 G7948
12-SPEED DRILL PRESSES
OWNER'S MANUAL
(For models manufactured since 01/21)
184841

Other manuals for Grizzly G7947

Questions and Answers

  • C
    Christina ThompsonAug 22, 2025
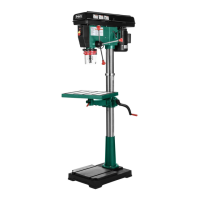
    What to do if Grizzly G7947 Drill has tool loose or lack of power in spindle?
    • S
      Shari LucasAug 22, 2025
      If you're experiencing a tool loose or lack of power in the spindle of your Grizzly Drill, here are some potential causes and solutions: * The tool might be incorrectly installed in the spindle taper. Remove and reinstall the tool. * There might be debris on the tool or spindle taper mating surfaces. Clean the tool and spindle taper. * You might be taking too big of a cut. Lessen the depth of cut and allow chips to clear. * The V-belts might be loose. Properly tension the V-belts. * The voltage might be wrong. Correct the voltage.
  • A
    Austin KirbyAug 27, 2025
    What to do if workpiece or tool vibrates or chatters during Grizzly G7947 operation?
    • T
      thomasjoseAug 27, 2025
      If the workpiece or tool vibrates or chatters during Grizzly Drill operation, here are a few things to check: * Table locks might not be tight. Tighten the table locks. * The workpiece might not be secure. Properly clamp the workpiece on the table or in a vise. * The spindle speed or feed rate might be too fast. Set the spindle speed correctly or use a slower feed rate. * The spindle or quill might be extended too far down. Fully retract the spindle and lower the headstock to increase rigidity and decrease vibration.
  • M
    Matthew RamirezAug 29, 2025
    Why Grizzly G7947 Drill produces bad surface finish?
    • M
      Matthew WashingtonAug 29, 2025
      If you're experiencing a bad surface finish with your Grizzly Drill, consider these potential causes: * The spindle speed might be too fast for the workpiece material. Set the spindle speed correctly. * The cutting tool might be dull or incorrect. Sharpen the cutting tool or select one that better suits the operation. * The rotation direction of the cutting tool might be wrong. Check for proper cutting tool rotation. * The workpiece might not be secure. Properly clamp the workpiece on the table or in a vise. * The spindle might be extended too far down during operation. Fully retract the spindle and lower the headstock to increase rigidity.
  • N
    Norman ClarkAug 31, 2025
    Why Grizzly Drill headstock is hard to raise?
    • K
      Kathleen BarkerAug 31, 2025
      If the headstock of your Grizzly Drill is hard to raise, it could be due to: * Faulty headstock lock nuts. Loosen or replace the lock nuts. * A faulty rack and pinion, or one jammed with grime or debris. Fix or replace any broken or loose parts, and clean and lubricate the rack and pinion.
  • A
    Adam EstradaSep 1, 2025
    Why Grizzly Drill spindle overheats?
    • R
      Ryan WellsSep 2, 2025
      If the spindle of your Grizzly Drill overheats, it is because the drill operated at high speeds for an extended period. Allow the drill to cool.
  • J
    jasmine48Sep 3, 2025
    Why Grizzly G7947 Drill spindle does not return to highest position?
    • A
      Adam JacksonSep 3, 2025
      If the spindle of your Grizzly Drill does not return to the highest position, it may be due to: * A poorly adjusted return spring. Increase the return spring tension. * A worn return spring. Replace the return spring.
  • Z
    Zoe BaileySep 5, 2025
    Why Grizzly Drill depth stop pro ducing inaccurate results?
    • J
      Joseph HudsonSep 5, 2025
      If the depth stop on your Grizzly Drill is producing inaccurate results, it is because the depth stop is not calibrated. Calibrate the depth stop.
  • A
    Amy WalkerSep 6, 2025
    What to do if my Grizzly Drill machine does not start?
    • H
      Heather PriceSep 7, 2025
      If your Grizzly Drill doesn't start, several factors could be at play. First, check the power plug and receptacle to ensure they are making good contact and are wired correctly. A faulty start capacitor could also be the culprit, requiring replacement. Inspect the motor connection for correct wiring. Ensure your power supply is functioning correctly with the correct voltage on all legs. The safety switch key might be defective, so try replacing it or the entire switch assembly. A faulty ON/OFF switch can also prevent starting, necessitating replacement. Look for any breaks or high resistance in the cables and wiring, repairing or replacing as needed. Finally, the motor itself might be at fault, requiring testing, repair, or replacement.
  • J
    Jesse HowardSep 12, 2025
    What to do if drilling stops, but the Grizzly Drill motor still operates?
    • M
      montesamySep 12, 2025
      If your Grizzly Drill stops drilling but the motor continues to run, it could be due to a loose or worn belt, so replace and/or adjust the belt. Another cause may be that the pulley for the spindle shaft or the motor is slipping on the shaft. To resecure the pulley: a. UNPLUG THE DRILL PRESS. b. Remove the setscrew on the slipping pulley. c. Align the flats on the pulley shaft with the setscrew hole. d. Reinstall and tighten the setscrew. Also, check if the bit slips in the chuck. If so, tighten the bit and inspect it for burrs or other obstructions that might interfere with the clamping surface.
  • S
    Steve BonillaSep 13, 2025
    Why does the chuck wobble or feel loose on the spindle shaft of my Grizzly Drill?
    • S
      Suzanne GrahamSep 13, 2025
      If the chuck on your Grizzly Drill wobbles or feels loose, it might be due to foreign material stuck between the chuck-to-spindle mating surface. In this case, remove the chuck and clean and deburr the tapered chuck and spindle mating surfaces, then reassemble. Alternatively, the chuck may be damaged and require replacement.

Summary

Contact Information

Manual Accuracy and Updates

Machine Description and Differences

Component Identification

Right-Side Controls

Identifies controls located on the right side of the drill press.

Left-Side Controls

Identifies controls located on the left side of the drill press.

Controls and Components Overview

Headstock Controls (Right)

Details the controls on the right side of the headstock.

Headstock Controls (Left)

Details the controls on the left side of the headstock.

G7947 Machine Specifications

G7947 Main Specifications

Operation Information

Details operational specifications for the drill press.

Spindle Information

Covers specifications related to the spindle assembly.

Table Information

Outlines the specifications for the drill press table.

G7948 Machine Specifications

G7948 Main Specifications

Operation Information

Details operational specifications for the G7948 drill press.

Spindle Information

Covers specifications related to the G7948 spindle assembly.

Table Information

Outlines the specifications for the G7948 drill press table.

Section 1: Safety Instructions and Warnings

General Machinery Safety

Provides essential safety instructions for operating machinery.

Drill Press Specific Safety Precautions

Preventing Entanglement and Injury

Addresses risks of entanglement and hand injuries during operation.

Workpiece and Tooling Safety

Covers secure workpiece handling and tool inspection for safety.

Section 2: Power Supply Requirements

Power Supply Availability and Circuit Info

Discusses power supply availability and circuit requirements.

120 V Circuit Requirements

Details the circuit requirements for 120V operation.

240 V Circuit Requirements

Details the circuit requirements for 240V operation.

Grounding and Extension Cord Usage

Grounding Requirements

Explains essential grounding procedures for safe operation.

Extension Cord Usage Guidelines

Provides recommendations and requirements for using extension cords.

Converting Voltage to 240 V

Section 3: Setup and Unpacking Procedures

Items Needed for Setup

Lists tools and items required for machine setup.

Machine Unpacking Instructions

Guides the user through the unpacking process.

Setup Inventory and Parts Check

Shipped Items Inventory

Lists all items shipped with the machine for inventory.

Cleanup Procedures

Site Considerations for Machine Placement

Weight Load and Space Allocation

Addresses weight capacity and space needed for operation.

Physical Environment and Electrical Installation

Covers optimal physical environment and electrical setup.

Anchoring and Mobile Base Mounting

Anchoring Machinery to the Floor

Explains methods for securing the machine to the floor.

Mounting to a Mobile Base

Details how to mount the drill press on a mobile base.

Machine Assembly Guide

Securing Column and Installing Pinion

Details securing the column to the base and installing the pinion.

Machine Assembly Guide (Continued)

Assembling Table Support and Headstock

Covers installation of table support, column ring, and levers.

Mounting the Headstock Assembly

Guides the safe mounting of the heavy headstock.

Machine Assembly Guide (Continued)

Positioning and Securing Headstock to Column

Details the process of aligning and securing the headstock.

Machine Assembly Guide (Continued)

Installing Chuck Guard and Table

Covers installation of the chuck guard, handles, and table.

Light Bulb Installation (120 V)

Instructions for installing a light bulb for 120V operation.

Joining Drill Chuck and Arbor

Machine Test Run Procedure

Section 4: Operations Overview and Safety

Typical Operation Overview

Provides a general understanding of machine operation steps.

Calculating Spindle Speed for Drilling

Drill Bit Speed Chart

Provides recommended spindle speeds for various drill bits and materials.

Changing Spindle Speeds

Drilling Operation Guidelines

Drilling Safety and Material Considerations

Covers safety, workpiece, and material handling during drilling.

Bit and Cutter Specifics

Discusses specific types of bits and cutters for drilling.

Installing and Removing Drill Bits

Setting the Depth Stop

Positioning the Drill Press Table

Adjusting Table Height

Instructions for adjusting the table's vertical position.

Adjusting Table Rotation

Instructions for rotating the table horizontally.

Adjusting Table Tilt

Instructions for tilting the table to desired angles.

Removing the Arbor

Section 5: Recommended Accessories

Drill Press Vise and Sanding Drums

Describes the 6" drill press vise and sanding drum set.

Protective Lubricants and Treatments

Lists recommended products for protecting metal surfaces.

Safety Accessories and Drill Bits

Basic Eye and Respiratory Protection

Lists safety glasses, face shields, and respirators.

Cobalt Alloy Drill Bits

Details the benefits of Cobalt Alloy drill bits.

Drill Press Tables and Hearing Protection

Drill Press Table Attachment

Describes an optional drill press table attachment.

Hearing Protection Options

Lists various types of earmuffs and earplugs.

Specialized Attachments and Sharpening

Mortising Attachment and Drill Bit Sharpening

Covers mortising attachment and drill bit sharpening machine.

Step Drill Sets and Anti-Fatigue Mats

Details step drill sets and anti-fatigue floor mats.

Section 6: Maintenance Overview

General Maintenance and Checks

Outlines general maintenance practices and checks.

Cleaning and Protecting Surfaces

Provides instructions for cleaning and protecting the machine.

Lubrication Guidelines

Details lubrication requirements for machine components.

V-Belt Inspection and Care

Covers inspection and care of the V-belts.

Section 7: Service and Troubleshooting

Motor and Electrical Troubleshooting

Addresses issues related to the motor and electrical systems.

Drill Press Operations Troubleshooting

Spindle and Workpiece Vibration Issues

Troubleshoots issues with spindle power, vibration, and surface finish.

Spindle Overheating and Depth Stop Issues

Addresses spindle overheating and depth stop calibration problems.

Service Procedures

Calibrating the Depth Stop

Explains how to calibrate the depth stop scale.

Tensioning the Spindle Return Spring

Details how to adjust the spindle return spring tension.

Section 8: Wiring Safety and Instructions

Wiring Safety Instructions

Provides critical safety guidelines for electrical wiring tasks.

Wiring Connections and Requirements

Covers wire connections, component damage, and circuit requirements.

Electrical Components Overview

Power and Light Switch Assembly

Details the power and light switch assembly.

Light Socket and Motor Wiring

Explains the light socket and motor junction box wiring.

G7947;G7948 Wiring Diagram

Section 9: Parts Breakdown and Information

G7947 Stand and Table Breakdown

Illustrated breakdown of the G7947 stand and table components.

G7947 Headstock Breakdown

G7947 Parts List

G7948 Parts Breakdown

G7948 Stand and Table Breakdown

Illustrated breakdown of the G7948 stand and table components.

G7948 Headstock Breakdown

G7948 Parts List

Labels and Cosmetics

Machine ID and Warning Labels

Details the machine ID, shock, pinch, and electricity warning labels.

Accessory and Safety Labels

Covers light bulb notice, touch-up paint, and entanglement labels.

Warranty and Returns Information

Grizzly G7947 Specifications

General IconGeneral
BrandGrizzly
ModelG7947
CategoryDrill
LanguageEnglish

Related product manuals