EasyManua.ls Logo

Grizzly G0761 - User Manual

Grizzly G0761
56 pages
Print Icon
To Next Page IconTo Next Page
Loading...
MODEL G0761
HEAVY-DUTY BENCHTOP
MILL/DRILL w/POWER FEED
& TAPPING
OWNER'S MANUAL
(For models manufactured since 10/13)
COPYRIGHT © MAY, 2014 BY GRIZZLY INDUSTRIAL, INC.
WARNING: NO PORTION OF THIS MANUAL MAY BE REPRODUCED IN ANY SHAPE
OR FORM WITHOUT THE WRITTEN APPROVAL OF GRIZZLY INDUSTRIAL, INC.
#TS16056 PRINTED IN CHINA
V1.05.14

Table of Contents

Questions and Answers

  • D
    Debra JenkinsJul 29, 2025
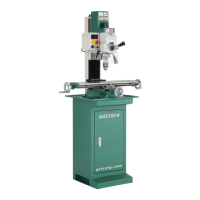
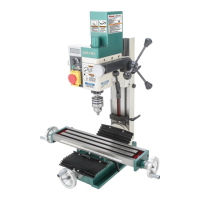
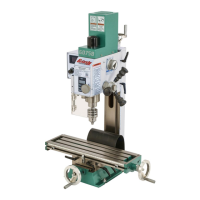
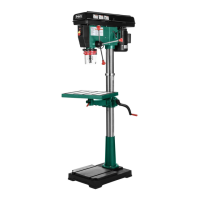
    Why Grizzly Drill doesn't start?
    • L
      lisa32Jul 29, 2025
      If your Grizzly Drill doesn't start, several factors could be at play. First, check the plug for any damage and ensure it's wired correctly. Verify that the power supply voltage matches the circuit requirements. Also, inspect the wall fuse or circuit breaker to see if it's blown or tripped; if so, reset the breaker or replace the fuse after ensuring there isn't a short circuit. Examine the wiring for any breaks, disconnections, or corrosion, and repair or replace as needed. Check the spindle switch to ensure it's wired correctly, and replace it if faulty. If these steps don't resolve the issue, the motor wiring or the motor itself may be at fault and require testing, repair, or replacement.
  • L
    lauraliAug 7, 2025
    What to do if Grizzly G0761 Drill stalls?
    • J
      John ScottAug 7, 2025
      If your Grizzly Drill stalls or is overloaded, first decrease the feed rate and cutting speed. Ensure you're using the correct cutter for the task. If the machine seems undersized, use smaller or sharper tooling, reduce the feed rate or spindle speed, and consider using cutting fluid. If the motor has overheated, clean it off, let it cool, and reduce the workload. Check the motor wiring. Test the motor bearings by rotating the shaft; grinding or looseness indicates bearing replacement is needed. If problems persist, the motor itself may be at fault and require testing, repair, or replacement.
  • W
    William WalkerAug 11, 2025
    How to prevent breaking tools on Grizzly G0761 Drill?
    • W
      William WallaceAug 11, 2025
      If you are breaking tools or cutters with your Grizzly Drill, adjust the spindle speed or use a slower feed rate. Use a larger cutting tool and a slower feed rate. Use coolant or oil for the appropriate application. Decrease the depth of cut. Fully retract the spindle and lower the headstock to increase rigidity.
  • W
    wilsonjodiAug 16, 2025
    Why does my Grizzly G0761 Drill workpiece vibrate?
    • S
      sparkerAug 16, 2025
      If the workpiece vibrates or chatters during operation with your Grizzly Drill, ensure that the table locks are tight. Properly clamp the workpiece on the table or in a vise. Adjust the spindle speed or use a slower feed rate. Fully retract the spindle and lower the headstock to increase rigidity.
  • D
    Dr. Jesse Cox PhDAug 20, 2025
    How to fix a hard to move table on Grizzly G0761 Drill?
    • T
      Travis BakerAug 20, 2025
      If the table on your Grizzly Drill is hard to move, ensure that the table locks are fully released. Frequently clean away chips that load up during milling operations. Check that all table limit stops are not in the way. If necessary, adjust the gibs.
  • S
    Steven OlsenAug 25, 2025
    What to do if tool slips in Grizzly G0761 Drill spindle?
    • B
      bhartmanAug 25, 2025
      If the tool slips in the spindle of your Grizzly Drill, tighten the drawbar. Clean the collet and spindle taper to remove any debris. Lessen the depth of cut and allow chips to clear.
  • N
    Nicole WilliamsonNov 2, 2025
    Why does my Grizzly G0761 vibrate so much?
    • M
      Mr. Matthew Huff PhDNov 2, 2025
      If your Grizzly Drill is vibrating or operating noisily, start by checking if any motor or machine components are loose. Inspect for stripped or damaged bolts and nuts, and retighten them using thread locking fluid. Ensure the workpiece is properly clamped. Reduce the depth of cut if it's excessive. Verify that the cutter or tooling is securely fastened. Replace or sharpen the cutter if it's dull or faulty. If the bit is chattering, try replacing or sharpening it, indexing it to the workpiece, and using an appropriate feed rate and cutting RPM. Check the machine's mounting and ensure it sits evenly; tighten or replace mounting bolts, and relocate or shim the machine if necessary. Inspect the motor fan for rubbing against the fan cover, and replace the cover or fan if damaged. Finally, test...

Summary

INTRODUCTION

Machine Description

Describes the mill/drill's function in milling, drilling, and tapping operations.

Manual Accuracy

Explains the manual's accuracy and how to get updates or assistance.

Identification

Basic Controls

POWER Lamp

Illuminates when the machine is connected to power.

Mode Switch

Sets spindle mode to drilling/milling or tapping.

High;Low Range Lever

Selects high or low spindle speed range.

Spindle Speed Lever

Selects one of three spindle speeds in the selected range.

SPINDLE REVERSE Button

Starts counterclockwise spindle rotation.

EMERGENCY STOP Button

Cuts power to spindle motor and remains depressed.

STOP Button

Stops spindle rotation.

SPINDLE FORWARD Button

Starts clockwise spindle rotation.

MACHINE DATA SHEET

MACHINE DATA SHEET - Table & Spindle Info

Table Info

Details table dimensions, T-slot specifications, and centers.

Spindle Info

Provides spindle taper, speeds, diameter, and bearing type.

SECTION 1: SAFETY

Safety Instructions for Machinery

Covers general safety, electrical hazards, eye protection, and proper attire.

General Safety Precautions

Additional Safety for Mill;Drills

SECTION 2: POWER SUPPLY

Availability

Discusses power supply circuit requirements and professional installation.

Full-Load Current Rating

Explains current draw and its relation to circuit sizing.

Power Supply Details

Grounding Instructions

Details proper grounding of the machine for electrical safety.

Extension Cords

Provides guidelines for using extension cords with the machine.

SECTION 3: SETUP

Unpacking

Instructions on how to unpack the machine and inspect for damage.

Inventory

Lists all items included with the machine for inventory purposes.

Needed for Setup

Cleanup

Site Considerations

Weight Load

Ensures the supporting surface can bear the machine and workpiece weight.

Space Allocation

Determines necessary space for operation, material handling, and maintenance.

Physical Environment

Specifies ideal environmental conditions for machine operation and longevity.

Electrical Installation

Guides placement near power and cord protection.

Lighting

Emphasizes adequate and safe lighting for operations.

Lifting & Placing

Bench Mounting

Assembly

Joining Drill Chuck & Arbor

Lubricating Mill;Drill

Test Run

Test Run Procedure

Spindle Bearing Break-In

Inspections & Adjustments

SECTION 4: OPERATIONS

Operation Overview

Provides a basic understanding of machine operation for novice users.

Downfeed Controls

Identification

Identifies the various downfeed control components on the machine.

Using Coarse Downfeed

Instructions for operating the spindle using coarse downfeed handles.

Using Fine Downfeed

Instructions for operating the spindle using the fine downfeed handwheel.

Depth Stop

Explains the function and adjustment of the depth stop mechanism.

Headstock Movement

Raising;Lowering Headstock

Procedure to adjust the vertical position of the headstock.

Tilting Headstock

Procedure to adjust the tilt angle of the headstock.

Table Travel

X-Axis Handwheel

Instructions for moving the table using the X-axis handwheel.

Graduated Dials

Explains the use of graduated dials for precise table movement.

Y-Axis Handwheel

Instructions for moving the table using the Y-axis handwheel.

X-Axis Power Feed

Limit Stops & Switch

Details the function of limit stops and switches for X-axis table movement.

Installing;Removing Tooling

Tooling Installation & Removal

Installing Tooling

Step-by-step guide for securely installing tools into the spindle.

Removing Tooling

Step-by-step guide for safely removing tools from the spindle.

Spindle Speed

Determining Spindle Speed

Explains factors and formula for calculating optimal spindle speed.

Setting Spindle Speed

Instructions for configuring speed levers to achieve desired RPM.

Tapping Mode

SECTION 5: ACCESSORIES

Milling Vises

Details precision and specialty milling vises for various operations.

Lubrication Oils

Lists recommended oils for machine maintenance and lubrication.

Machine Accessories

Rotary Table Set

Describes the 6" Rotary Table Set for milling applications.

Grease & Clamping Kit

Details Armor Plate grease and a 52-piece clamping kit.

Collet Sets

Presents South Bend® R-8 Collet Sets for quick-change tooling.

SECTION 6: MAINTENANCE

Schedule

Outlines a maintenance schedule for daily, 8, 40, and 90-hour intervals.

Cleaning and Protecting

Instructions for cleaning chips and protecting surfaces from rust.

Lubrication

Emphasizes cleaning components before lubricating for smooth operation.

Headstock Lubrication

Component Lubrication

Ball Oilers Lubrication

Instructions for lubricating handwheel ball oilers using a pump-type oil can.

Table & Column Ways Lubrication

Procedure for cleaning and lubricating table and column ways.

Sliding Surface Lubrication

Quill Outside Surface Lubrication

Instructions for cleaning and lubricating the quill's smooth surface.

Table Leadscrews Lubrication

Procedure for cleaning and lubricating X- and Y-axis leadscrews.

Gear and Rack Lubrication

Column Leadscrew, Nut, & Pinion Gear Lubrication

Procedure for cleaning and greasing Z-axis leadscrew components.

Quill Rack & Pinion Lubrication

Instructions for cleaning and greasing the quill rack and pinion teeth.

SECTION 7: SERVICE

Troubleshooting

Lists common symptoms, their possible causes, and solutions.

Troubleshooting Guide

Service Procedures

Adjusting Gibs

Procedure for adjusting gibs to control table movement accuracy and stiffness.

Adjusting Leadscrew Backlash

Procedure to adjust leadscrew backlash for smooth operation and reduced wear.

Tightening Return Spring Tension

SECTION 8: WIRING

Wiring Safety Instructions

Covers hazards related to wiring, modifications, connections, and components.

Electrical Box & Control Panel Wiring

Control Panel & Electrical Box Wiring Diagrams

Motor & Tapping Switches Wiring

SECTION 9: PARTS

Headstock Parts

Exploded view and list of parts for the headstock assembly.

Parts Breakdown

Headstock Parts List

Detailed list of part numbers and descriptions for the headstock.

Headstock Parts List Continued

Table & Column Parts

Table & Column Parts List

Electrical Parts List

Accessories Parts List

Labels & Cosmetics

WARRANTY & RETURNS

Grizzly G0761 Specifications

General IconGeneral
Motor1 HP
Swing12"
Spindle taperMT2
Spindle travel3-1/8"
Number of speeds12
Speed range250 - 3050 RPM
Table size9-1/2" x 9-1/2"
Chuck Size5/8"
Drilling capacity1"

Related product manuals