EasyManua.ls Logo

Grizzly G0705 - User Manual

Grizzly G0705
60 pages
Print Icon
To Next Page IconTo Next Page
Loading...
COPYRIGHT © MARCH, 2010 BY GRIZZLY INDUSTRIAL, INC. REVISED APRIL, 2013 (TR)
WARNING: NO PORTION OF THIS MANUAL MAY BE REPRODUCED IN ANY SHAPE
OR FORM WITHOUT THE WRITTEN APPROVAL OF GRIZZLY INDUSTRIAL, INC.
(FOR MODELS MANUFACTURED SINCE 09/09) #JB12469 PRINTED IN CHINA
MODEL G0705
MILL/DRILL w/STAND
OWNER'S MANUAL

Questions and Answers

  • C
    Christina BradfordAug 13, 2025
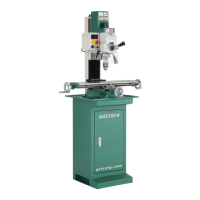
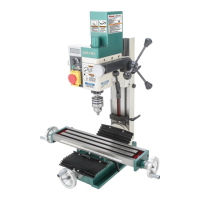
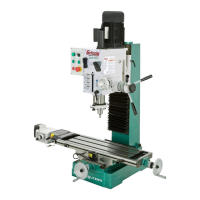
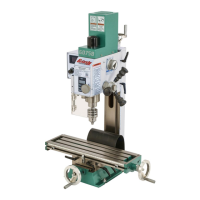
    Why won't my Grizzly G0705 Drill start?
    • K
      Kevin KelleyAug 13, 2025
      If your Grizzly Drill won't start, several factors could be at play. It could be due to a blown wall fuse or tripped circuit breaker. Ensure the circuit size is correct and there isn't a short; then, reset the breaker or replace the fuse. The plug might be faulty or wired incorrectly, so check for damage and correct wiring. Incorrect motor wiring, open wiring, or high resistance could also be culprits; inspect for broken wires or corroded connections and repair or replace them as needed. The machine power switch could be at fault, so ensure it's wired correctly and replace it if necessary. Lastly, the motor itself might be faulty, requiring testing, repair, or replacement.
  • C
    Charles SalazarAug 25, 2025
    Why am I breaking cutters on my Grizzly Drill?
    • H
      Hannah ParrishAug 25, 2025
      Breaking tools or cutters on your Grizzly Drill can be caused by a few things. The spindle speed might be too slow, or the feed rate too fast; set the spindle speed correctly or use a slower feed rate. The cutting tool might be getting too hot; use coolant fluid or oil for the appropriate application. You might be taking too big of a cut; decrease the depth of cut. The spindle might be extended too far down; fully retract the spindle and lower the headstock to increase rigidity.
  • A
    Angela JenningsAug 28, 2025
    How to improve surface finish with Grizzly Drill?
    • A
      Alison JacksonAug 28, 2025
      To improve the surface finish when using your Grizzly Drill, check the following: Your spindle speed may be too slow, or your feed rate too fast; set the spindle speed correctly or use a slower feed rate. You might be using a dull or incorrect cutting tool; sharpen your cutting tool or select one that better suits the operation. Ensure the cutting tool has the correct direction of rotation. The workpiece might not be securely clamped; secure it properly to the table. The spindle might be extended too far down; fully retract the spindle and lower the headstock to increase rigidity.
  • L
    Luke YatesSep 1, 2025
    What causes workpiece vibration with Grizzly G0705?
    • C
      Christine DaySep 2, 2025
      Workpiece vibration or chattering during operation with your Grizzly Drill can be attributed to several factors. Ensure the table locks are tight. Also, check that the quill lock lever is tightened. Verify that the workpiece is securely clamped to the table or in the mill vice, ensuring the mill vice is tight to the table. An incorrect spindle speed or feed rate can also cause vibration; set the spindle speed correctly or use a slower feed rate. Lastly, if the spindle is extended too far down, fully retract it and lower the headstock to increase rigidity.
  • C
    Carmen WilsonSep 5, 2025
    What to do if the tool slips in the collet of my Grizzly G0705?
    • J
      Jason ButlerSep 5, 2025
      If the tool slips in the collet of your Grizzly Drill, it could be because the collet is not fully drawn up into the spindle taper; tighten the drawbar. It could also be due to using the wrong size collet; measure the tool shank diameter and match it with an appropriately sized collet. Debris on the collet or in the spindle taper can also cause slippage; clean the collet and spindle taper. Taking too big of a cut can also be a factor; lessen the depth of cut and allow chips to clear. Finally, making a climb cut can cause slippage; reverse the feed direction to avoid climb cuts.
  • C
    Christine CombsSep 9, 2025
    Why is the table on my Grizzly G0705 Drill hard to move?
    • S
      Stephanie MckenzieSep 9, 2025
      If the table on your Grizzly Drill is hard to move, start by checking if the table locks are released. Chips may have loaded up on the ways; clean away chips frequently during milling operations. The ways may be dry and need lubrication. Also, check that all table limit stops are not interfering. Finally, the gibs may be too tight.
  • J
    Jeffrey WhiteNov 16, 2025
    What to do if my Grizzly G0705 stalls?
    • J
      Jennifer CortezNov 17, 2025
      If your Grizzly Drill stalls or is overloaded, consider the following: * The feed rate might be too fast, or the cutting speed too slow; adjust accordingly. * You might be using the wrong cutter type; ensure you're using the correct cutter for the task. * The machine might be undersized for the task, or the tooling might be incorrect; use smaller or sharper tooling, reduce the feed rate or spindle speed, and use cutting fluid if possible. * The motor connection might be wired incorrectly; wire the motor correctly for the intended voltage. * The motor might have overheated; clean off the motor, let it cool, and reduce the workload. * The motor bearings might be at fault; test by rotating the shaft—rotational grinding or a loose shaft indicates bearing replacement is needed. * ...
  • J
    jonessaraNov 20, 2025
    How to reduce vibration in my Grizzly G0705?
    • T
      Tammy AndersonNov 20, 2025
      Excessive vibration or noise in your Grizzly Drill can stem from several sources. Begin by checking for loose components; inspect and replace any stripped or damaged bolts or nuts, and re-tighten them using thread-locking fluid. An excessive depth of cut can also cause vibration, so decrease it. Ensure your cutter or tooling is properly secured. If the cutter is dull or faulty, replace or resharpen it. If the bit is chattering, replace or sharpen it, index it to the workpiece, and use the appropriate feed rate and cutting RPM. An overextended quill can also contribute to vibration; retract the quill and lower the headstock. Finally, ensure the machine is correctly mounted and sits evenly; tighten or replace mounting bolts and relocate or shim the machine if necessary. Motor bearings at fau...

Summary

Introduction

Manual Accuracy

Explains potential discrepancies between manual and machine for user reference.

Contact Information

Provides contact details for technical support and feedback.

Machine Description

Describes the mill/drill's purpose, function, and basic operation.

SECTION 1: SAFETY

Safety Instructions for Machinery

Critical safety guidelines for operating the mill/drill and general precautions.

Additional Safety for Mill;Drills

Specific safety precautions and warnings for mill/drill operations.

SECTION 2: POWER SUPPLY

Availability and Circuit Information

Details power supply availability and general circuit information requirements.

Circuit Requirements for 220 V

Specifies electrical requirements for 220V operation, including voltage and amperage.

Circuit Requirements for 110 V

Specifies electrical requirements for 110V operation, including voltage and amperage.

Grounding Requirements

Explains essential grounding procedures for electrical safety and equipment protection.

Extension Cords

Guidance on using extension cords, including limitations and gauge requirements.

Voltage Conversion

Explains the need for professional voltage conversion and references the procedure.

110 V Conversion Procedure

Step-by-step instructions for converting the machine to 110V operation.

SECTION 3: SETUP

Needed for Setup

Lists necessary tools and items required to complete machine setup.

Unpacking Instructions

Guides on safely removing the machine from its packaging and inspecting for damage.

Inventory Check

Details how to check all shipped items against the provided parts list.

Cleanup Procedures

Steps for removing rust preventative from unpainted surfaces.

Site Considerations

Discusses weight load, space, environment, electrical, and lighting needs.

Mounting Options

Details methods for mounting and leveling the machine, including options.

Moving & Placing Machine

Guides on safely moving and positioning the machine unit.

Leveling the Machine

Instructions for ensuring the machine table is level from all sides.

Mounting to a Workbench

Describes methods for securely attaching the machine to a workbench.

Assembly Steps

Instructions for attaching handwheel handles to the machine.

Test Run Procedure

Steps to verify the machine operates correctly before regular use.

Break-In Procedure

Essential steps for breaking in the spindle bearings for longevity.

SECTION 4: OPERATIONS

Operation Overview

Provides a general understanding of machine operations and key concepts.

Head and Spindle Controls

Explains controls for quill, depth stop, and spindle levers.

Table Travel Controls

Details handwheels, locks, and scales for X and Y axis movement.

Graduated Dials for Precision Movement

Explains how to use graduated dials for accurate movements.

Spindle Speed for Milling

Guides on calculating and setting spindle speeds for milling operations.

Speed Changes and Adjustment

Instructions for changing spindle speeds via pulley system adjustment.

Spindle Speed for Drilling

Provides recommended speeds for drilling various materials and tools.

Spindle Height Adjustment

Instructions for adjusting spindle height and locking the quill.

Tooling Installation and Removal

Guides on installing and removing tooling like collets and chucks.

Drill Chuck and Collet Adapter Installation

Instructions for installing drill chucks and using collet adapters.

Headstock Position Adjustment

Details adjusting headstock height and clamping it securely.

Depth Stop Calibration

Guides on setting and calibrating the depth stop for precise cuts.

SECTION 5: ACCESSORIES

Collet, Clamping, and Rotary Table Accessories

Lists common accessories like collet sets, clamping kits, and rotary tables.

Boring Heads and Milling Accessories

Describes boring head sets and face milling accessories.

Specialized Mill Accessories

Covers end mill sets, blocks, and edge finders.

Power Feed Accessory

Information on the optional power feed system for enhanced control.

SECTION 6: MAINTENANCE

Maintenance Schedule

Outlines daily, monthly, and biannual checks for optimal performance.

Cleaning and Protecting Surfaces

Procedures for cleaning the machine and protecting cast iron surfaces.

Lubrication Procedures

Details specific lubrication points and methods for smooth operation.

V-Belt Inspection and Replacement

Instructions for checking V-belt tension and replacing worn belts.

SECTION 7: SERVICE

Troubleshooting Common Issues

Provides solutions for common machine problems like starting issues or vibrations.

Gib Adjustment

Guides on adjusting table gibs for smooth, play-free movement.

Return Spring Tension Adjustment

Instructions for adjusting the quill recoil spring tension.

Leadscrew Backlash Adjustment

Instructions for reducing play in table movement via leadscrew adjusters.

SECTION 8: WIRING

Wiring Safety Instructions

Critical safety warnings and guidelines for working with electrical wiring.

G0705 Wiring Diagram and Components

Detailed wiring diagrams and information on electrical components.

SECTION 9: PARTS

Headstock Parts Identification

Breakdown and list of parts for the headstock assembly.

Base Parts Identification

Breakdown and list of parts for the machine base and stand.

Electrical Components Breakdown

Lists electrical components for reference and troubleshooting.

Labels Breakdown and List

Identifies all safety and information labels on the machine.

WARRANTY AND RETURNS

Warranty Information and Procedures

Details the product warranty period and how to make a claim.

Grizzly G0705 Specifications

General IconGeneral
Voltage110V
Spindle Speeds5
Spindle Speed100 - 2, 500 RPM
Motor1 HP
Drill Capacity1/2 in.
Table Size9-1/2" x 9-1/2"
Table T-Slot Size5/8"

Related product manuals