EasyManua.ls Logo

Grizzly G8689Z - User Manual

Grizzly G8689Z
52 pages
Print Icon
To Next Page IconTo Next Page
Loading...
COPYRIGHT © AUGUST, 2023 BY GRIZZLY INDUSTRIAL, INC.
WARNING: NO PORTION OF THIS MANUAL MAY BE REPRODUCED IN ANY SHAPE
OR FORM WITHOUT THE WRITTEN APPROVAL OF GRIZZLY INDUSTRIAL, INC.
#CS22812 PRINTED IN CHINA
V1.08.23
MODEL G8689Z
4" X 16" MINI MILLING
MACHINE
OWNER'S MANUAL
(For models manufactured since 07/23)
***Keep for Future Reference***

Questions and Answers

  • R
    rachelsantiagoAug 12, 2025
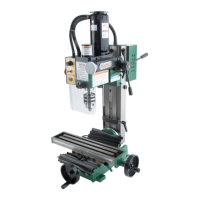
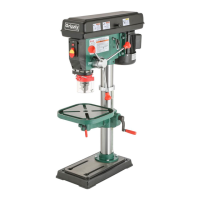
    Why is my Grizzly G8689Z breaking tools or cutters?
    • P
      Pamela SmithAug 12, 2025
      If your Grizzly Power Tool is breaking tools or cutters, it might be due to several reasons. The spindle speed could be too fast for the depth of cut, cutting tool size, or workpiece material. Try reducing the spindle speed and feed rate, and take lighter cuts. Ensure you are using the proper lubricant for the operation, as improper or no lubricant can cause the cutting tool to overheat. Check if the cutting tool is dull or incorrect; if so, sharpen or replace it, selecting a better tool for the operation. Also, consider if the cutting tool is too small; using a larger cutting tool and slower feed rate may help. Finally, avoid taking too big of a cut by lessening the depth of cut and allowing chips to clear.
  • J
    Jaime AndersonAug 16, 2025
    What to do if my Grizzly G8689Z Power Tool workpiece or tool vibrates or chatters during operation?
    • C
      Carol PonceAug 16, 2025
      If your Grizzly Power Tool workpiece or tool vibrates or chatters during operation, first check that the table lock handles are tight. If not, tighten them. Ensure the workpiece is properly clamped on the table or in a vise. If the spindle speed or feed rate is too fast, reduce them. Also, check if the gibs are too loose in the table and tighten them if necessary. Replace or sharpen the bit if it's chattering, index the bit to the workpiece, and reduce the feed rate. Finally, the chuck or cutter may be at fault, so replace an unbalanced chuck or replace/sharpen the cutter.
  • A
    Andrew StewartAug 20, 2025
    How to improve bad surface finish with Grizzly G8689Z?
    • G
      Gary KnoxAug 20, 2025
      If you're experiencing a bad surface finish with your Grizzly Power Tool, consider the following: The spindle speed or feed rate might be too fast, so try reducing both. Ensure the workpiece is securely clamped on the table or in a vise. Check if the cutting tool is dull or incorrect; if so, sharpen or replace it, and select a better tool for the operation. Also, verify that the cutting tool is designed for the correct rotation direction and replace it if necessary.
  • A
    Amy CooperAug 25, 2025
    Why is the table hard to move on my Grizzly G8689Z?
    • J
      Juan CarrilloAug 25, 2025
      If the table on your Grizzly Power Tool is hard to move, first check if the table lock handles are tightened down and loosen them. Make sure to frequently clean away chips during operations, as they can load up on the ways. Ensure the table ways are lubricated. If the gibs are too tight, loosen them. Lastly, the X-/Y-axis leadscrews might be binding, so clean and lubricate them.
  • U
    upayneAug 27, 2025
    How to fix a tool that is loose in the spindle of my Grizzly G8689Z Power Tool?
    • A
      Alexis JenkinsAug 27, 2025
      If the tool is loose in the spindle of your Grizzly Power Tool, make sure the cutter or tooling is secured properly. If the cutting tool holder is not fully drawn up into the spindle taper, tighten the drawbar. Also, check for debris on the cutting tool holder or in the spindle taper and clean them if necessary. Finally, avoid taking too big of a cut by lessening the depth of cut and allowing chips to clear.
  • A
    Amanda GarciaAug 31, 2025
    Why is the headstock hard to move on my Grizzly G8689Z Power Tool?
    • J
      Joshua SmithAug 31, 2025
      If the headstock on your Grizzly Power Tool is hard to move, first check if the headstock lock handle is tightened down and loosen it. Ensure the downfeed lever hub teeth are disengaged for rapid downfeed and engaged for micro downfeed. Frequently clean away chips during operations, as they can load up on the column ways. Clean and lubricate the column ways and rack. If the gib is too tight, loosen it. Finally, the headstock counterbalance spring might be at fault, in that case replace the spring assembly.
  • V
    vbuchananSep 4, 2025
    What causes a cutting result that is not square on my Grizzly G8689Z Power Tool?
    • D
      dgeorgeSep 4, 2025
      If your Grizzly Power Tool cutting result is not square, it could be due to the spindle not being exactly 90° to the table, so tram the spindle. Another cause could be inconsistent table travel, in that case adjust the gibs.
  • S
    Steven RogersSep 8, 2025
    Why does the spindle overheat on my Grizzly Power Tool?
    • L
      lopezjefferySep 8, 2025
      If the spindle of your Grizzly Power Tool overheats, it could be because the machine was operated at maximum speed for an extended period. Allow the machine to cool and avoid operating at maximum speed for long durations. Another cause could be poor spindle bearing lubrication, in that case replace the spindle bearings.

Summary

INTRODUCTION

Contact Information

Provides contact details for Grizzly Technical Support and feedback.

Manual Accuracy and Updates

Explains efforts to ensure accuracy and where to find updates.

Identification of Machine Components

Controls and Components Overview

Power Controls

Details power indicators, speed dial, and ON/OFF switches.

Spindle Controls

Explains spindle downfeed levers, lock handles, and depth stops.

Table and Left Spindle Components

MACHINE DATA SHEET

SECTION 1: SAFETY

Safety Instructions for Machinery

Covers essential safety guidelines for operating machinery.

Safety Symbol Definitions

Explains the meaning of DANGER, WARNING, CAUTION, and NOTICE signals.

General Safety Precautions

Lists various safety precautions for apparel, dust, hearing, and operation.

Additional Safety for Mill;Drills

Provides specific safety advice for mill/drill operations.

SECTION 2: POWER SUPPLY

Power Supply Requirements

Details voltage, cycle, phase, and circuit requirements.

Full-Load Current Rating

Explains the machine's current draw and circuit sizing.

Grounding and Extension Cords

Covers grounding requirements and recommendations for extension cords.

SECTION 3: SETUP

Setup Preparation

Lists items needed for setup and explains the unpacking process.

Unpacking Procedure

Details how to unpack the machine and inspect for damage.

Inventory Check

Instructions for checking loose inventory items.

Cleanup Process

Guide for cleaning rust preventative from unpainted surfaces.

Site Considerations

Discusses workbench load and placement location requirements.

Lifting and Placing the Machine

Step-by-step guide for safely lifting and positioning the machine.

Leveling and Bench Mounting

Explains the importance of leveling and methods for bench mounting.

Test Run Procedures

Spindle Break-In Procedure

SECTION 4: OPERATIONS

Operation Overview

Provides a basic understanding of machine operation.

Positioning the Table

Details table movement, handwheel dials, and lock handles.

Joining Drill Chuck and Arbor

Instructions for joining a drill chuck and arbor.

Removing Tooling

Steps for safely removing tooling from the spindle.

Installing Tooling

Procedure for installing tooling into the spindle taper.

Tilting the Column

Guide for adjusting the column angle for machining operations.

Using Spindle Downfeed

Explains the use of rapid and micro spindle downfeed controls.

Adjusting Depth Stop

Instructions for setting the depth stop for repeated operations.

Setting Spindle Speed

Guide for setting spindle speed ranges and desired RPM.

SECTION 5: ACCESSORIES

SECTION 6: MAINTENANCE

Maintenance Schedule

Outlines ongoing, daily, and monthly maintenance tasks.

Cleaning and Protecting Surfaces

Instructions for cleaning swarf and protecting cast iron surfaces.

Lubrication Guidelines

General advice on machine lubrication for longevity.

Table and Column Ways Lubrication

Details lubrication for table and column ways.

Column Tilt Components Lubrication

Instructions for lubricating column tilt components.

Leadscrews Lubrication

Guide for cleaning and lubricating the X and Y axis leadscrews.

Column Rack Lubrication

Procedure for cleaning and lubricating the column rack.

SECTION 7: SERVICE

Troubleshooting Guide

Lists common symptoms, causes, and solutions for machine issues.

Adjusting Machine Gibs

Procedure for adjusting gibs to control table movement accuracy.

Adjusting X-Axis Leadscrew Backlash

Instructions for reducing play in the X-axis leadscrew.

Component Replacement Procedures

Guides for replacing fuses and motor brushes.

Tramming the Spindle

Steps for aligning the spindle perpendicular to the table.

SECTION 8: WIRING

Wiring Safety Instructions

Essential safety guidelines for working with machine wiring.

Wiring Diagram

Schematic illustrating the machine's electrical connections.

Electrical Component Photos

Visual references for electrical box and control box wiring.

SECTION 9: PARTS

Table Components and Parts

Diagram and list of parts for the machine table.

Headstock Components and Parts

Diagram and list of parts for the headstock assembly.

Column Components and Parts

Diagram and list of parts for the machine column.

Labels and Cosmetics

WARRANTY AND RETURNS

Grizzly G8689Z Specifications

General IconGeneral
Work LightNo
Motor1/2 HP
Spindle Speed1720 RPM
Max. Drilling Capacity1/2 inch
Spindle Travel2 inches

Related product manuals