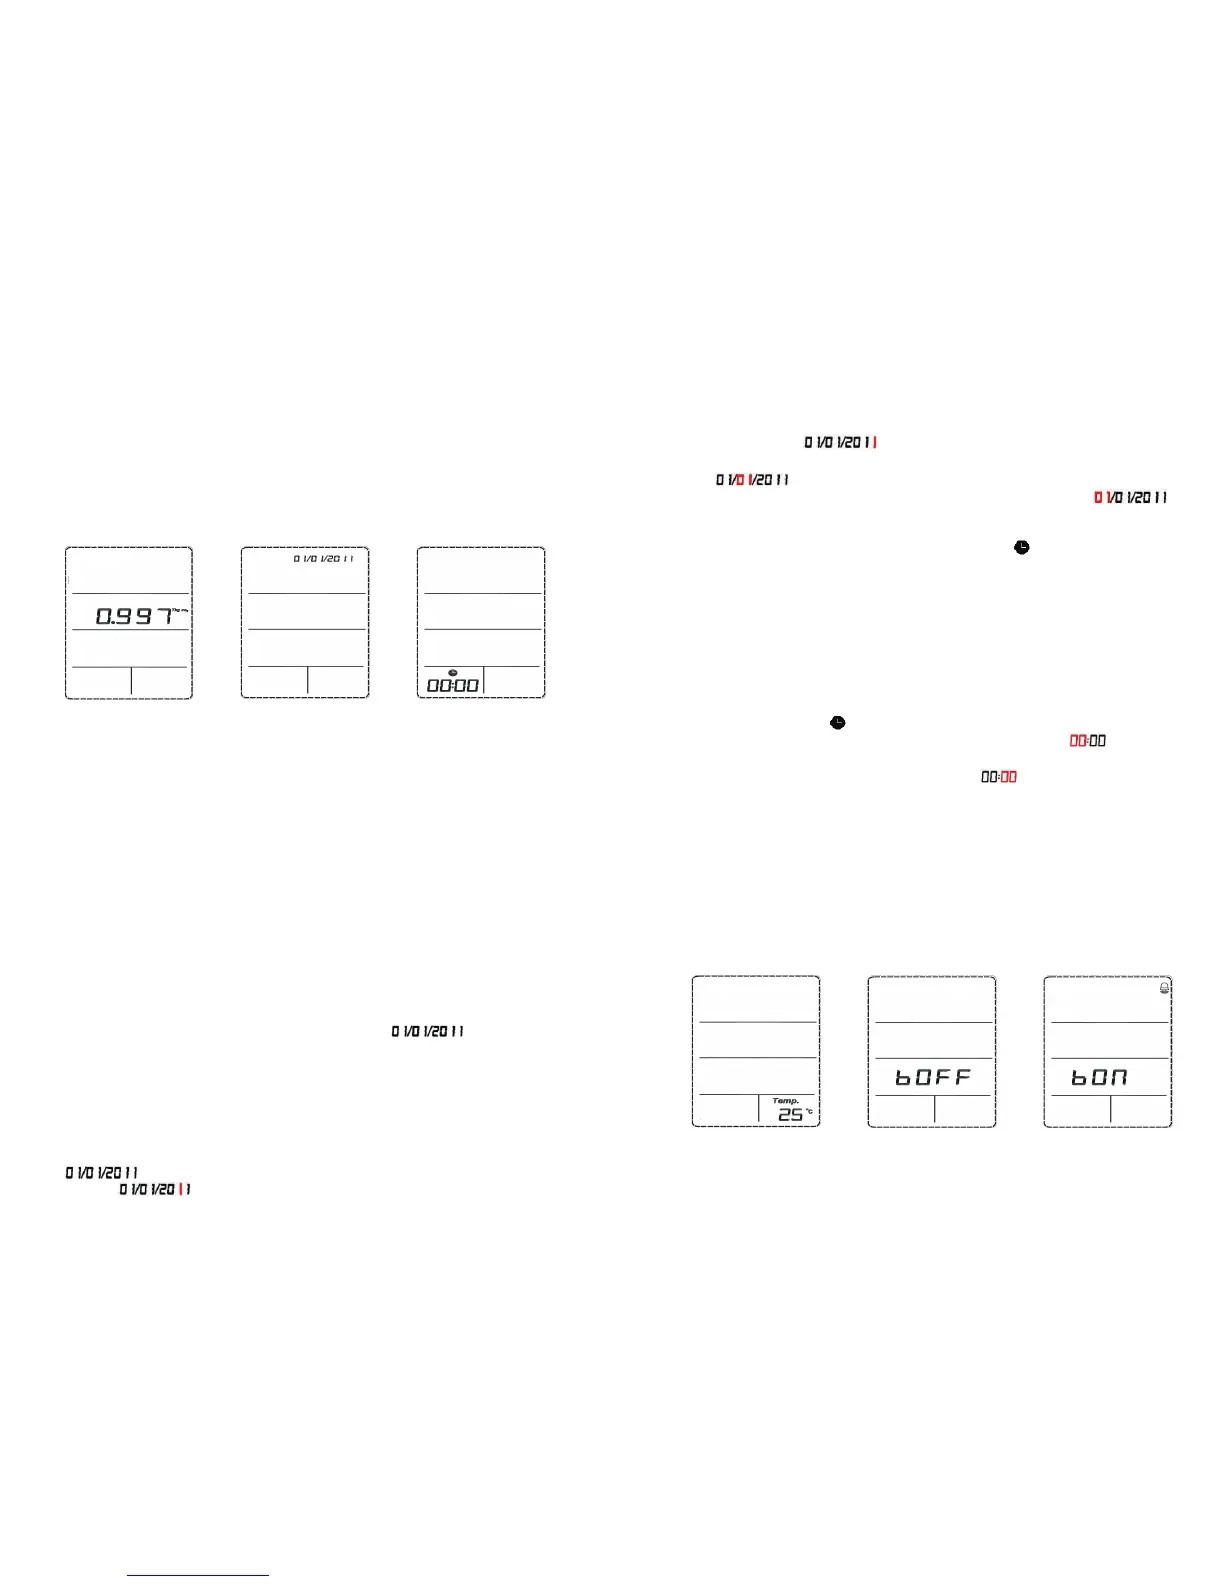
from 0 to 9, and press “OK” to confirm after adjustment, then the fourth figure “1”
of the Year “2011” will flash; press “Up” or “Down” to adjust its value,
ranging from 0 to 9, and press “OK” to confirm after adjustment, then the Month
01” w ill flash; press “Up” or “Down” to adjust its value, ranging from 1
to 12, and press “OK” to confirm after adjustment, then the Day “01”
will flash; press “Up” or “Down” to adjust its value, ranging from 1 to 31, and press
“OK” to confirm after adjustment, then the date will stop flash. Now the interface is
restored to the status as shown in Figure 9 and the time starts to flash.
If there is no need to set data, press “Down” to enter the time setting module.
When the time symbol flashes, press "OK” for a short while to enter the time
setting module, as shown in Figure 13, then the Hour “00:” of will flash;
press “Up” or “Down” to adjust its value, ranging from 00 to 23, and press “OK” to
confirm after adjustment, the Minute “:00” of will flash; press “Up” or
“Down” to adjust its value, ranging from 00 to 59, and press “OK” to confirm after
adjustment, then the time stops flashing. Now the interface is restored to the status
as shown in Figure 9 and “Temp.” flashes.
2.3.5 Time setting
If there is no need to set time, press “Down” to enter the temperature unit setting
module.
Note: When entering time setting, the block indicates the current system time.
Figure 14
Figure 15 Figure 16
after adjustment, then the “6” of 0.163 will flash; press “Up” or “Down” to adjust
its value, ranging from 0 to 9, and press “OK” to confirm after adjustment, then the
“3” of 0.163 will flash; press “Up” or “Down” to adjust its value, ranging from 0 to
9, and press “OK” to confirm after adjustment. At the moment, “3” stops flashing
and the interface is restored to the status as shown in Figure 9, then “Kg CO2” starts
to flash.
Figure 11
Figure 12 Figure 13
2.3.3 CO2 coefficient setting
Press “OK” for a short while when Kg CO2 flashes, then you will enter the setting of
CO2 emission factor, as shown in Figure 11. The default value of system is 0.997. At
the time when the first figure “0” flashes, press “Up” or “Down” to adjust its value,
ranging from 0 to 9, and press “OK” to confirm after adjustment, then the first “9”
will flash; press “Up” or “Down” to adjust its value, ranging from 0 to 9, and press
“OK” to confirm after adjustment, then the second “9” will flash; press “Up” or
“Down” to adjust its value, ranging from 0 to 9, and press “OK” to confirm after
adjustment, then the figure “7” will flash; press “Up” or “Down” to adjust its value,
ranging from 0 to 9, and press “OK” to confirm after adjustment. Now the interface
is restored to the status as shown in Figure 9 and the date flashes.
2.3.4 Date setting
When the date flashes, press “OK” for a short while to enter the module of date
s setting, as shown in Figure 12, then the third figure “1” of the Year
“2011” will flash; press “Up” or “Down” to adjust its value, ranging