Reassembly Procedures CR, CRN 32•45•64•90
27
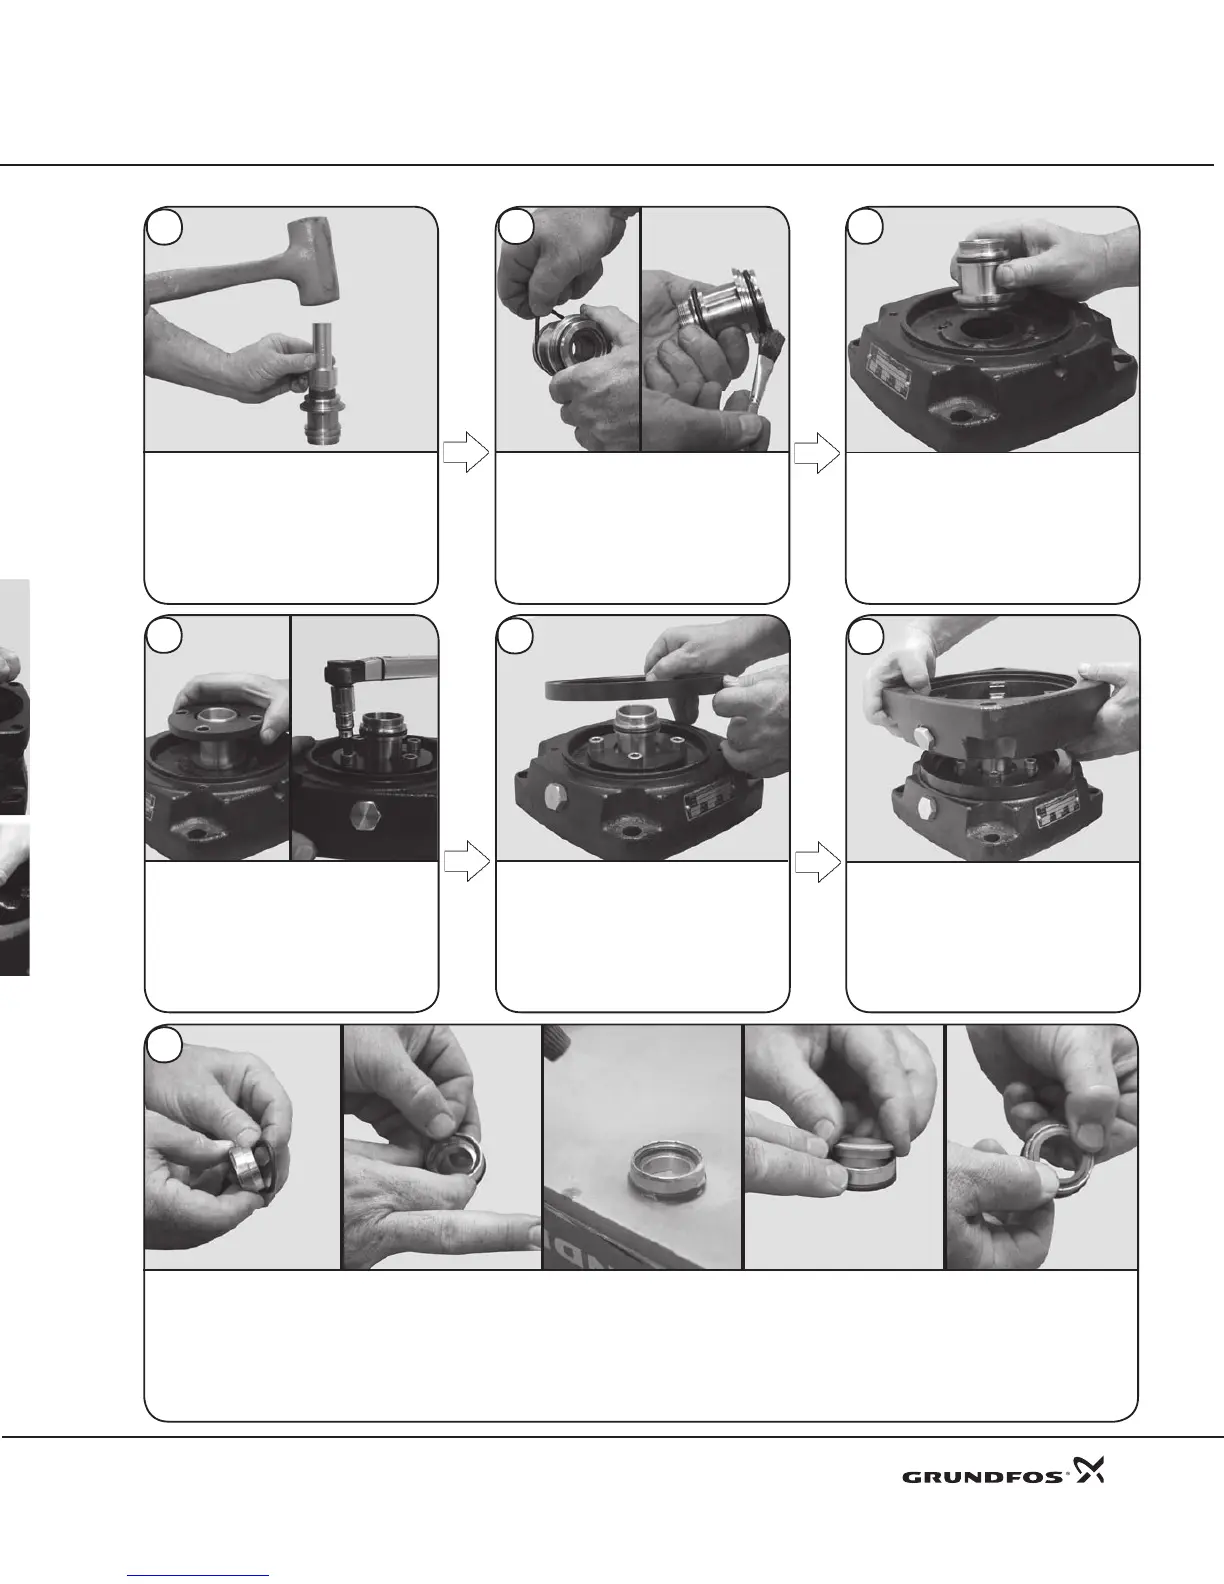
Back-to-Back Seal
Use 00SV2128 and a rubber mallet
to drive in three new Bushings (Pos.
47g) and the Retainer Ring (Pos.47h)
into the Connecting Pipe (Pos. 149).
Replace the O-rings (Pos. 109a &
109b). Do not roll the O-ring into
place; stretch and release them into
the grooves. Then lubricate the
O-rings with Rocol or Dow Corning
111. Once loose, lift the sleeve off.
26
25
17
Assemble the stationary seal by placing the O-ring (Pos. 102) over the Retainer (Pos. 103a). Place the O-ring (Pos. 102a) into the retainer
recess. Lubricate/spray a 5% solution of soapy water onto the O-ring resting in the retainer recess. Align edges of the Stationary Seal
(Pos. 103) with the retainer and rmly press the stationary seal into O-ring. Stationary seal components can be seen in the diagram on
the next page.
31
Lower the Retainer (Pos. 58c) over the
connecting pipe. Lubricate the threads
of the 8mm hex socket Retaining Screws
(Pos. 58d) with Gardolube (00SV9995)
or Thread-Eze (96611372). Install and
diagonally torque to 46ft.-lbs./62Nm.
28
29
30
Place the Spacing Ring (Pos. 116) onto
the pump head.
Place the complete connecting pipe
assembly into the lowermost Pump
Head (Pos. 2), making sure it is fully
seated.
Lower the middle Pump Head
(Pos. 2c) over and past the
connecting pipe threads and upper
O-ring. The pump head should
rest on top of the spacing ring.
 Loading...


